Add LinkedIn Feed
To create a LinkedIn feed, you need to follow the given steps-
Step 1
Login or Sign Up to your Taggbox Widget

Step 2
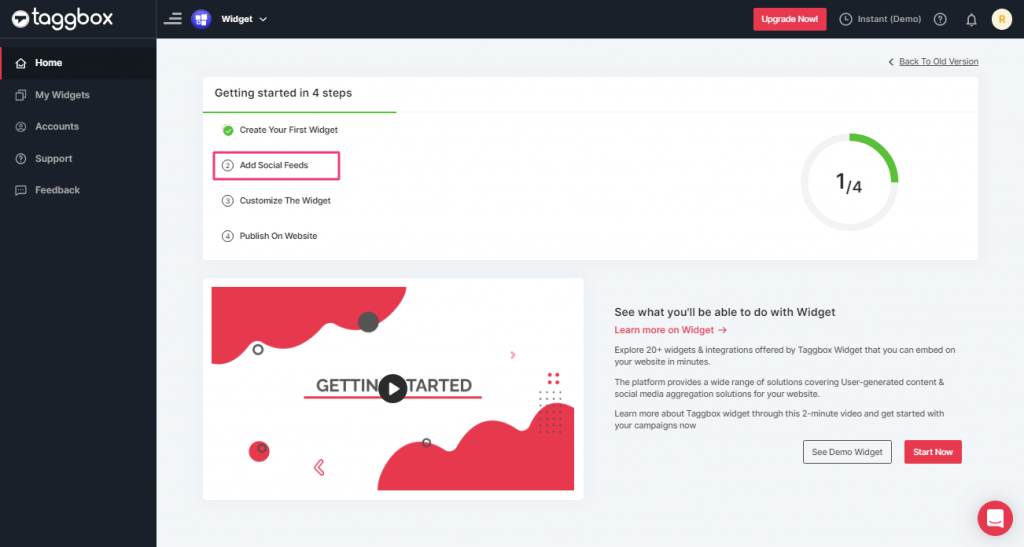
You’ll be redirected to Taggbox Widget Dashboard:

Step 3
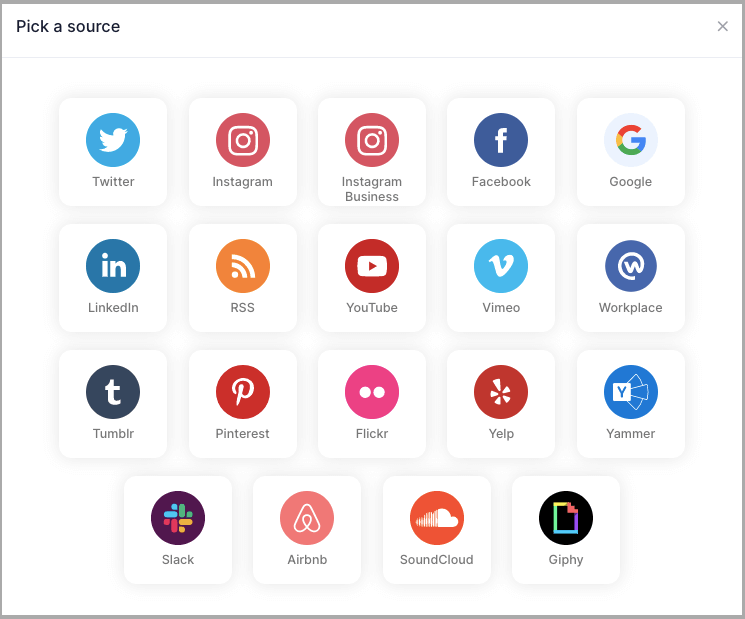
On the dashboard, click on Add Social Feeds to add LinkedIn feeds on your widget.
Step 4
In the popup Pick a source, select “LinkedIn” as your source of aggregating feeds.
Step 5
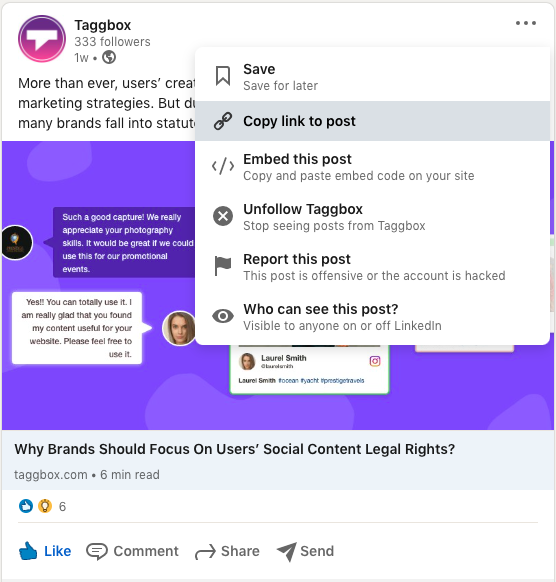
Select any public LinkedIn post you want to add to your website
Step 6
Now, copy the link of LinkedIn public post
Step 7
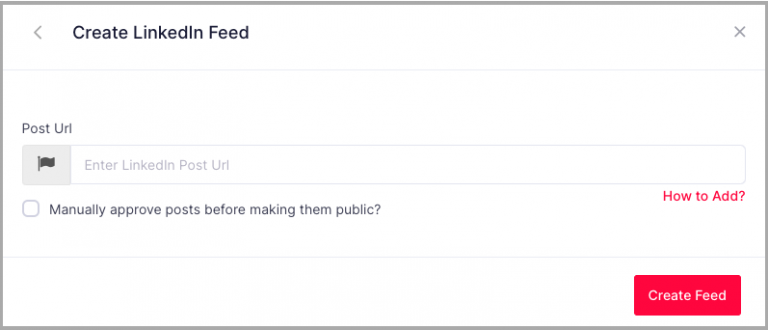
Enter the URL of the post and click on the Create Feed button, to aggregate the feeds on the widget editor.
or
Or you can simply add multiple LinkedIn feeds to your website in bulk at one go. Just Paste your favorite LinkedIn feeds URLs into a file and further convert it into CSV. Then upload your file here and click on the “Create Feed” option.
Embed LinkedIn on Website
To embed LinkedIn feed on your website you need to follow below steps –
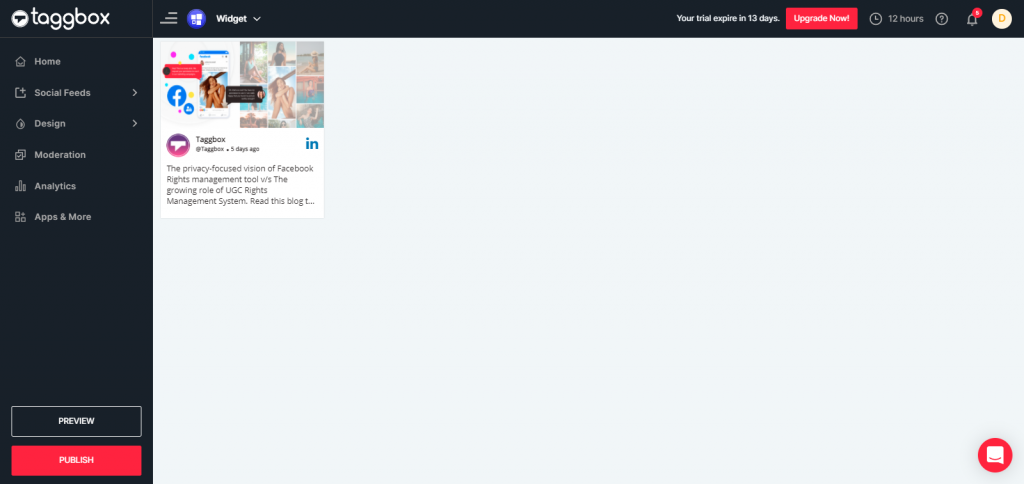
Step 1
Click the “PUBLISH” button on the bottom-left of the screen, You can also see the “PREVIEW” of how your feeds gonna looks like.
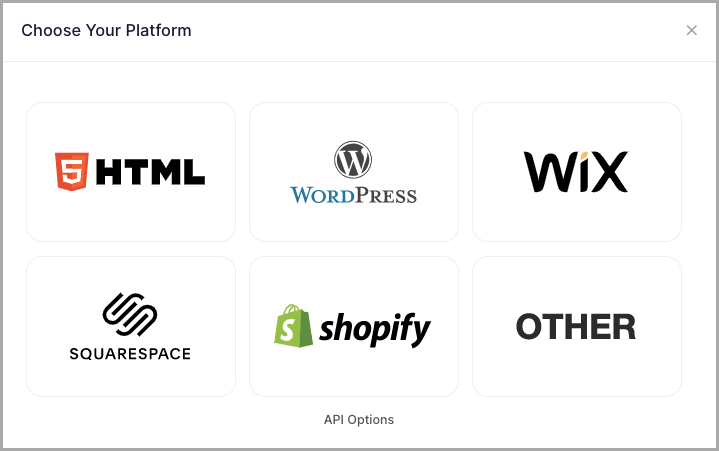
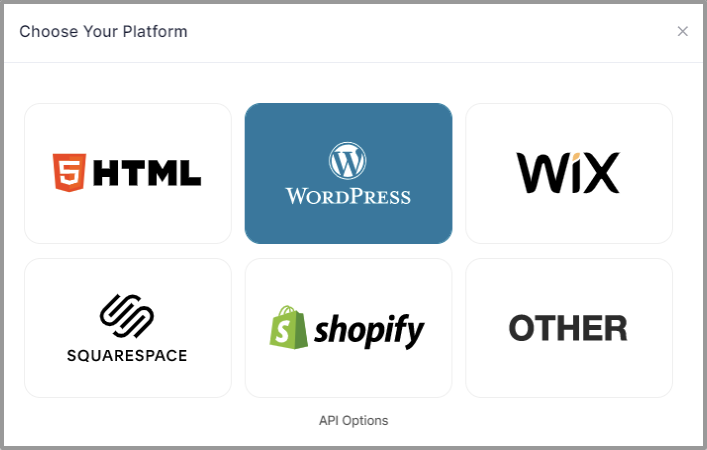
Step 2
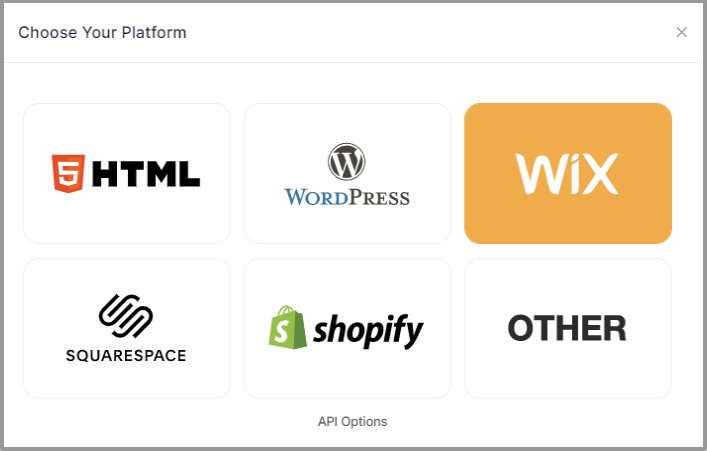
Select Your Website Platform (Eg: HTML, WordPress, Wix etc.) or else select OTHER as your website platform.
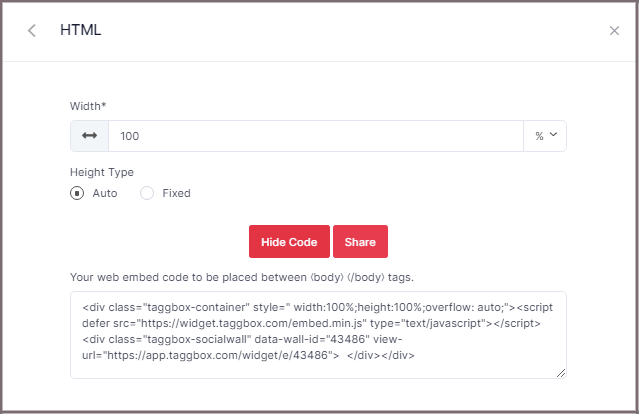
Embed on HTML Website
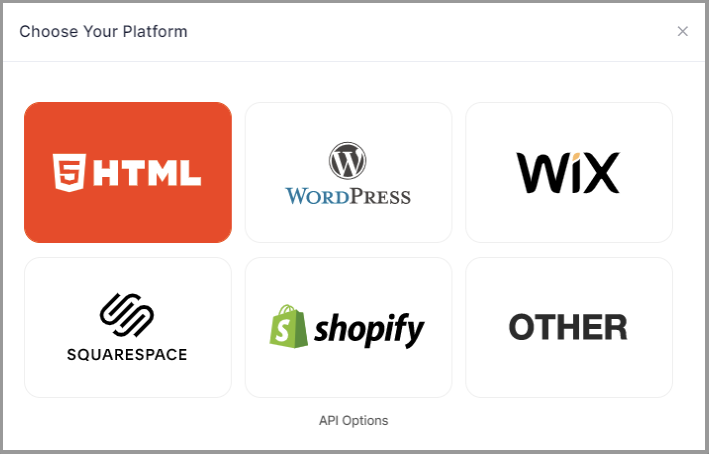
Step 1
In the pop-up Choose Your Platform, select the HTML logo as your website platform.
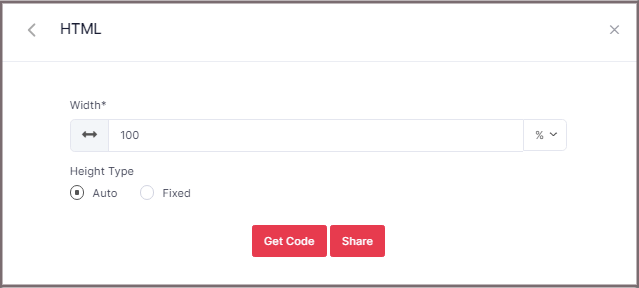
Step 2
Set width and height type as per your requirements and click on Get Code
Step 3
Copy the generated code and Paste it into your HTML webpage body tag, where you want to embed LinkedIn feeds.
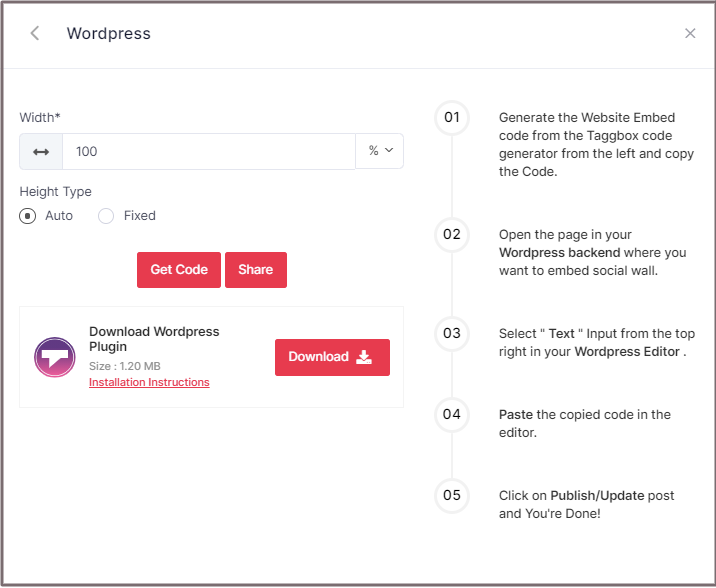
Embed on WordPress Website
Step 1
In the pop-up Choose Your Platform, select the WORDPRESS logo as your website platform.
Step 2
Set width and height as per your requirements and Click on Get Code
Step 3
Copy the generated code and paste it into your webpage
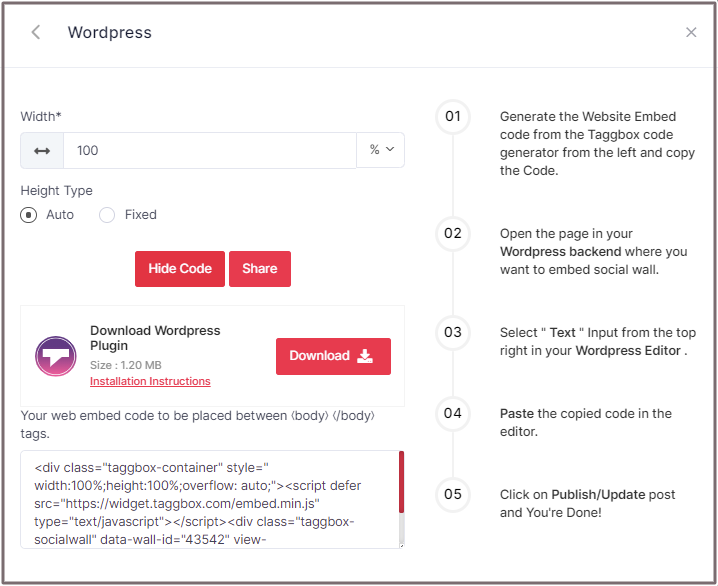
Now follow these steps-
Step 1
Generate the Website Embed code from the Taggbox code generator and copy the Code.
Step 2
Open the page in your WordPress backend where you want to embed a social wall.
Step 3
Select “Text” Input from the top right in your WordPress Editor.
Step 4
Paste the copied code in the editor.
Step 5
Click on Publish/Update post and You’re Done.
Embed on WIX Website
Step 1
In the pop-up Choose Your Platform, select the WIX logo as your website platform.
Step 2
On choosing Wix as your website platform; you’ll receive below Pop-up “Wix”, Follow the instruction on the pop-up and proceed to the below steps:

Step 3
Open your WIX Editor and Navigate to the Page Where you want to Embed Taggbox.
Step 4
Click on “+ Add” Button.
Step 5
Click on More and Select Embed a Site.
Step 6
Check the “Website Address” under Mode.
Step 7
Copy and paste the generated URL into the ” Website Address ” field.

Embed on Squarespace Website
Step 1
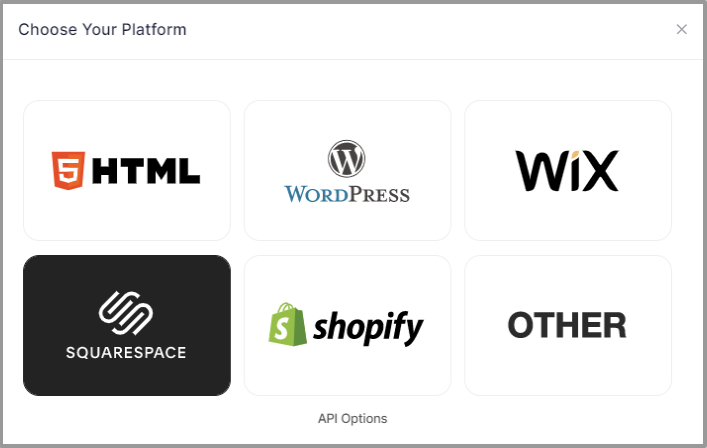
In the pop-up Choose Your Platform, select the Squarespace logo as your website platform.
Step 2
Set width and height as per your requirements and click on Get Code
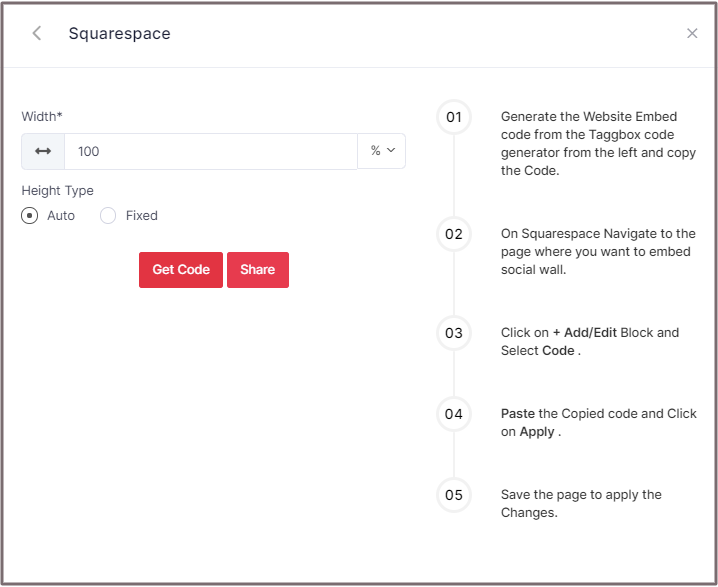
Step 3
Copy the generated code and paste it into your webpage
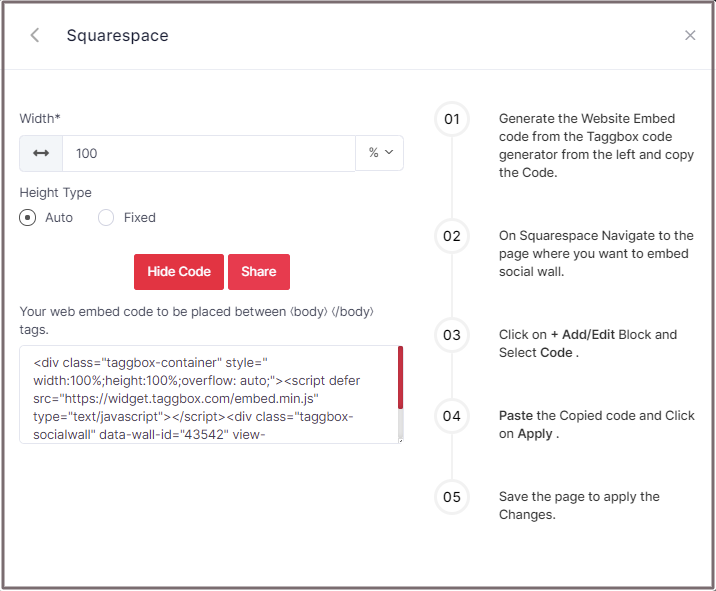
Now follow these steps-
Step 1
Generate the Website Embed code from the Taggbox code generator from the left and copy the Code.
Step 2
On Squarespace Navigate to the page where you want to embed social wall.
Step 3
Click on +Add/Edit Block and Select Code.
Step 4
Paste the Copied code and Click on Apply.
Step 5
Save the page to apply the Changes.
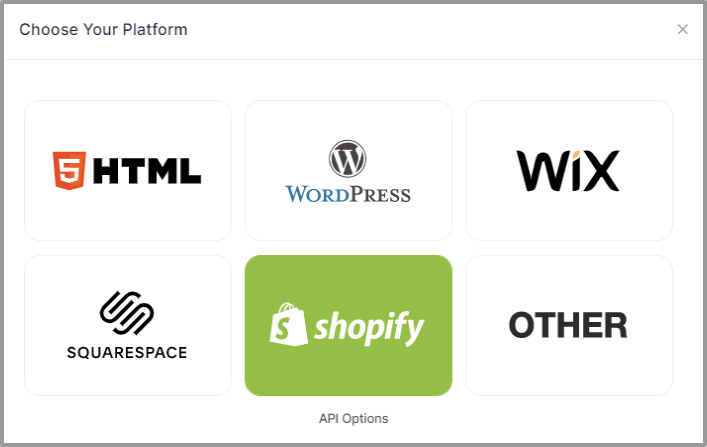
Embed on Shopify Website
Step 1
In the pop-up Choose Your Platform, select the Shopify logo as your website platform.
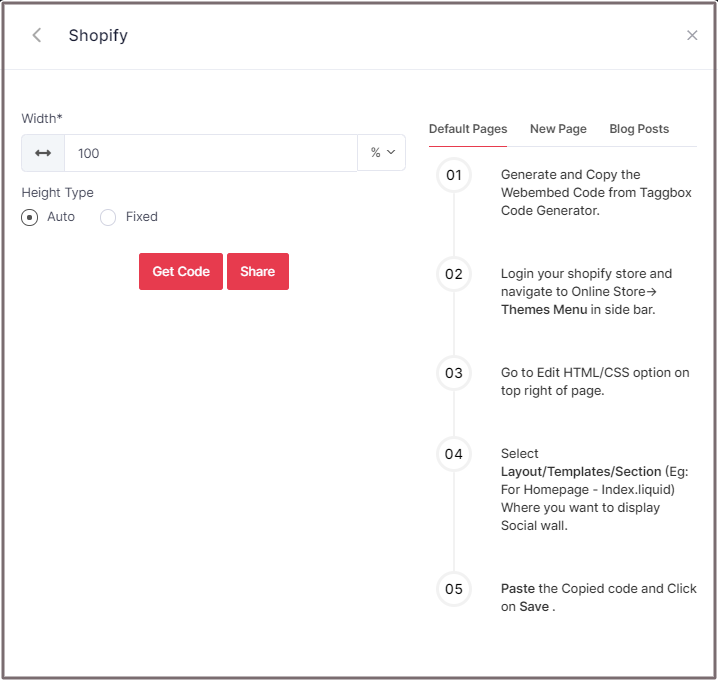
Step 2
Set width and height as per your requirements and click on Get Code.
Step 3
Copy the generated code and paste it into your webpage
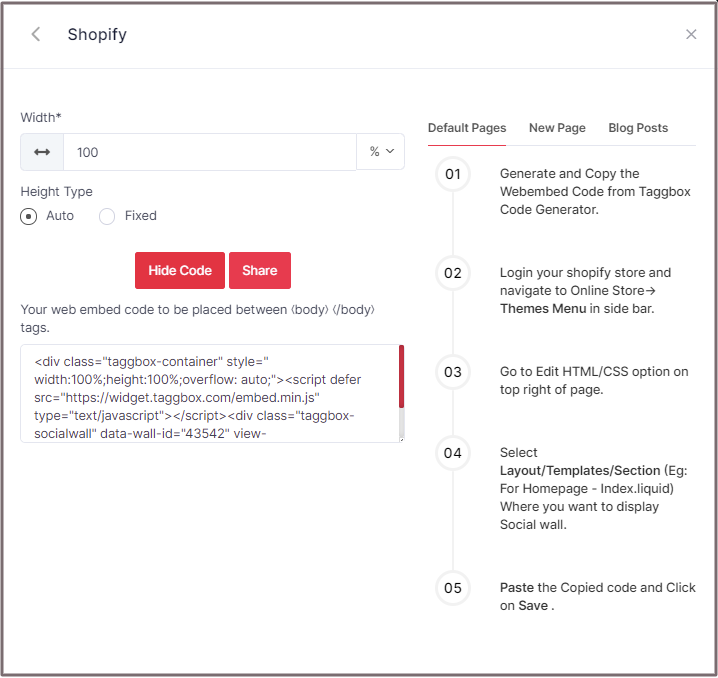
Default Pages
Follow these steps for Default Pages:
Step 1
Generate and Copy the Web Embed Code from Taggbox Code Generator.
Step 2
Log in to your Shopify store and navigate to Online Store-> Themes Menu in the sidebar.
Step 3
Go to Edit HTML/CSS option on top right of the page.
Step 4
Select Layout/Templates/Section (Eg: For Homepage – Index.liquid) Where you want to display the Social wall.
Step 5
Paste the Copied code and Click on Save.
New Pages
Follow these steps for new pages:
Step 1
Generate and Copy the Web Embed Code from Taggbox Code Generator.
Step 2
Log in to your Shopify store and Navigate to Online Store->Pages menu in the sidebar.
Step 3
Click on Add Page on Top right of the page.
Step 4
Select Show HTML (<>) option of Text Editor.
Step 5
Paste the Copied code and Click on Save.
Blog Posts
Follow these steps for Blog Posts:
Step 1
Generate and Copy the Web Embed Code from Taggbox Code Generator.
Step 2
Login your Shopify store and Navigate to Online Store->Blog posts menu in the sidebar.
Step 3
Click on Add Blog post on the Top right of the page.
Step 4
Select Show HTML (<>) option of Text Editor.
Step 5
Paste the Copied code and Click on Save.
If you have any questions or need help, please Contact us or write us at [email protected].