Now you can easily create a Shoppable Pinterest feed and embed Pinterest Shoppable gallery on website in minutes with Taggbox Commerce.
We have divided the steps into 3 major headings.
1. Adding Pinterest Pins
2. Making Pins Shoppable
3. Publishing Shoppable Pins On Website
So, let’s get started with the steps.
1. Adding Pinterest Pins
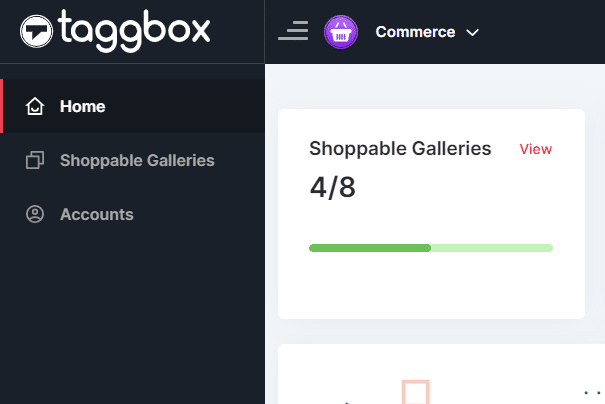
1. Create your new Taggbox Commerce account for free or login to your existing account

2. The dashboard will appear; choose the “Shoppable Galleries” option from the sidebar
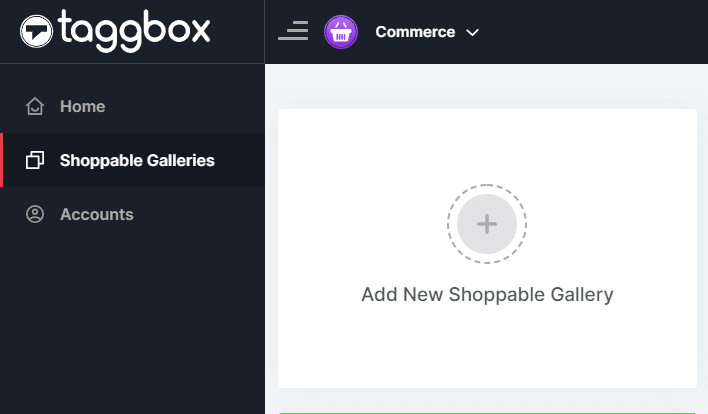
3. Now you will see the “Add New Shoppable Gallery” option, choose that option, and a pop-up will appear
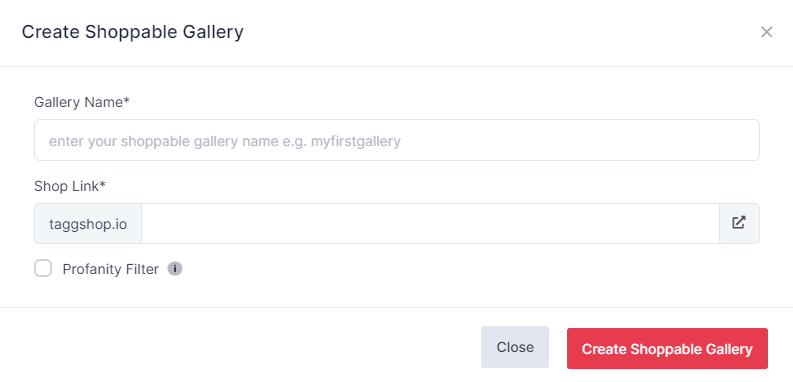
4. Enter the unique name for your Pinterest Shoppable Feed, and also you can create the unique URL. Once done, then click on “Create Shoppable Gallery.”
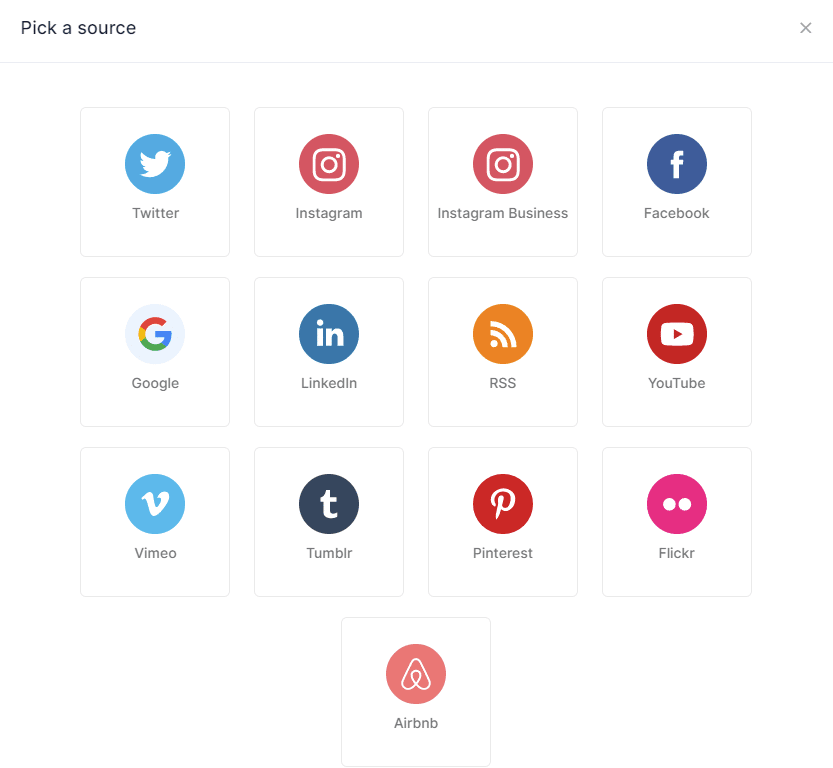
5. You will be redirected to the editor, and a pop-up will appear; now select “PINTEREST” as the source social media platform.
6. A new pop-up will appear; you can choose the feed type like Handle or User Board
Handle: Enter your brand handle for Pinterest
User Board: Enter the URL for the Pinterest board that you want to aggregate
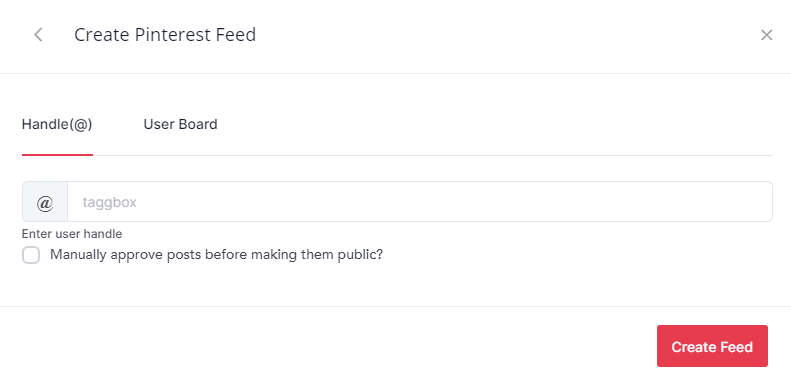
7. Once you enter the feed type, then click on the “Create Feed” button, within seconds you will automatically get the feeds from your handle or boards
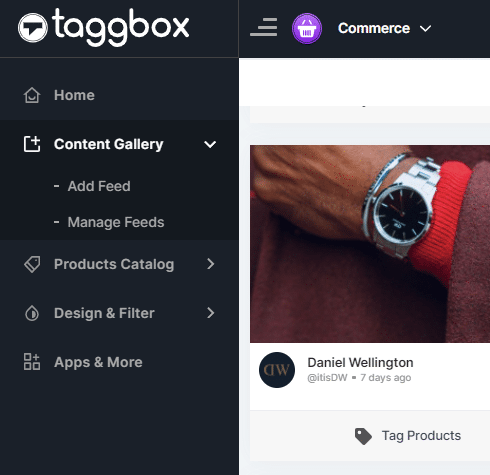
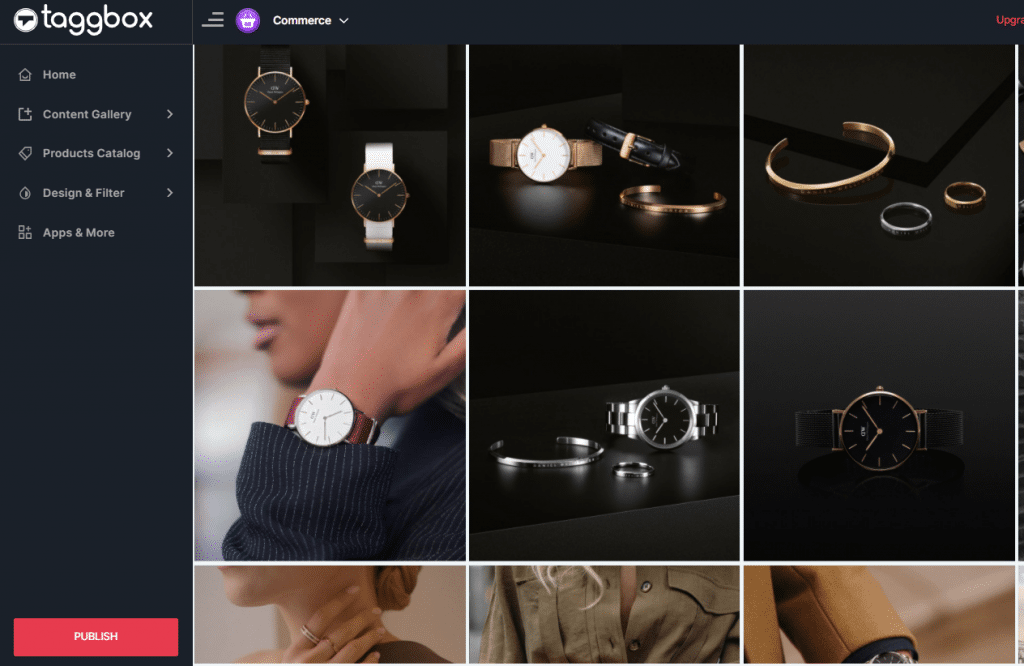
Once you get the feeds from Pinterest, now you will see the editor section with all your posts. Here you can create Shoppable posts for pinterest.
2. Making Pinterest Pins Shoppable
8. Click on the “Add Products” option under the Product Catalog heading in the editor sidebar.
9. You will see two options i.e., Import Product List and Add product.
Import Product List: The option to upload multiple products at once through CSV files
Add Product: The option to add a single product at a time.
10. Once you have uploaded the products, then you can move on to tagging the products to the Pinterest pins.
11. Click on the “Tag Products” option under the Product Catalog, and you will see all your posts with a Tagging option under each post.
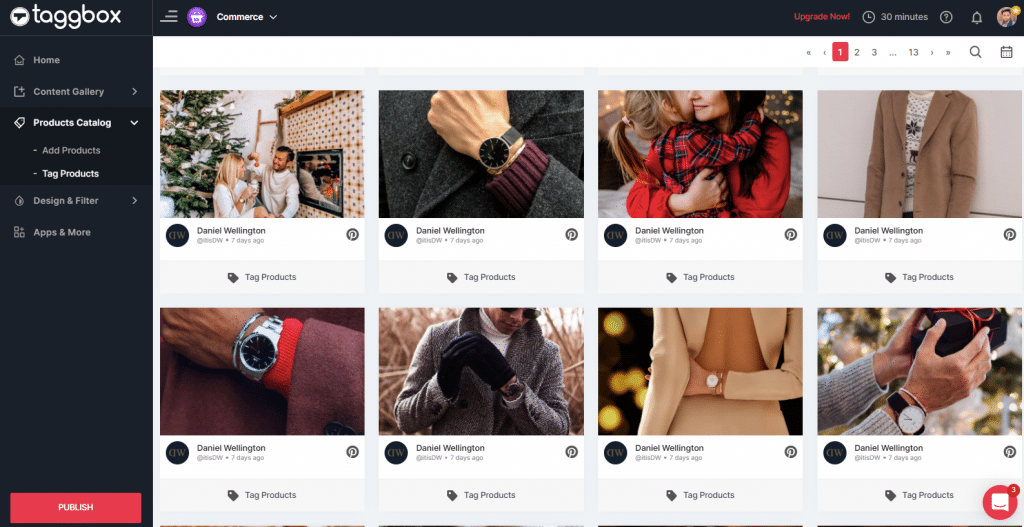
12. Click on the tag product under the post you want to make shoppable, and you will see all the uploaded products in the pop-up.
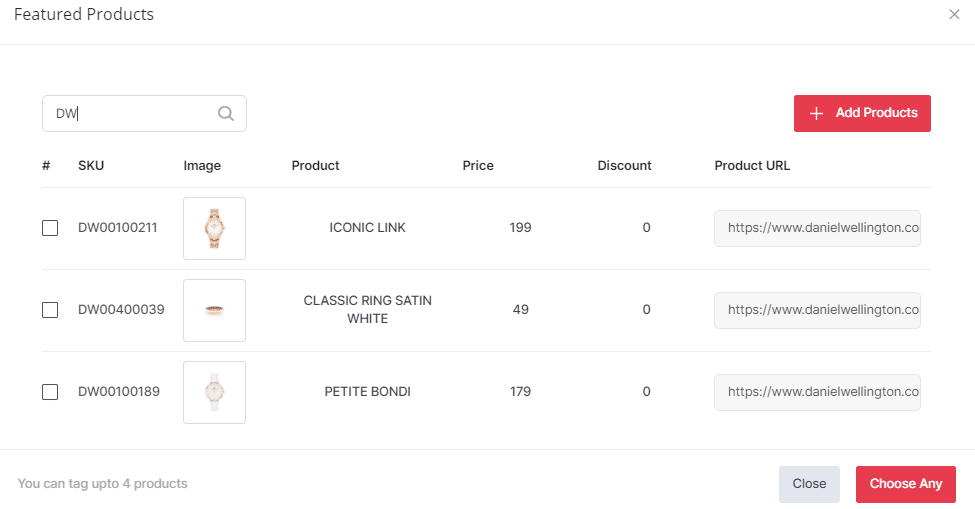
13. Select the product (s) and click on the “Tag” button to successfully tag products to the post.
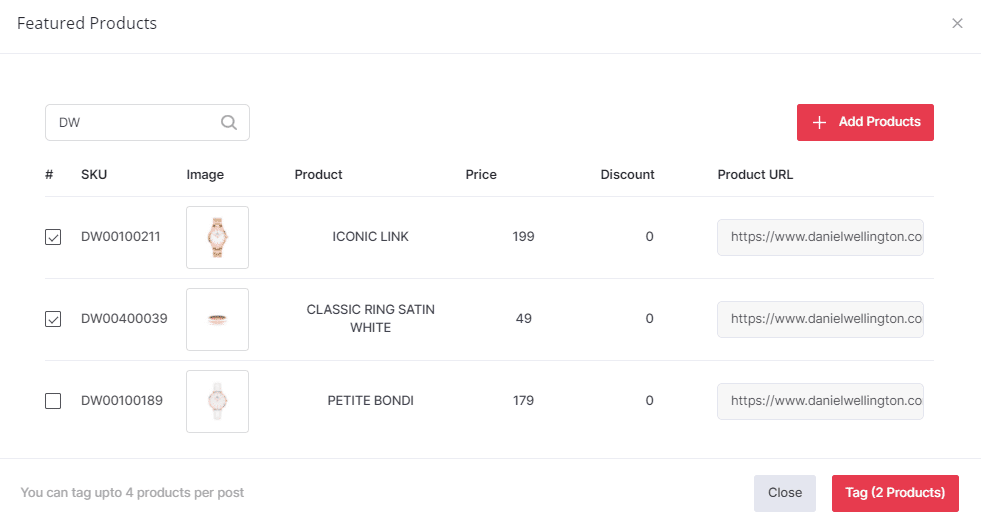
You can only tag 4 products per post, and you can tag products to as many posts as you like.
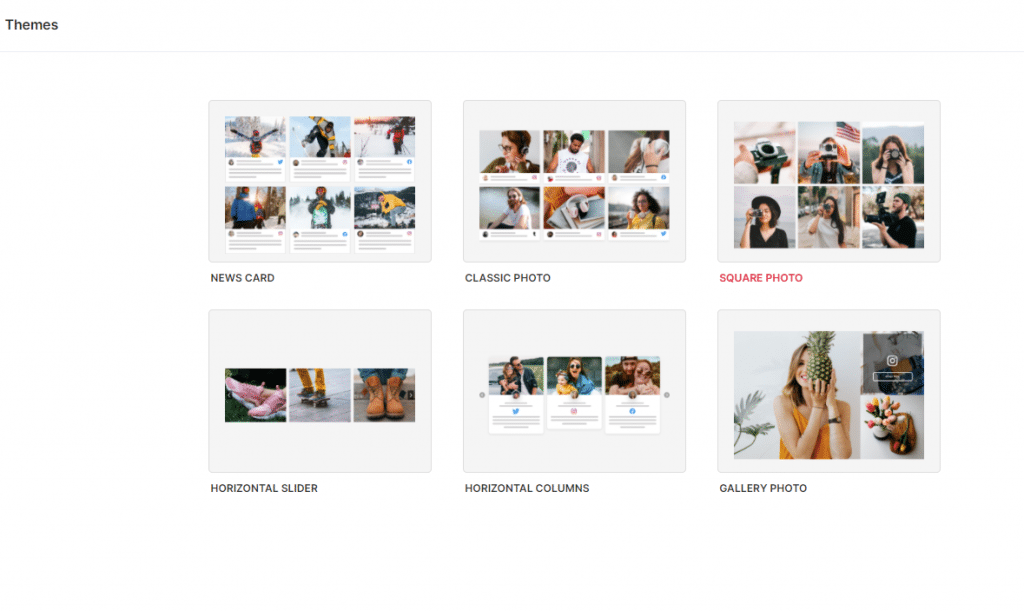
Once you are done tagging, you can move to customize and design the Shoppable Pinterest gallery using the “Design & Filter” section in the sidebar.
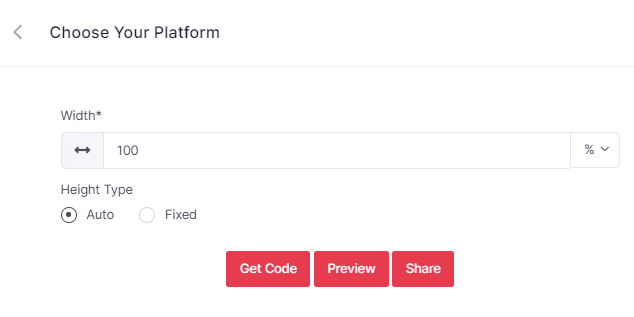
3. Embed Pinterest Shoppable Gallery On Website
Now that you have made the Pinterest gallery shoppable by tagging products to visual i.e. visual eCommerce, it is time to publish the gallery on the website.
14. Click on the “Publish” button in the bottom left corner of the editor; a pop-up will appear
15. Choose your website platform from the given options like HTML, WordPress, Shopify, Wix, and many others.
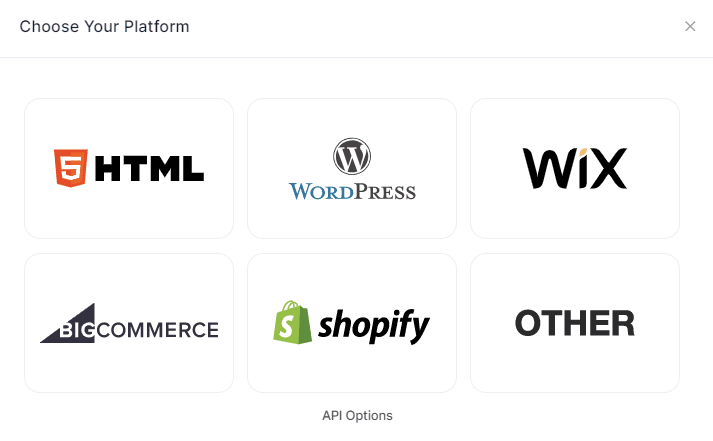
Let’s select HTML as an example here.
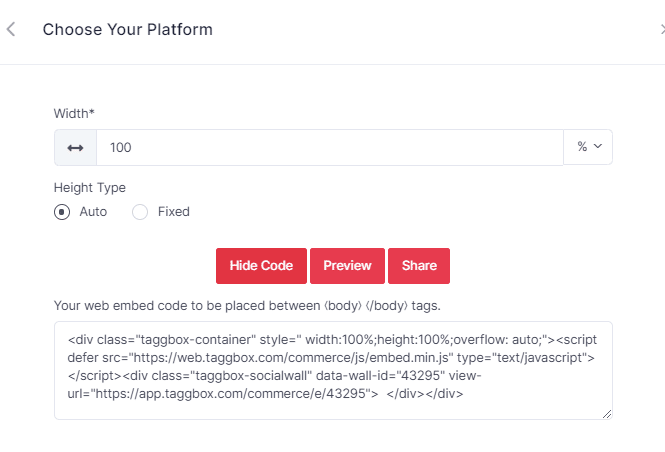
16. A new pop-up will appear, click on the “Get Code” option, and you will get the unique HTML embed code.
17. Copy the given code and paste it in your website’s backend where you want to showcase the Shoppable Pinterest gallery.
Tadaa! You have successfully embedded the Pinterest shoppable gallery on website or your ecommerce or online store.
Read More: How To Create & Embed Shoppable Instagram Feed On Website