Here’s a step-by-step guide on using the UGC uploader feature in your Taggbox Commerce account. NOTE: If you are an existing customer and have already created your shoppable gallery, you can jump directly to STEP 10.
And for the new users, you can follow these steps:
1. Create your free Taggbox Commerce account or sign in to an existing account
2. Click on Shoppable galleries from the sidebar; you will see all your galleries
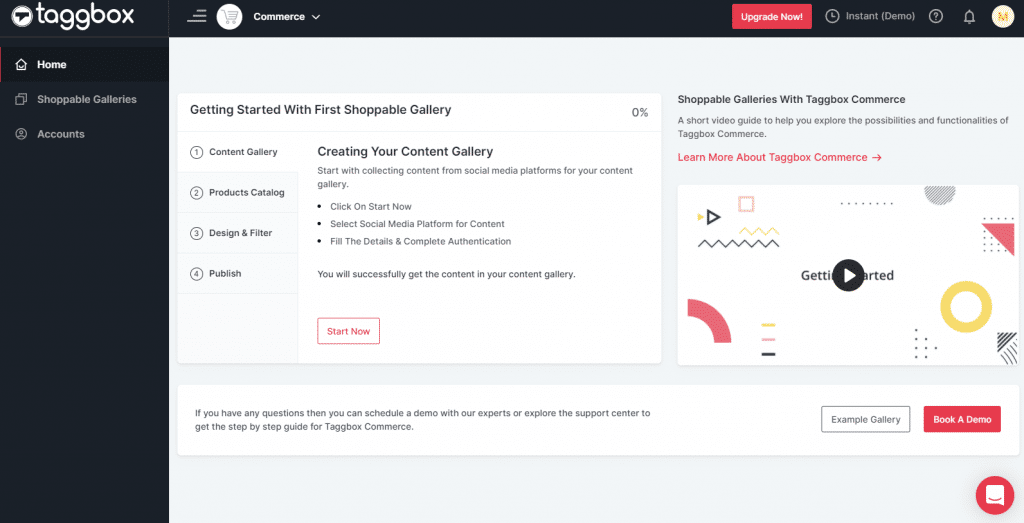
3. Click on the Edit button of the gallery to which you want to add the feed.
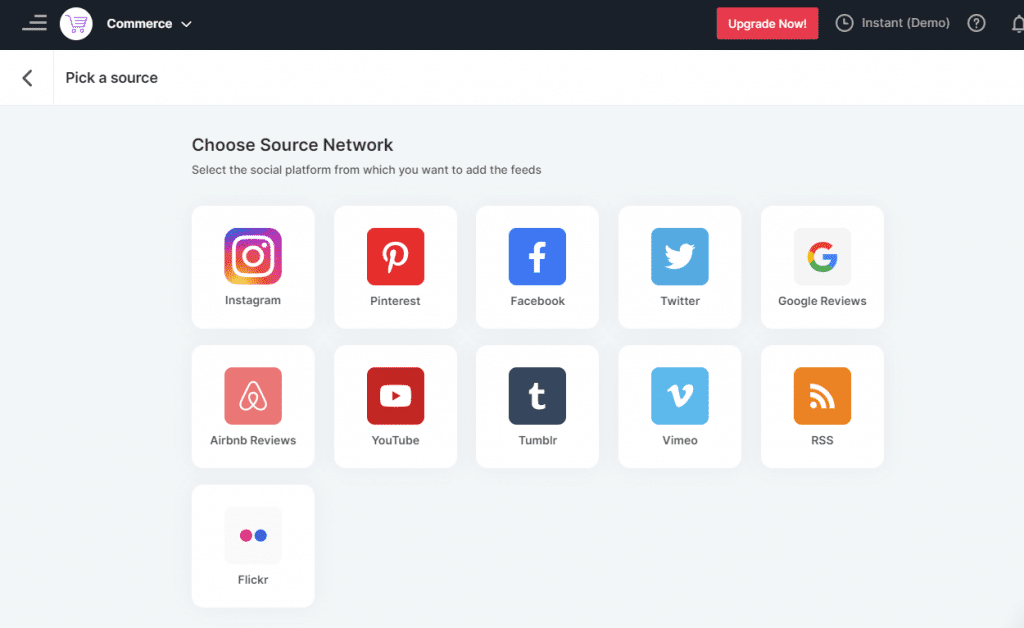
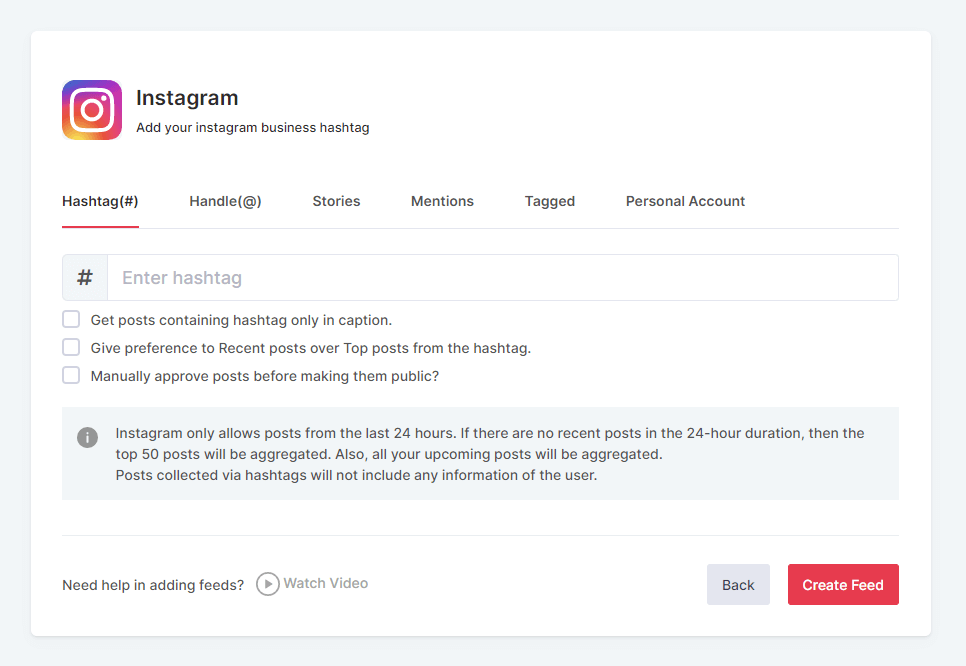
4. Now choose your source platform, enter the feed type like a hashtag, handle, etc. a
5. Click on the Create Feed button and complete the authentication process, and you will get the content in your account.
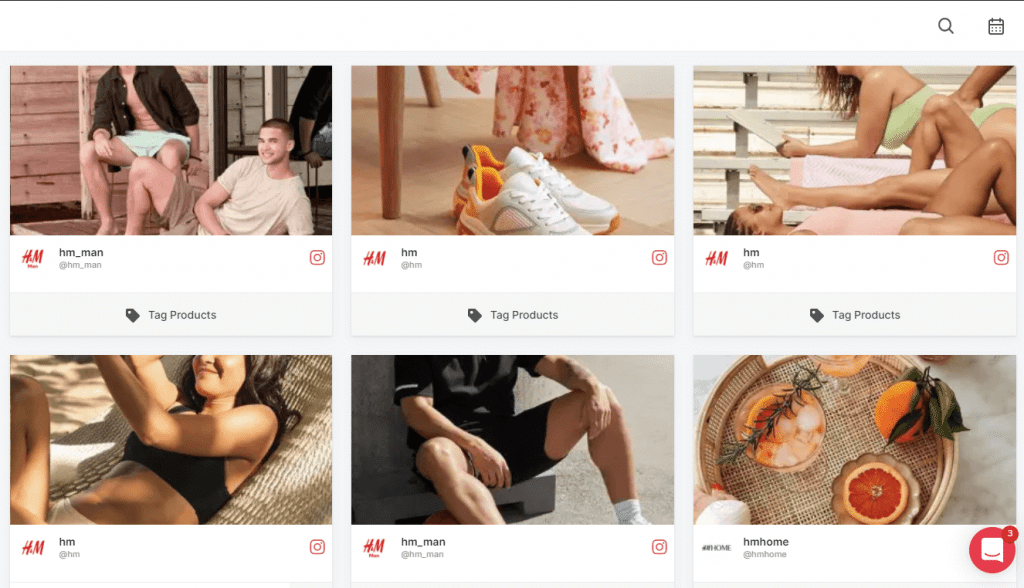
6. Now it’s time to upload and tag products to the posts in your account.
6. Click on Add Products option under the product catalog in the sidebar; you will see different options
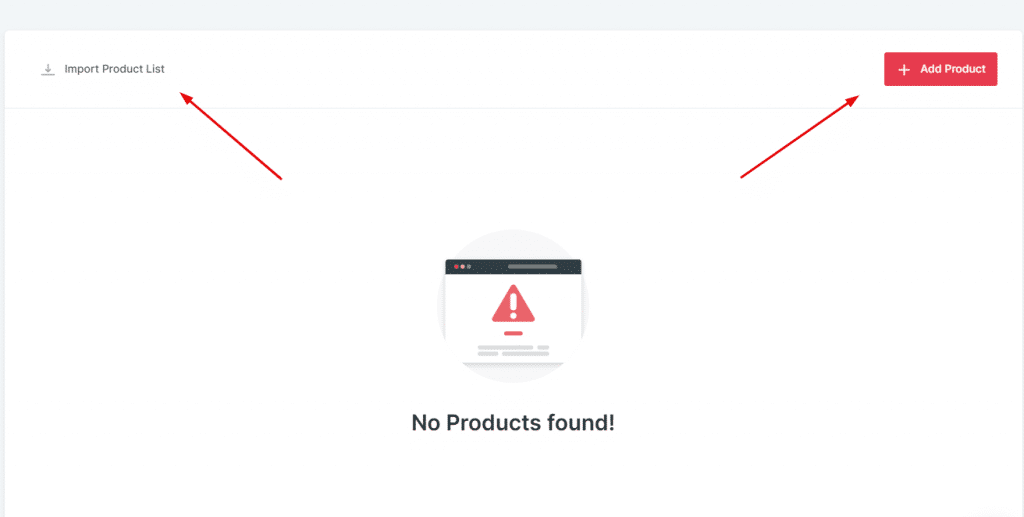
Import Product List: To upload products using a CSV file
Add A Product: To upload single product at a time
Sync Shopify Products: To directly sync products from Shopify store
Choose the option that suits your needs and upload your products.
8. Now click on Tag Products under product catalog; all your posts will appear with a Tag Products option under them
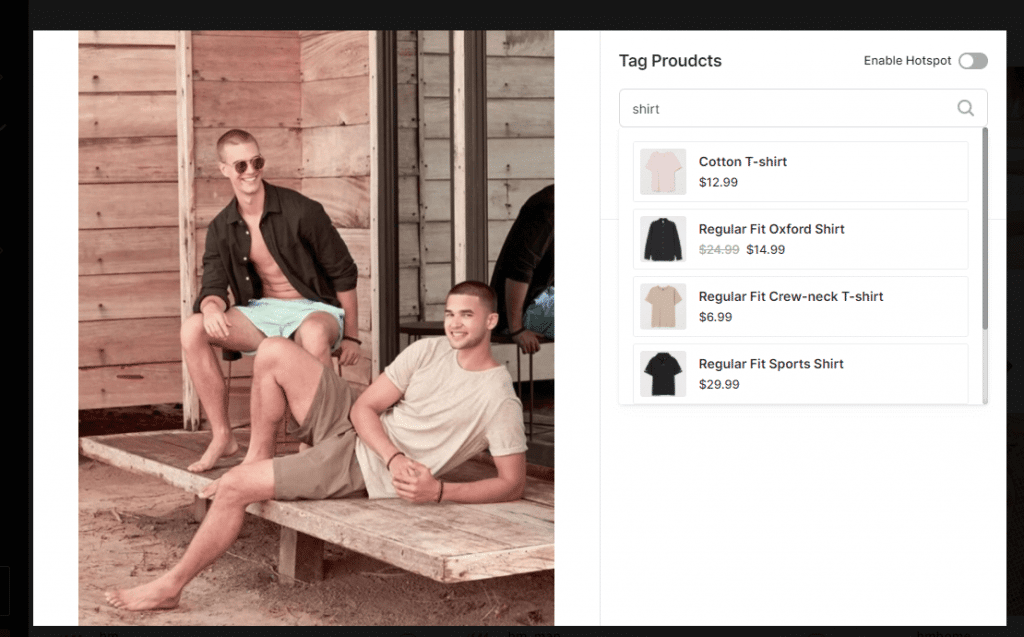
9. Click on Tag product under any post, a popup will appear. Search your product and click on it to tag it to the post.
Similarly, you tag products to all your posts in your gallery.
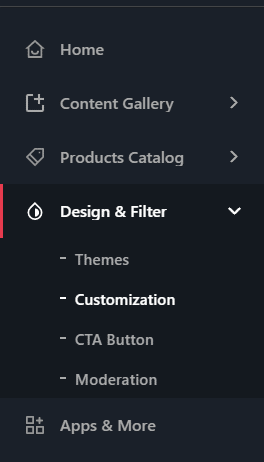
10. Now it is time to enable the UGC UPLOADER feature; click on the Customization option under Design & Filter
11. You will see an UGC uploader option, click on it, and you will see different options
12. Now enter the details like Button text, title, description, terms & conditions, etc. and enable and apply the settings.
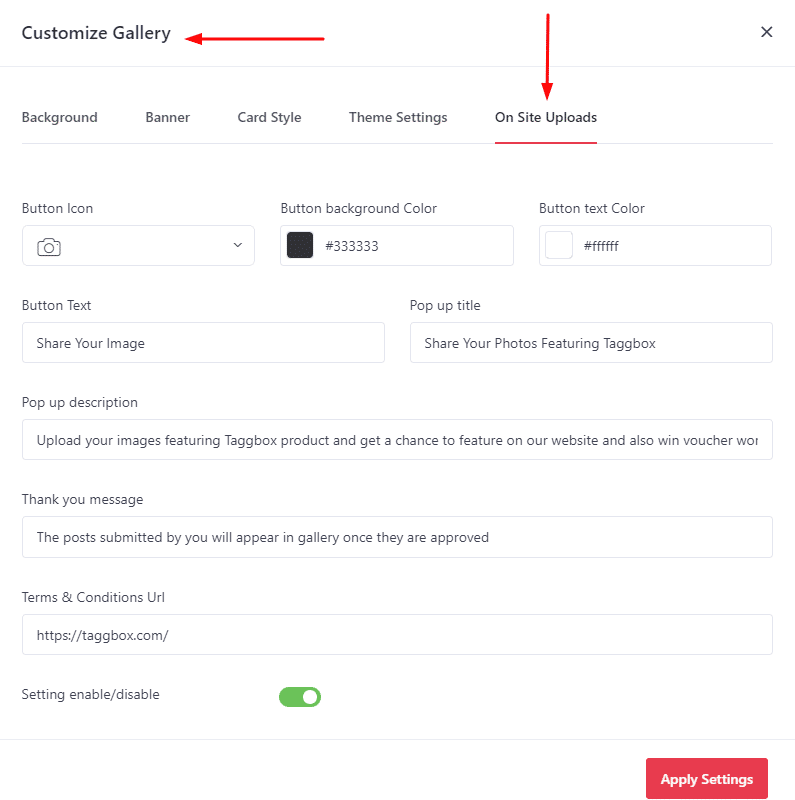
Button Text: The text will appear on the button when the user clicks on the button to submit images.
Title: It is the heading that will appear on the popup when the user clicks on the button
Description: It is a detailed description like title, appearing on the popup
Terms & Conditions: Enter the URL for T&Cs related to how you will use the content and what permissions are the users providing to you.
Once you are done with the aforementioned details and apply the settings, you can publish your gallery.
13. Click on Publish button at the bottom and choose where you want to show the gallery
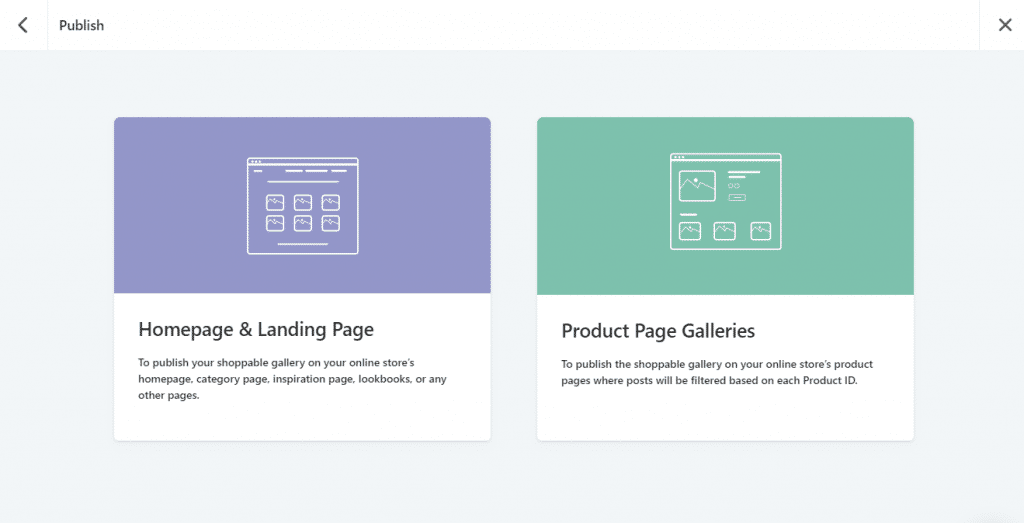
14. Let’s choose Homepage & General Pages, now choose your CMS platform and follow the publishing steps.
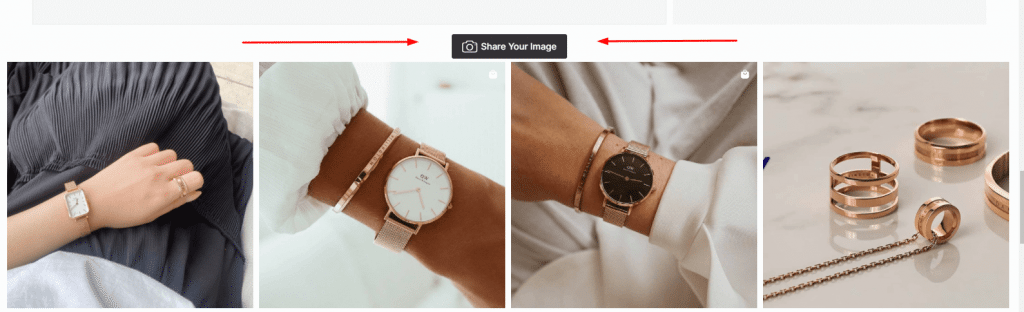
Once you complete the steps, you will be able to see the gallery on your website and the UGC uploader button.
How Does UGC Uploader Works?
Here’s how the visual UGC, reviews, & rating uploads works once you add it to your shoppable gallery on your website/online store.
1. Users click on the “UGC uploading” button on your gallery
2. They add an image and choose to write either a caption or review & rating
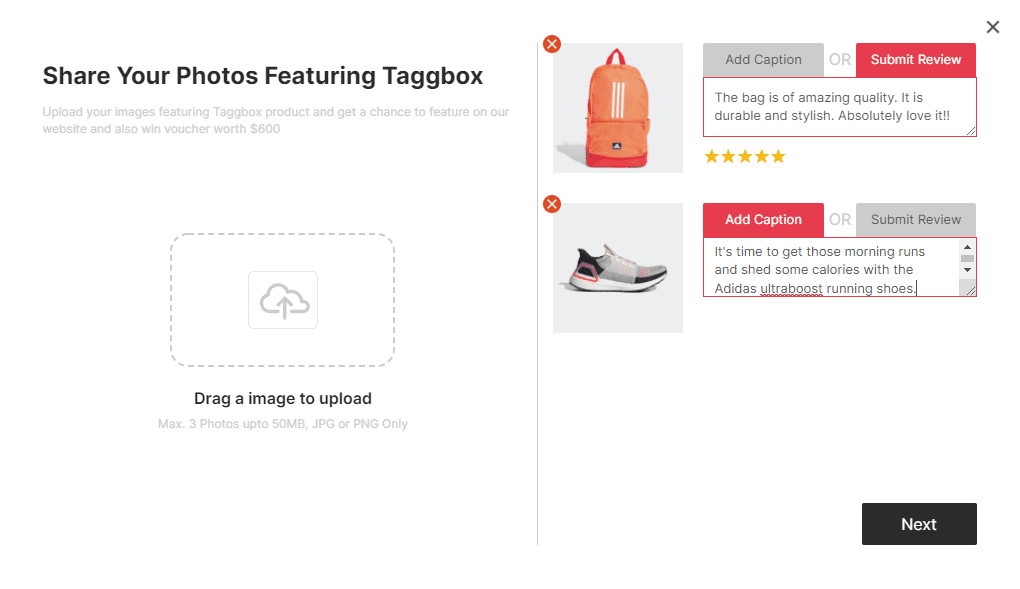
3. Once done, then they click on Next and enter their Username & Email
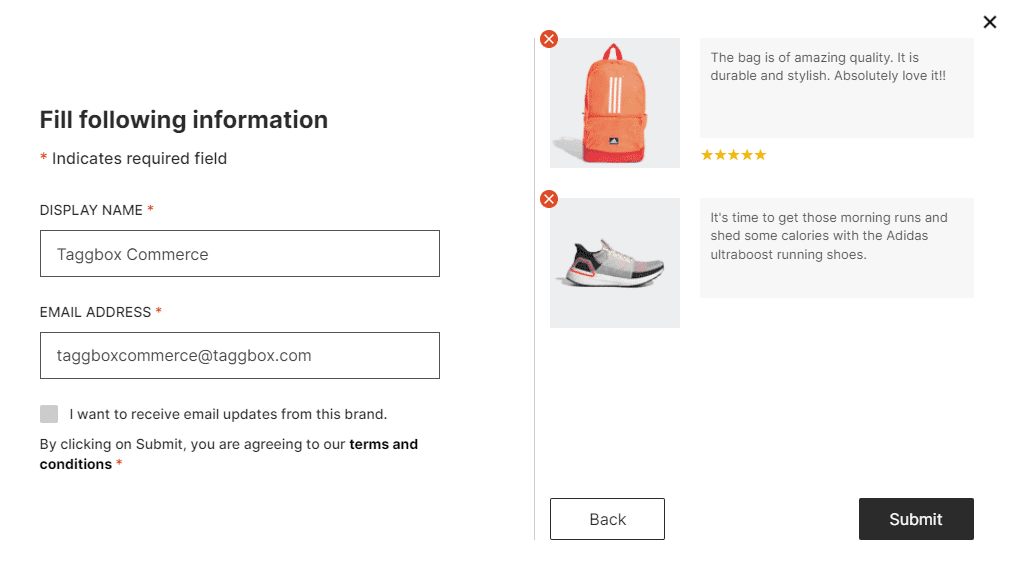
4. Now, they click Submit button, and UGC is submitted to your Taggbox account
5. Go to moderation in your Taggbox account and find the submitted posts in the Private section
6. Make the posts public which you want to show in your gallery
7. Tag products to these posts, and then the posts will show on your shoppable gallery
That’s how easy it is to leverage the UGC uploader option in your Taggbox Commerce account.