Embed RSS feed on Sharepoint website with real time update and customization feature. Using Taggbox Widget you can simple add live RSS feed on your Sharepoint website.
Sharepoint owned by Microsoft is a web-based collaborative platform that integrates with Microsoft Office. According to Microsoft, Sharepoint has 190 Million users which is a huge number in terms of sharing your content with those users.
So, to make the most out of it you should use Tools like Taggbox Widget, which lets you aggregate feeds or content in one place and helps you to embed the feed into your website.
We will be covering two key points here:
- How to Add RSS Feeds
- How to Embed RSS Feeds on Sharepoint.
Let’s dive in!
Try Taggbox Widget – Start Your 14 Days Free Trial
How to Add RSS Feed On Sharepoint
Step 1:
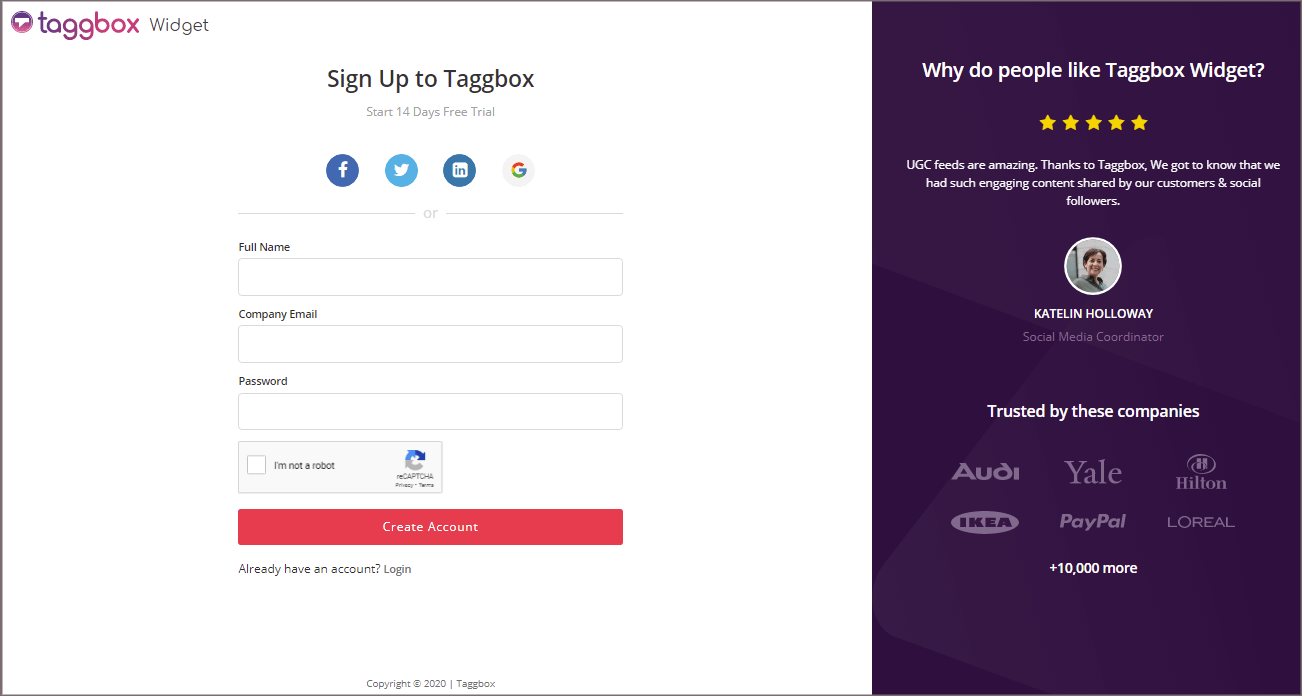
Create your Taggbox Widget Account. Sign Up for 14 days Free Trial or Login to your existing account.
Step 2:
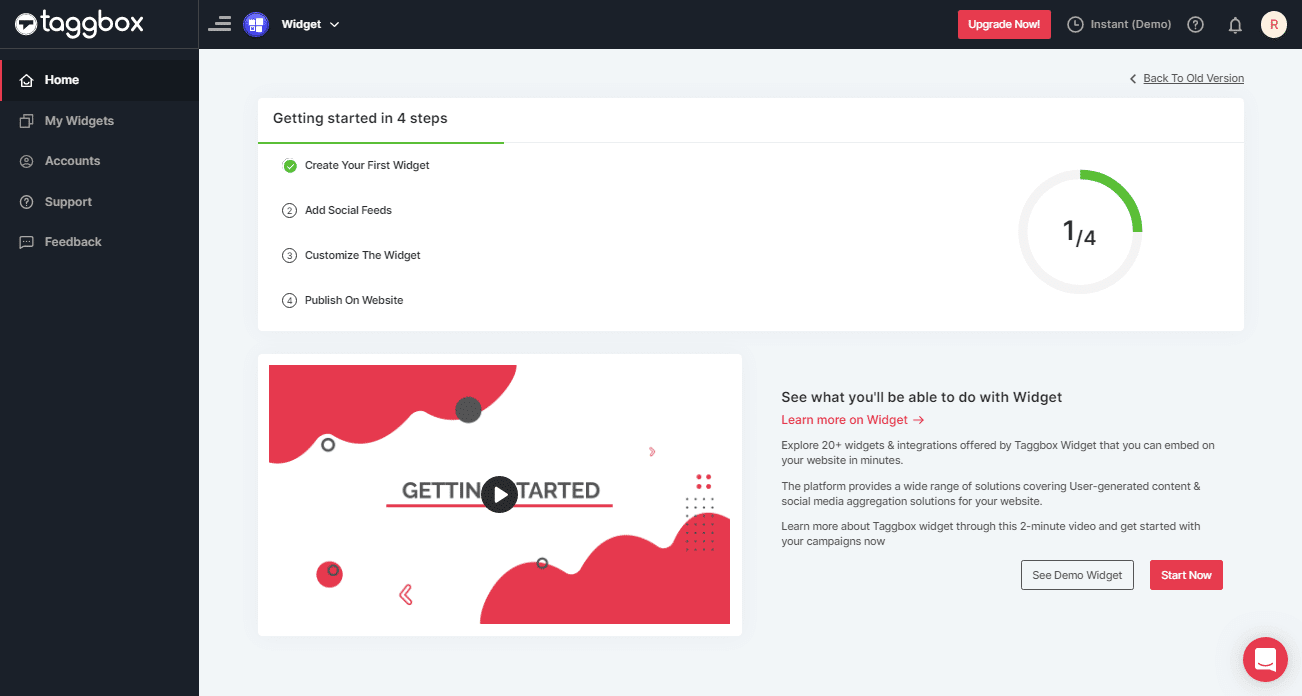
After Sign Up or Log in you’ll be redirected to Taggbox Widget Dashboard.
Step 3:
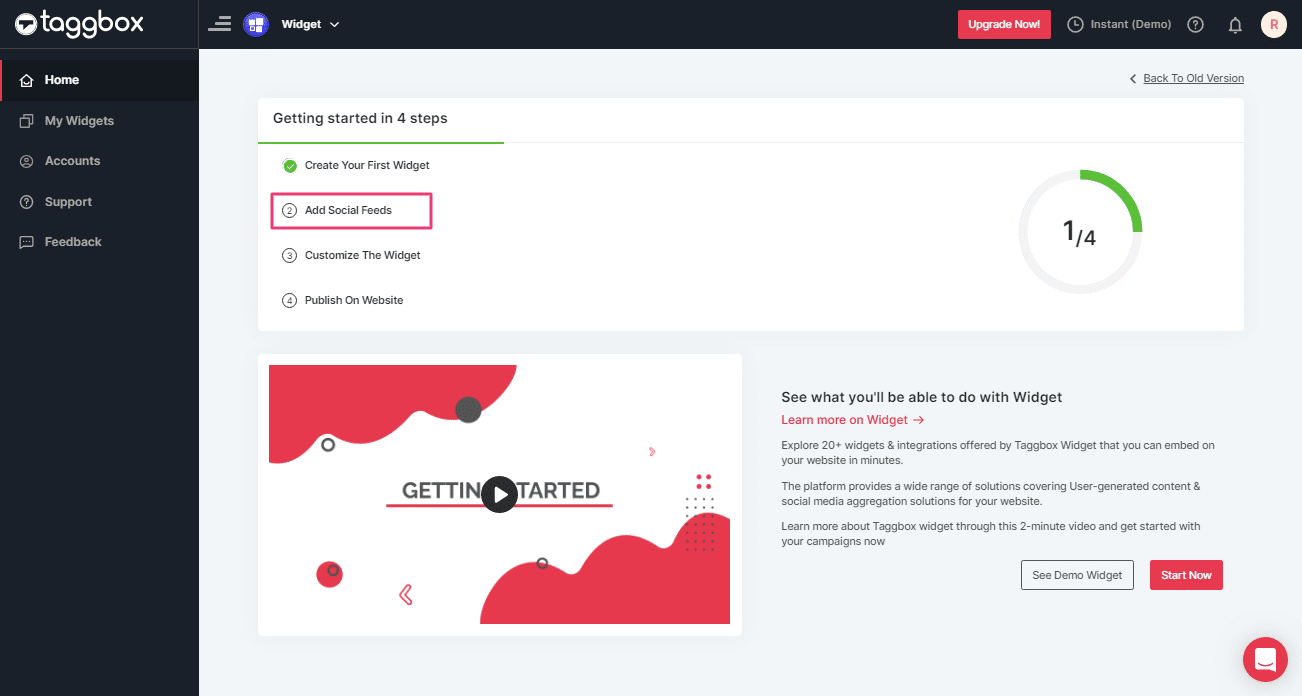
Click on “Add Social Feeds” option to add RSS feed to your widget
Step 4:
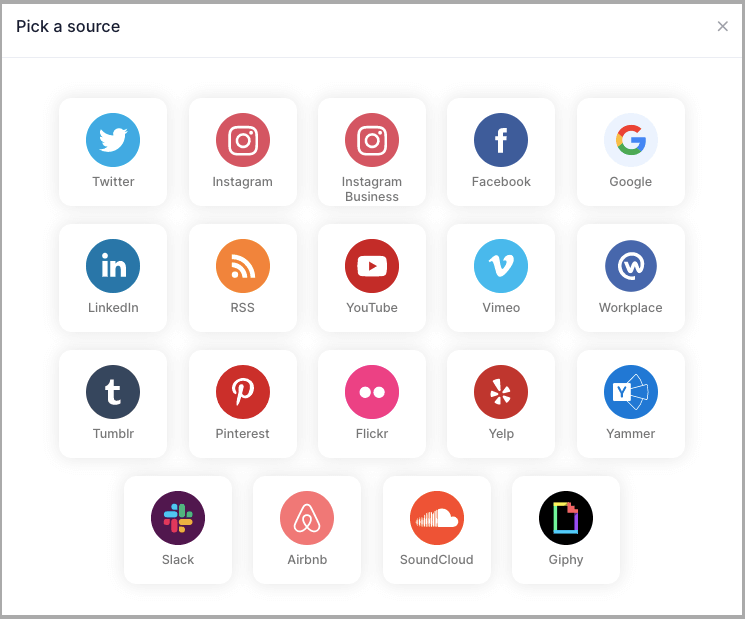
A new Dialog Box will appear “Pick a Source” select “RSS” as a source of aggregating feeds.
Step 5:
A “Create RSS Feed” dialog box will appear, enter the details:
- Display Name – Name that you want on the display.
- Feed URL – Enter the XML URL for the feed you want to embed.
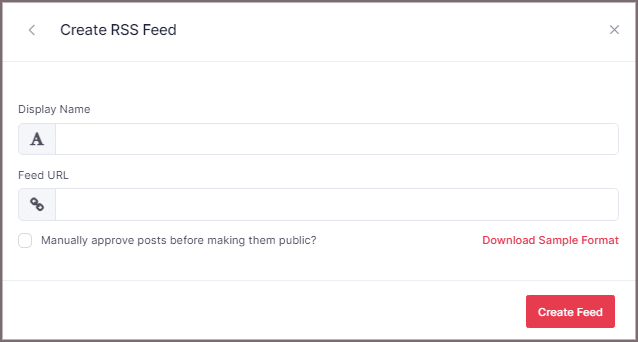
Tip: You can also manually approve posts before making them public by taking the feeds to moderation; enable the checkbox.
Step 6:
Finally, Click “Create Feed” button.
Now, Taggbox will aggregate all the content from the entered RSS URL to the RSS feed widget.
How to embed RSS Feed on Sharepoint?
Follow the steps to embed RSS feed on Sharepoint.
Step 1. – Login to your Sharepoint Account
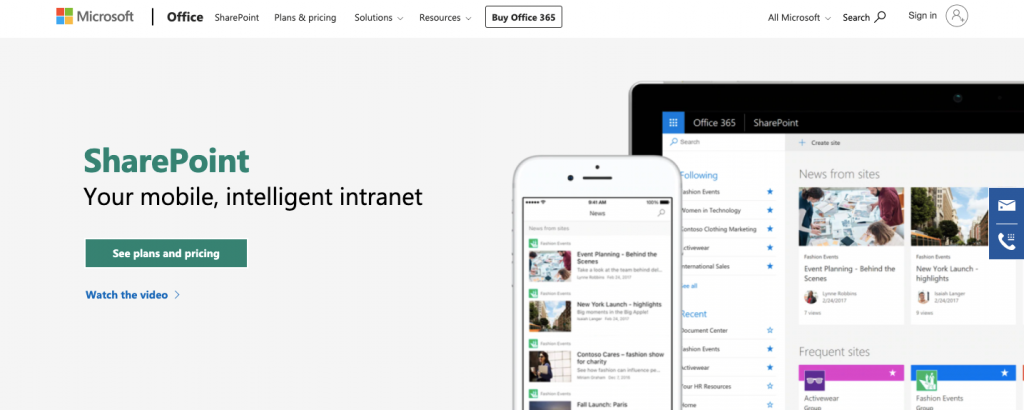
Step 2 – You can use your existing site or you can click on Create Site to build a new site.
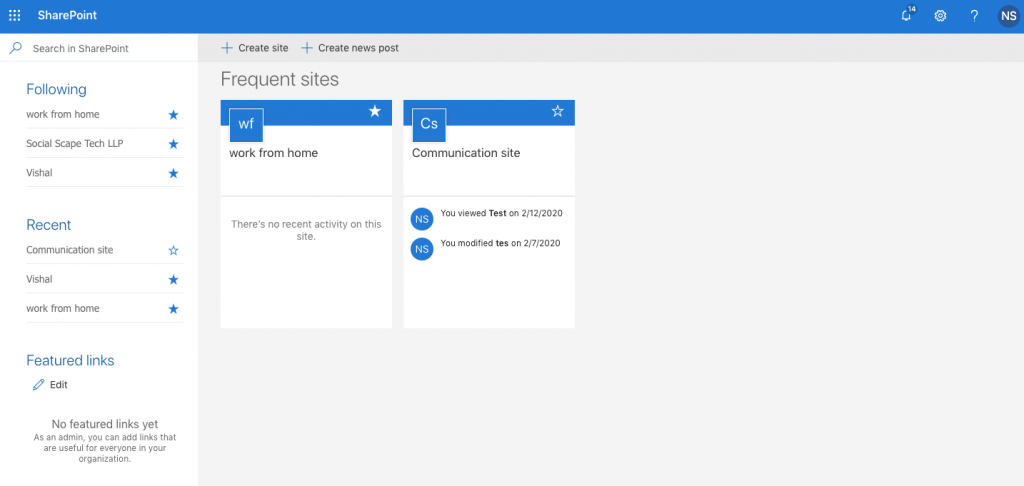
Note: If you opted for creating a new site, you will get an option to choose between Team Site and Communication Site. You can choose the option that suits you and fill in details such as Site Name, Site Design, Site Description, and Site Language. Then click on Finish and your site is created.
Step 3 – After selection of website. To authorize Taggbox to be able to embed the RSS Feed on your site, click on Settings on the top right corner.
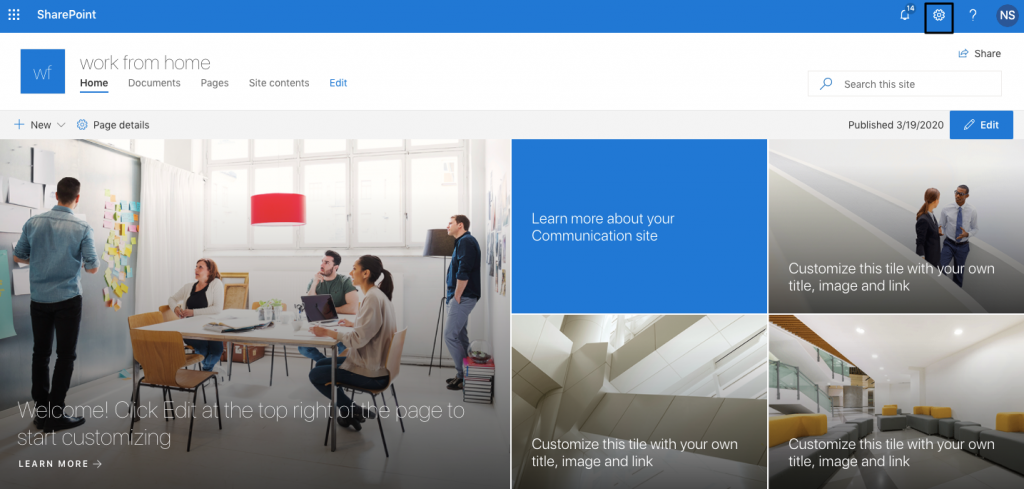
Step 4 – Click on Site Information.
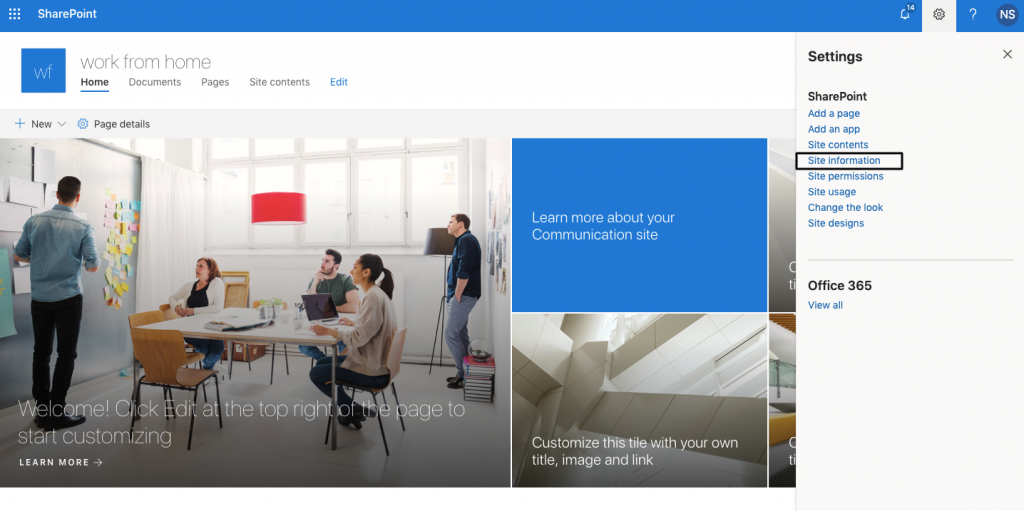
Step 5 – Now click on View all site setting.

Step 6 – You will see multiple options, click on HTML Field Security.
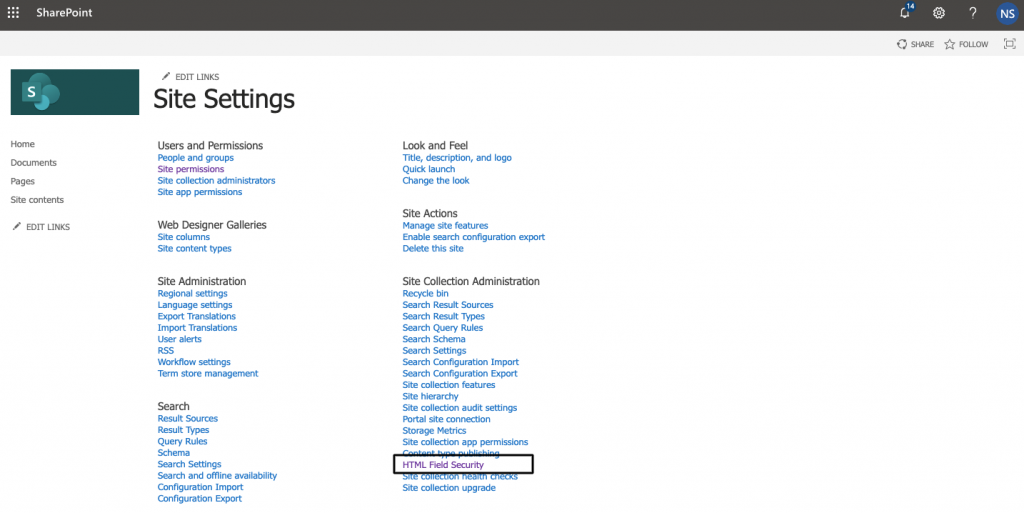
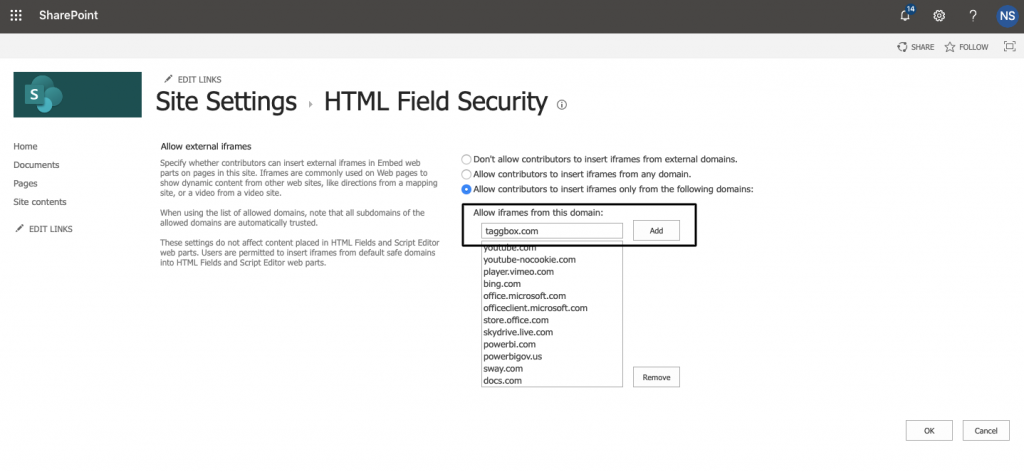
Step 7 – On your screen, you will see an option to allow Iframe. Enter taggbox.com and click on Add. Then choose the option OK on the bottom left corner.
Step 8 – Go back to your website now. Click on the Edit button to enable edit mode then click on (+) icon on your website. A pop-up will appear, click on embed.
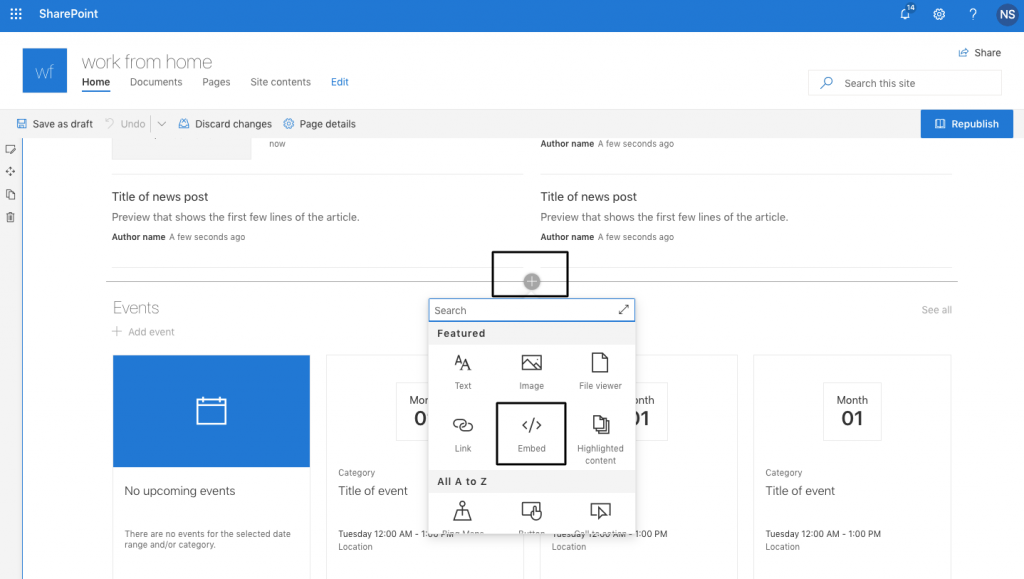
Step 9 – Now a pop-up will appear that will ask you for an EMBED CODE. Copy and Paste the below-mentioned code there.
Embed CODE:
<iframe src="https://app.taggbox.com/widget/e/Your_Wall_Id?" style="visibility: visible; position: static; margin: 0px; left: -999em; display: inline-block; border: none; width: 100%; height: 650px;min-height: 600px; " frameborder="0" allowtransparency="true"></iframe>
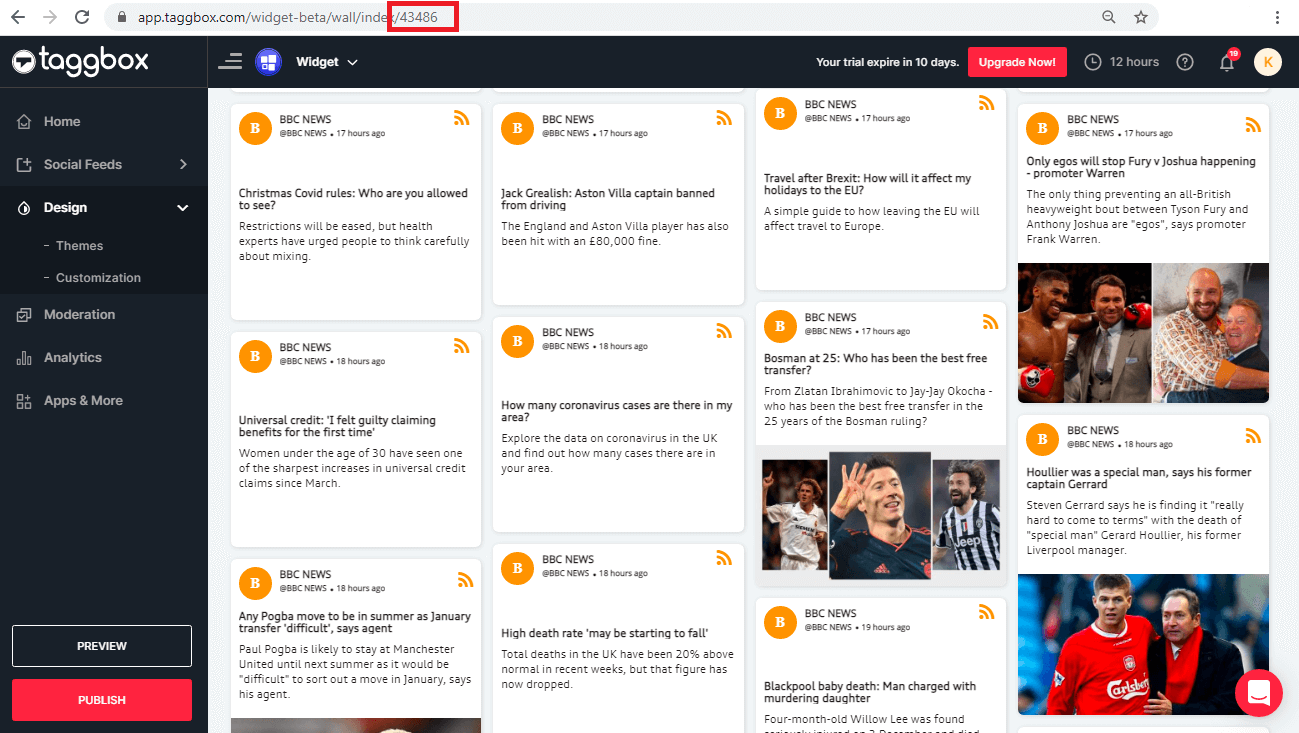
Important – Now go to the RSS Feed you created on Taggbox Widget, you will see your Wall ID in the URL e.g: (https://app.taggbox.com/widget-beta/wall/index/43486). In the example URL, 43486 is the wall ID. In the same way, get your WALL ID from the URL and COPY that Wall ID; and replace it with “Your_Wall_ID” in the above EMBED CODE.
Step 10 – Click on the Republish button, and your RSS Feed has been embedded.
You have successfully embedded the RSS Feeds on SharePoint.
To turn on the Real-Time Updates go to HOME>MY WIDGETs and turn the REAL-TIME UPDATEs toggle on.
Try Taggbox Widget to add RSS Feed on SharePoint 14 Days Free Trial
If you have any questions or need help, please Contact us or write us at [email protected]