To create and embed Flickr gallery on your website, you need to follow the given steps-
Embed Flickr Gallery On Your Website
Try Taggbox Widget – Start Your 14 Days Free Trial
Step 1
Signup for a new Taggbox Widget account or Log in if you already have an existing account.

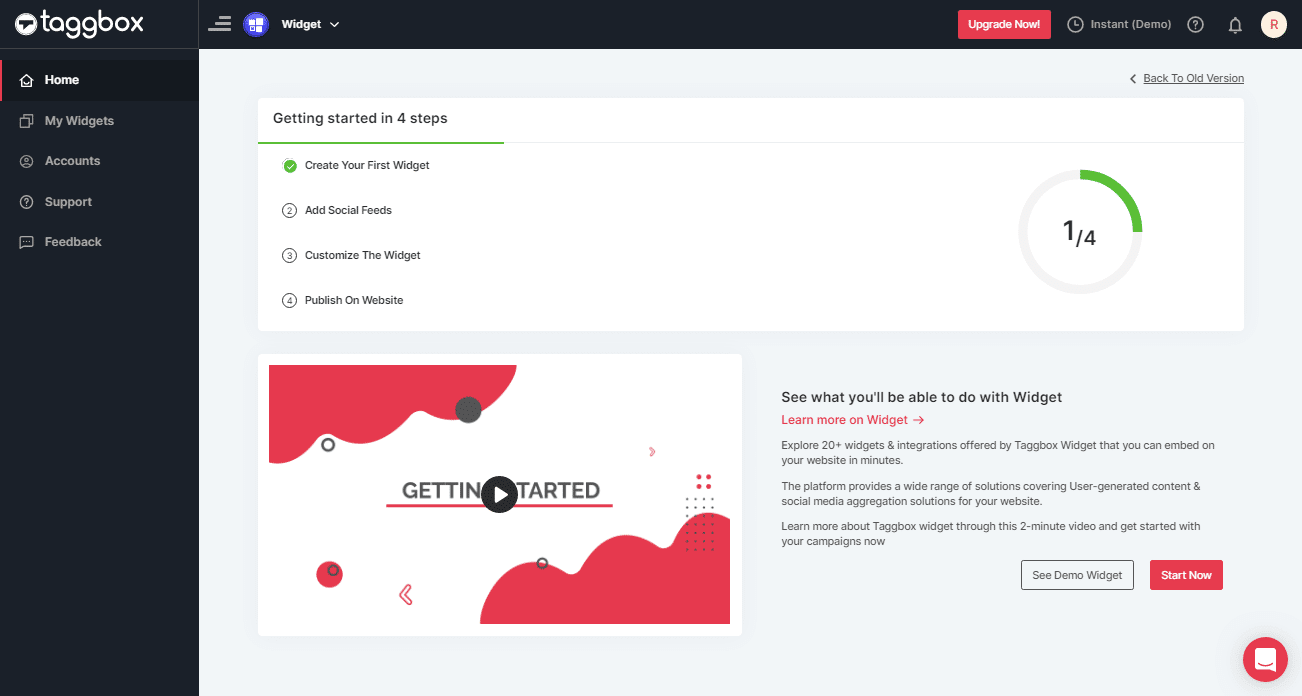
You’ll be redirected to Taggbox Widget Dashboard:
Step 2
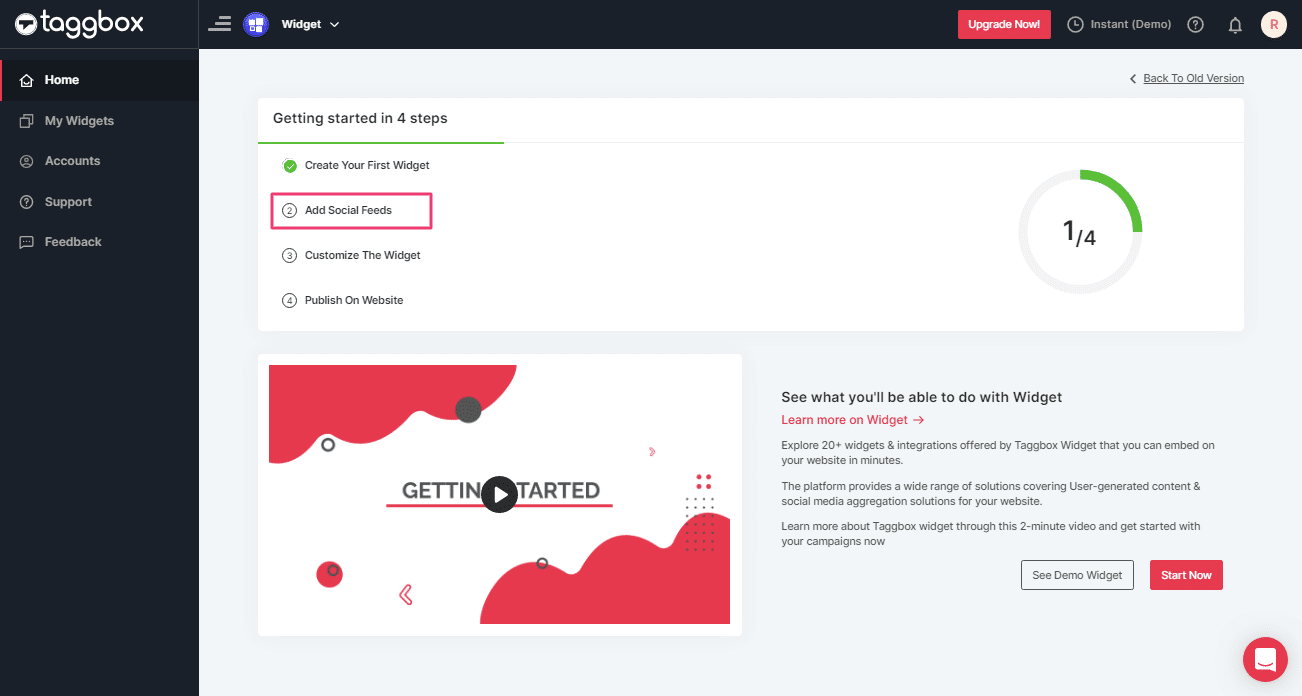
On the dashboard, click on Add Social Feeds to start adding Flickr Gallery feeds on your widget.
Step 3
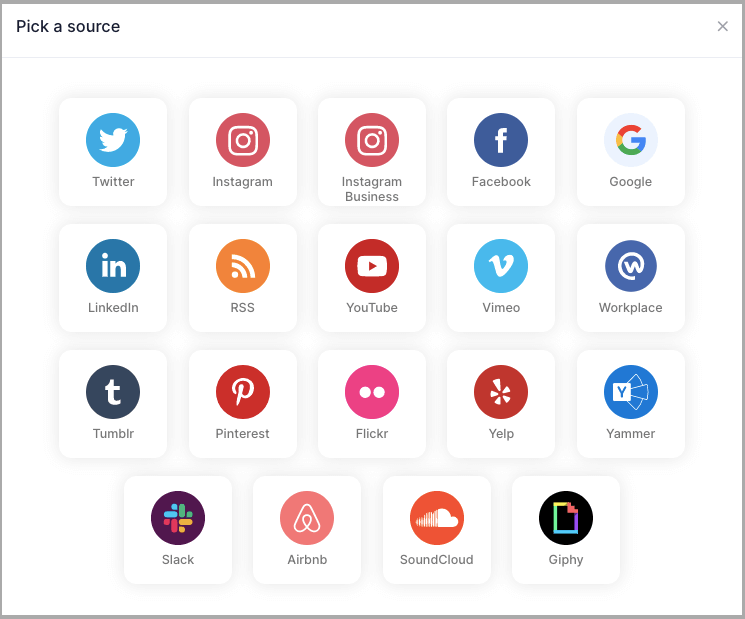
In the popup “Pick a Source” that appears, select Flickr as your source of aggregating feeds.
Step 4
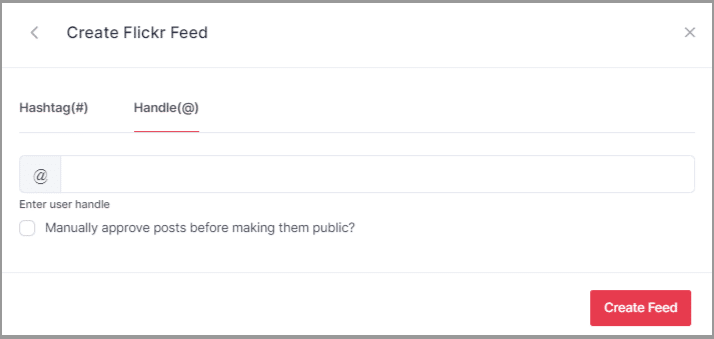
You’ll get a new Pop-up “Create Flickr Feed”. Here, you will see two choices for adding feeds which are:
Hashtag(#): To fetch Flickr photos via Hashtag, enter your Flickr Hashtag.
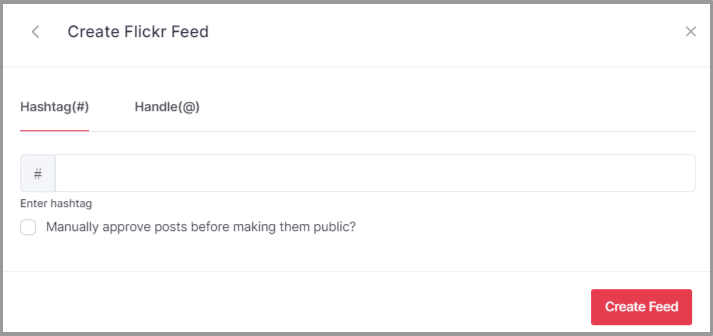
Handle(@): To fetch Flickr photos of account, enter your Flickr Handle.
Step 5
Choose your aggregating method and enter the input accordingly.
Finally, click “Create Feed” button to start the process of aggregating feeds.
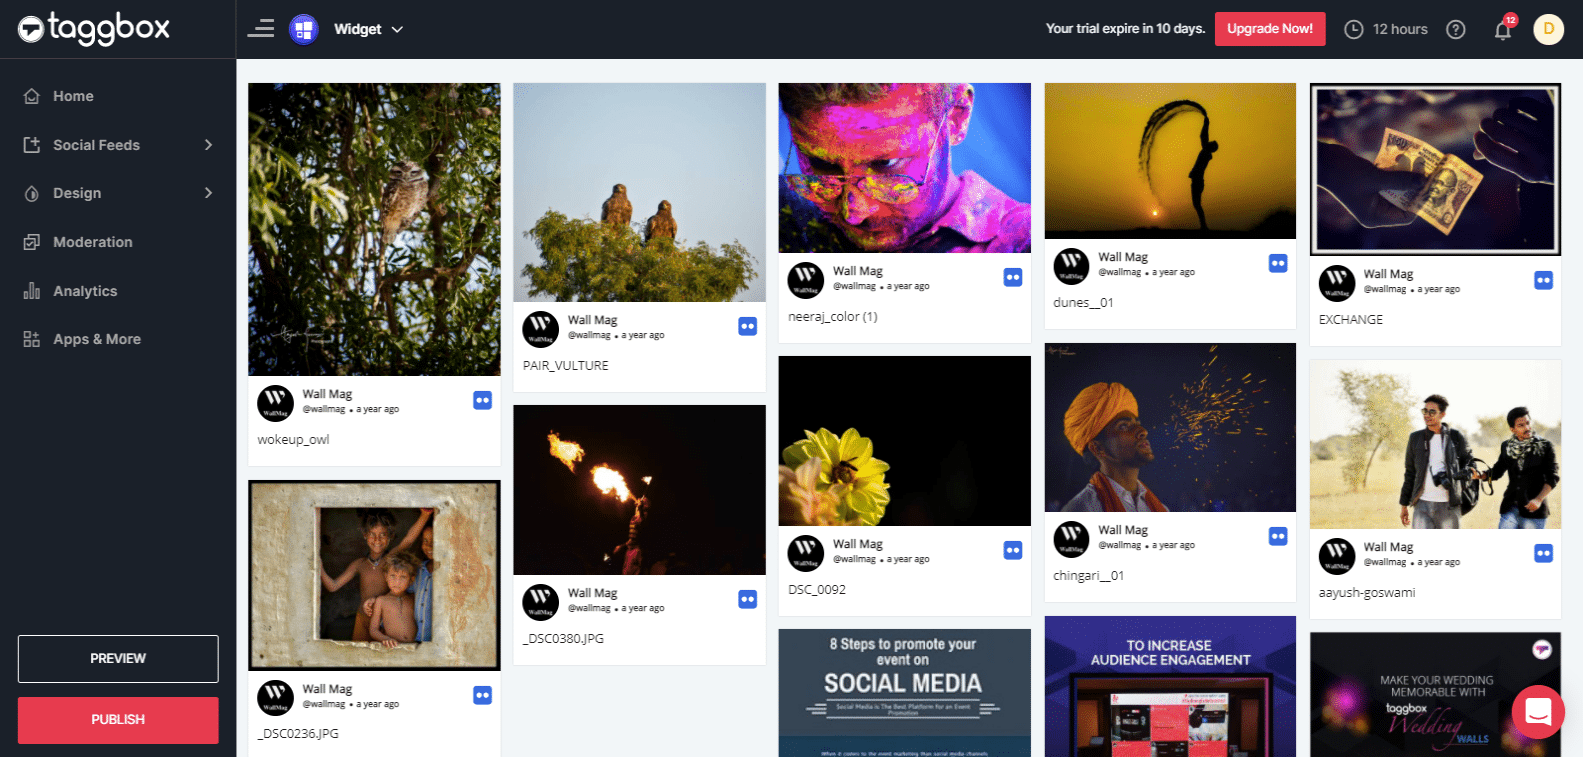
Great, The Connection will be created and within a few moments posts will appear on the Widget editor.
Embed Flickr Album on Website
To embed Flickr album on your website you need to follow below steps –
Step 1
Click the “PUBLISH” button on the bottom-left of the screen, You can also see the “PREVIEW” of how your feeds gonna look on different devices.
Step 2
A dialog box “Choose Your Platform” will appear, Select the Logo of your website platform or else select “OTHER” if your website platform is not listed.

Example:
Embed Flickr Gallery on HTML Website
Step 1
To embed your Flickr gallery/album on HTML website, choose HTML as your website platform.

Step 2
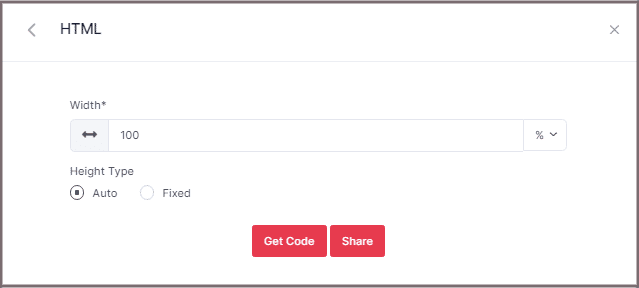
A new Dialog Box will appear “HTML”:
Enter the width and height into the input box according to your requirement;
Step 3
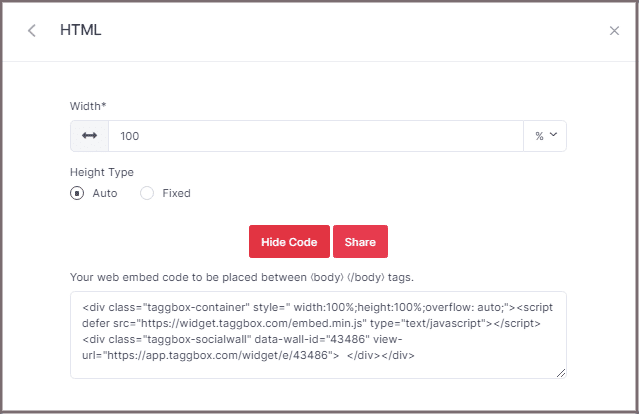
Click GET CODE and COPY the generated code; you can also share the code on your email ID by clicking the SHARE button
Lastly, Paste it into your HTML webpage body tag, where you want to embed Flickr feeds.
Embed Flickr Album on WordPress Website
Step 1
To embed your Flickr album on the WordPress website, choose WordPress as your website platform.

Step 2
A new Dialog Box will appear “WordPress”:
Enter the width and height into the input box according to your requirement;
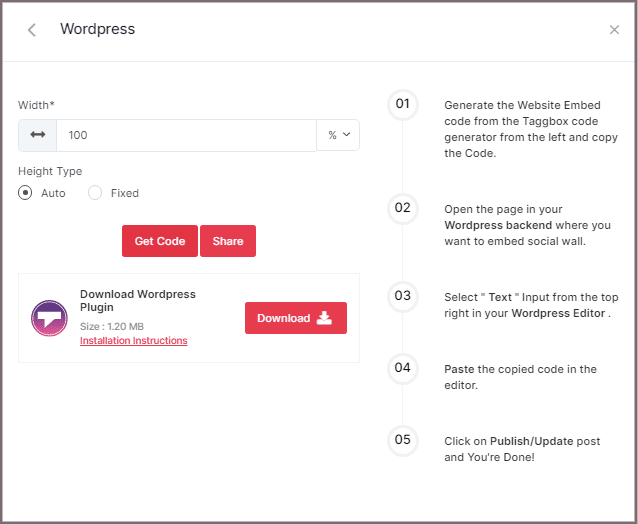
Step 3
Click GET CODE and COPY the generated code; you can also share the code on your email ID by clicking the SHARE button.
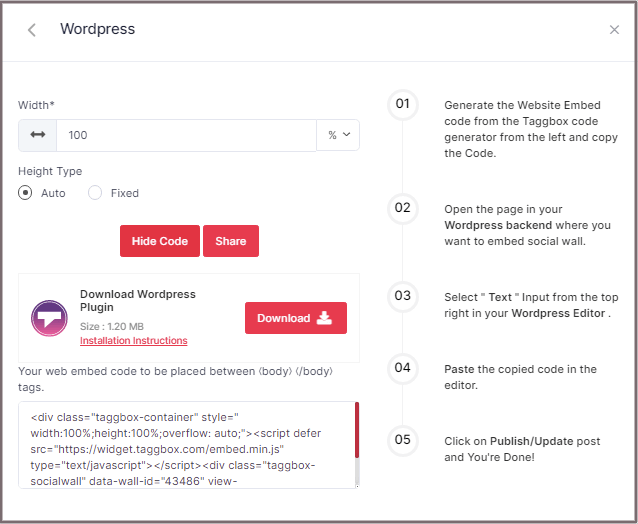
Tip: You can also use the Taggbox Widget WordPress Plugin for making the integration process effortless and smooth.
You can now embed Flickr feeds on the WordPress website using the below steps for Modern and Classic Editor:
A. Embed Flickr Gallery On WordPress 5.0 Website
Learn here how you embed Flickr gallery On WordPress 5.0 Website
Step 1A
Open the page/post in your WordPress backend where you want to embed the Flickr Gallery Feeds.
Step 2A
Select “(+) Add Block” in the top left corner of the WordPress Editor.
Step 3A
Here, click on Formatting and then choose Custom HTML and paste the copied embed code in the editor.
Step 4A
Click on Publish/Update post and You’re done.
B. How You Embed Flickr photos on WordPress Classic Editor
Learn here how you embed Flickr feeds on WordPress Classic Editor
Step 1B
Open the page/post in your WordPress backend where you want to embed the Flickr feeds.
Step 2B
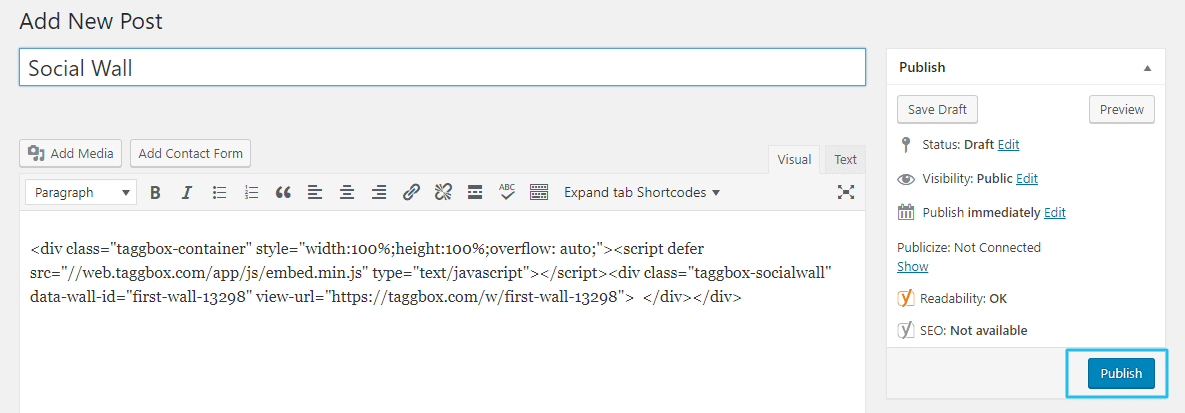
On the right-hand side, you will find a Visual and a Text option. Choose Text Mode.
Step 3B
Paste the generated embed code where you want to show your Widget and click on Update/Publish to save the changes.
Embed on WIX Website
To embed your Flickr gallery on the Wix website, choose WIX as your website platform.

Now follow these steps –
Step 1
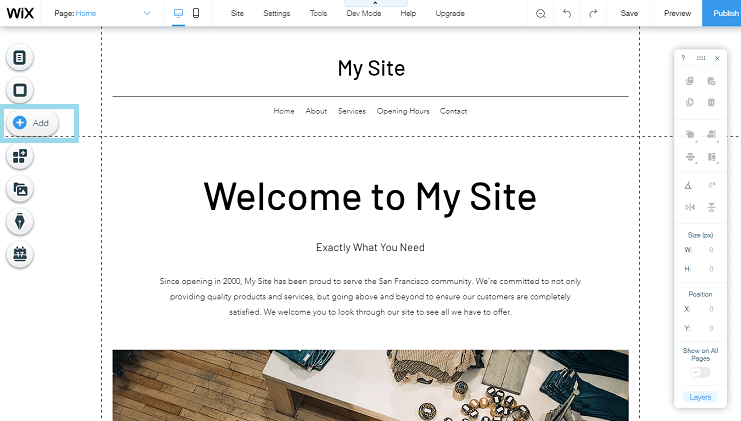
Open your WIX Editor and Navigate to the Page Where you want to Embed your Flickr gallery.
Step 2
Click on “+ Add” Button.
Step 3
Click on More and Select Embed a Site.
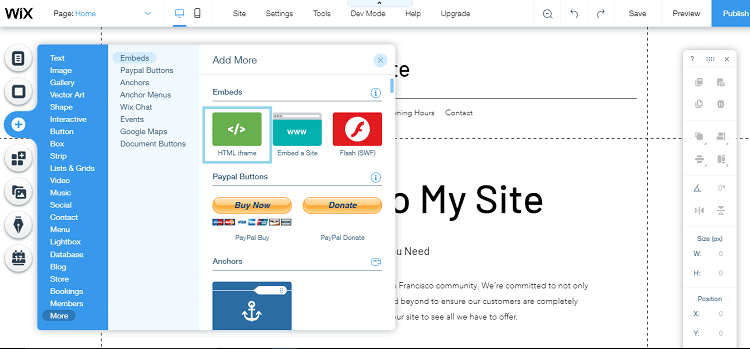
Step 4
Check & Copy the “Website Address” under 5th line.
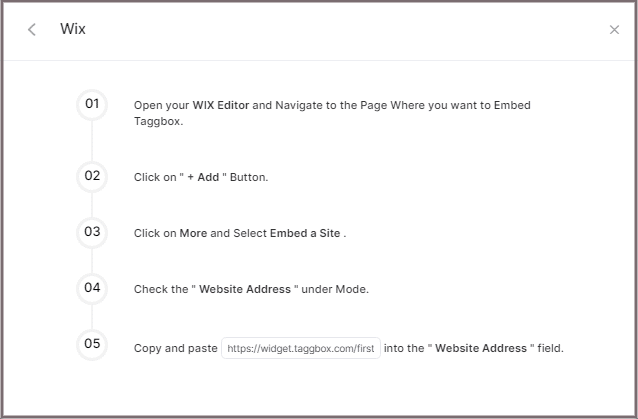
Step 5
Paste the generated URL into the “Website Address” field.

Embed on Squarespace Website
Step 1
To embed your Flickr gallery on Squarespace website, choose Squarespace as your website platform.

Step 2
A new Dialog Box will appear “Squarespace”:
Enter the width and height into the input box according to your requirement;
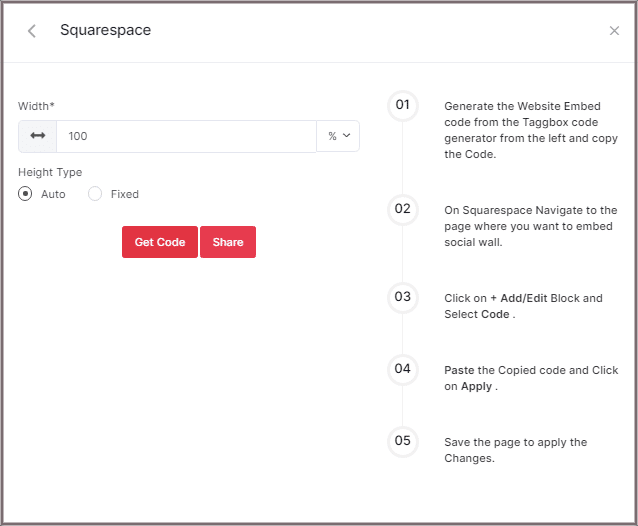
Step 3
Click GET CODE and COPY the generated code; you can also share the code on your email ID by clicking the SHARE button.
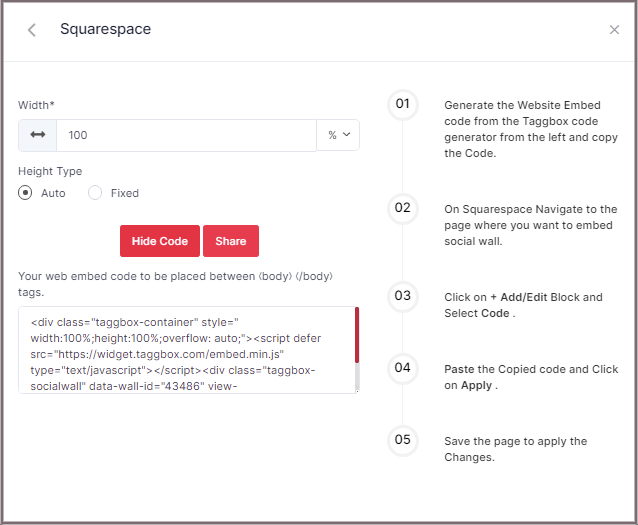
Step 4
On Squarespace, Navigate to the page where you want to embed Flickr photo gallery
Step 5
Click on Edit.

Step 6
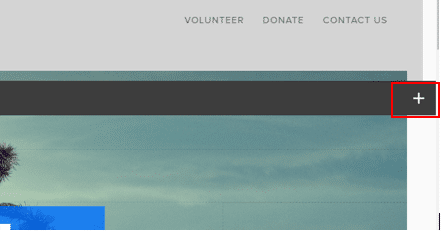
Click on +Add/Edit Block.
Step 7
Select Code.

Step 8
Paste the Copied code and Click on Apply.

Step 9
Save the page to apply the Changes.
Embed on Weebly Website
Step 1
To embed your Flickr photo gallery on the Weebly website, choose OTHER as your platform for generating embed code for Weebly website.

Step 2
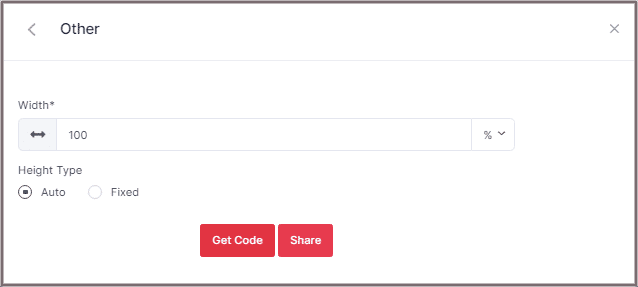
A new Dialog Box will appear “OTHER”:
Enter the width and height into the input box according to your requirement;
Step 3
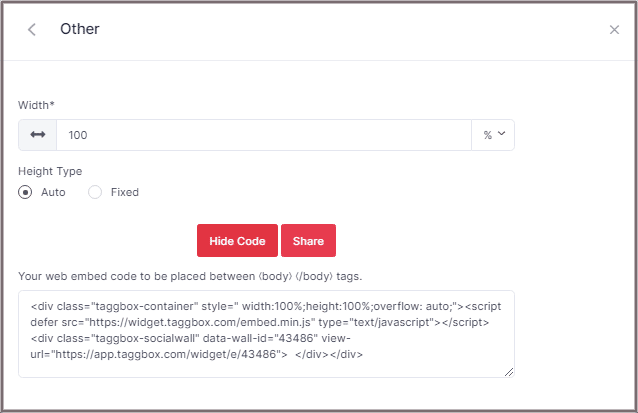
Click GET CODE and COPY the generated code; you can also share the code on your email ID by clicking the SHARE button.
Step 4
On Weebly Navigate to the page where you want to embed your Flickr album feeds
Step 5
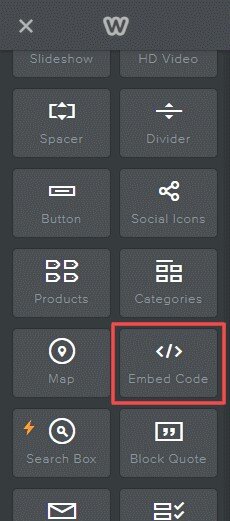
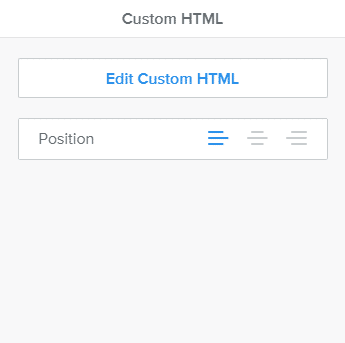
In the left navigation bar, drag “Embed Code” and Drop it on the position where you want to display the Flickr Gallery Widget.
Step 6
Click on Edit Custom HTML and paste the Copied embed code into the Container.
Step 7
Publish your changes.
Embed on Shopify Website
Step 1
To embed your Flickr gallery on the Shopify website, choose Shopify as your website platform.

Step 2
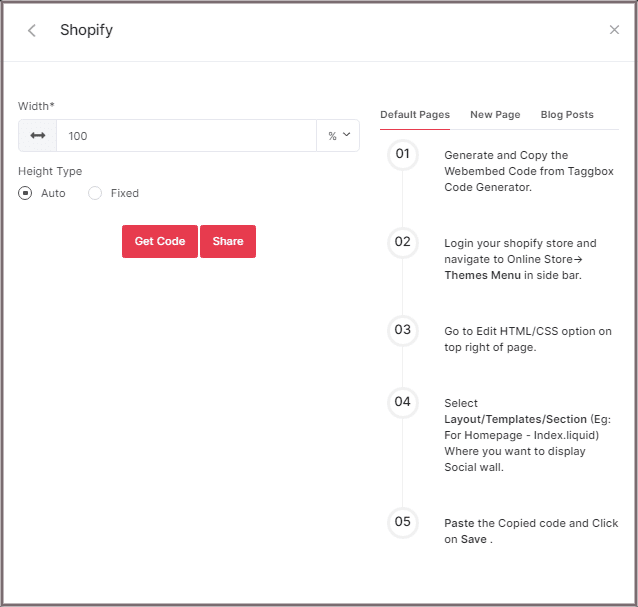
A new Dialog Box will appear “Shopify”:
Enter the width and height into the input box according to your requirement;
Step 3
Click GET CODE and COPY the generated code; you can also share the code on your email ID by clicking the SHARE button.
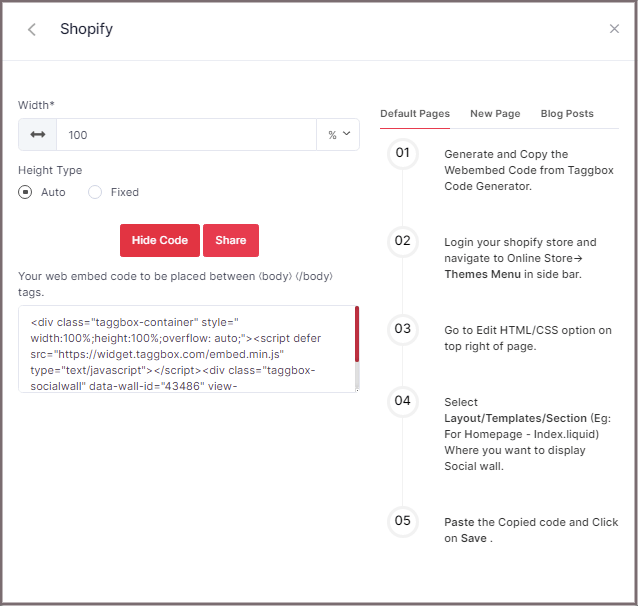
Shopify gives you the option to embed your Flickr gallery either on default Pages or New Pages or Blog Posts. Here are the steps on all three methods:
Default Pages
Follow these steps for Default Pages:
Step 1
Login your Shopify store and navigate to Online Store-> Themes Menu in the sidebar.
Step 2
Click on the Customize button.

Step 3
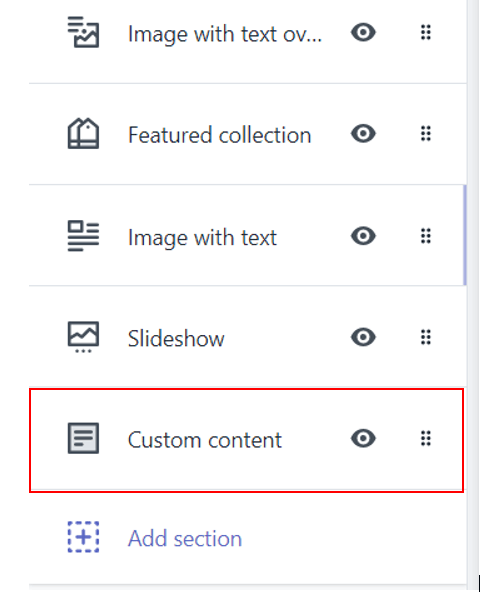
Then Navigate to left side of the page and click on Custom Content.
Step 4
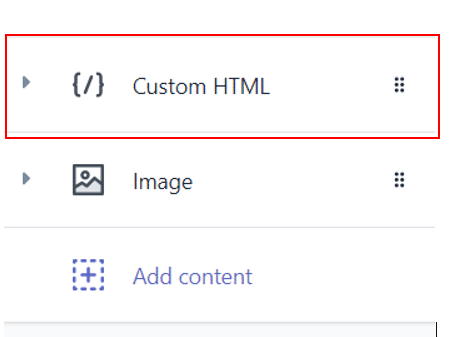
Then click on Custom HTML and paste the Copied code and Click on Save.
New Pages
Follow these steps for new pages:
Step 1
Login to your Shopify store and Navigate to Online Store->Pages menu in the sidebar.

Step 2
Click on Add Page.

Step 3
Select Show HTML (<>) option of Text Editor.

Step 4
Paste the Copied code and Click on Save.
Blog Posts
Follow these steps for Blog Posts:
Step 1
Login to your Shopify store and Navigate to Online Store->Blog posts menu in the sidebar.

Step 2
Click on Add/Create Blog Post on the Top right of the page.

Step 3
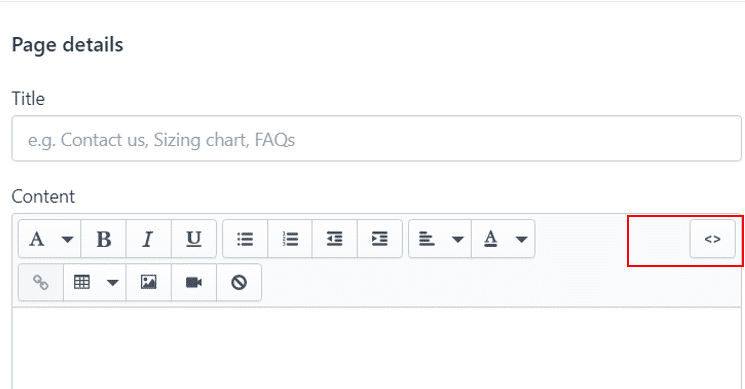
Select Show HTML (<>) option of Text Editor.
Step 4
Paste the Copied code and Click on Save.
Try Taggbox Widget To Embed Flickr Gallery – Start Your 14 Days Free Trial
If you have any questions or need help, please Contact us or write us at [email protected].