Adding a Taggbox widget to your HTML website is a quick process. Once your gallery is ready, you only need to generate the embed code and paste it into the HTML of the page where you want your HTML widget to appear.
Follow the steps below.
Step 1: Log in to Your Taggbox Account
Sign in to your Taggbox account. After logging in, you’ll land on the dashboard where all your galleries are available.
Step 2: Create a Gallery and Add a Feed
If you don’t have a gallery yet, create one. Then:
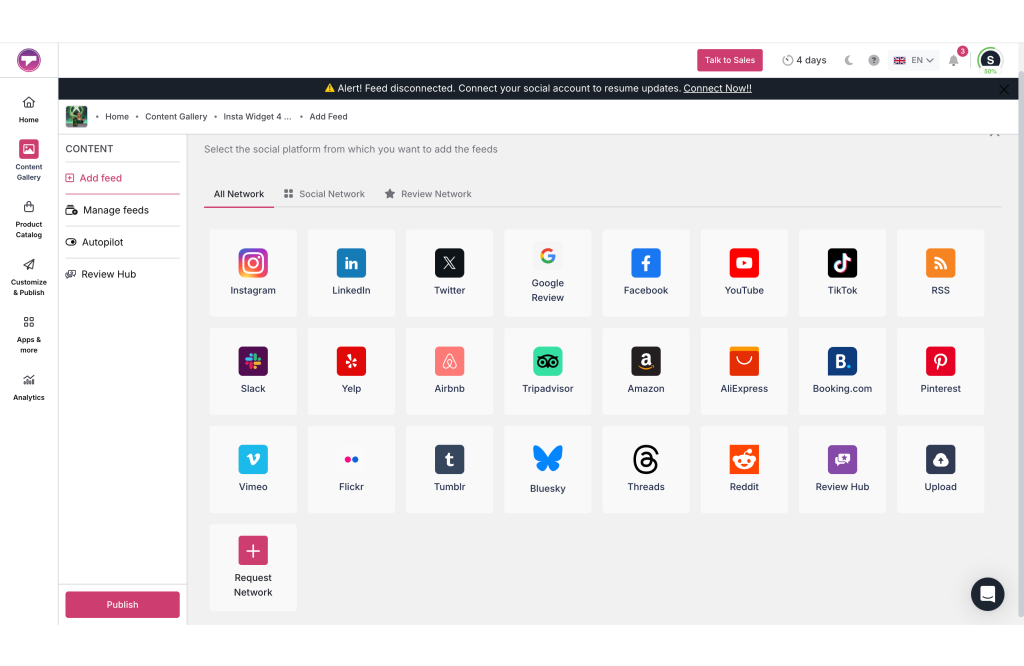
- Open the gallery.
- Go to Content Gallery > Add Feed.
- Select your preferred social media or review platform, including:
Step 3: Moderate Your Content (Optional)
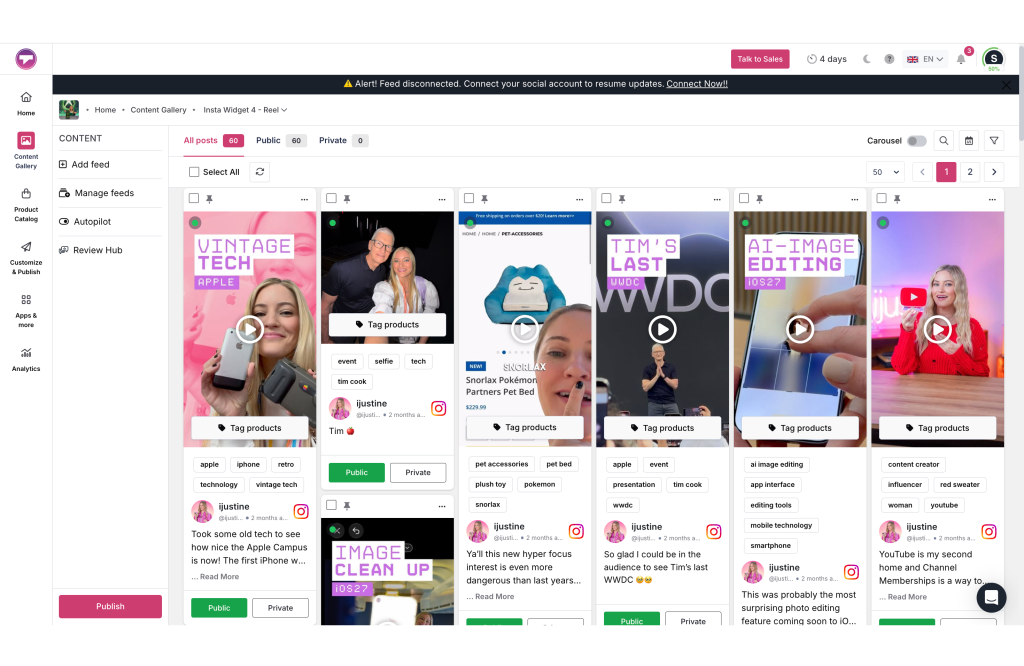
You can choose exactly which posts appear on your website.
- Open Content Gallery.
- Review all imported posts.
- Mark the posts as Public or Private.
- Add product tags if you’re using shoppable galleries.
- Organize your content before publishing.
This ensures only the content you want visitors to see is displayed on your website through moderation.
Step 4: Customize Your Widget
Go to Customize & Publish to personalize your widget’s appearance.
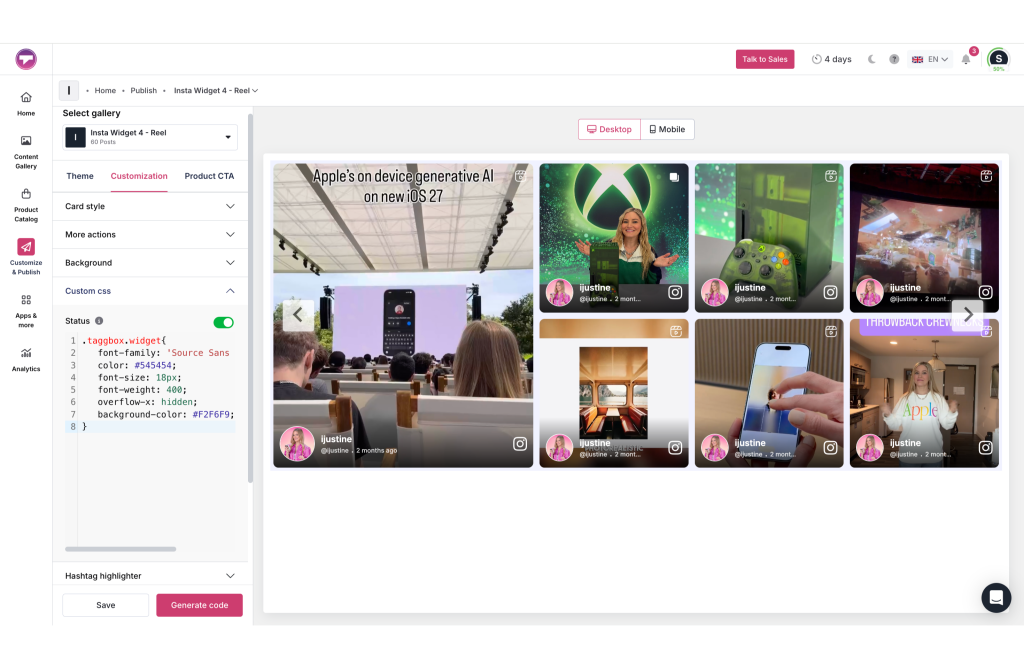
You can customize:
- Theme and layout
- Card styles
- Background colors
- Fonts
- Custom CSS
- Banner settings
- Product CTA
- Other display options
Use the live preview to see how your widget will look before publishing.
Step 5: Generate the Embed Code
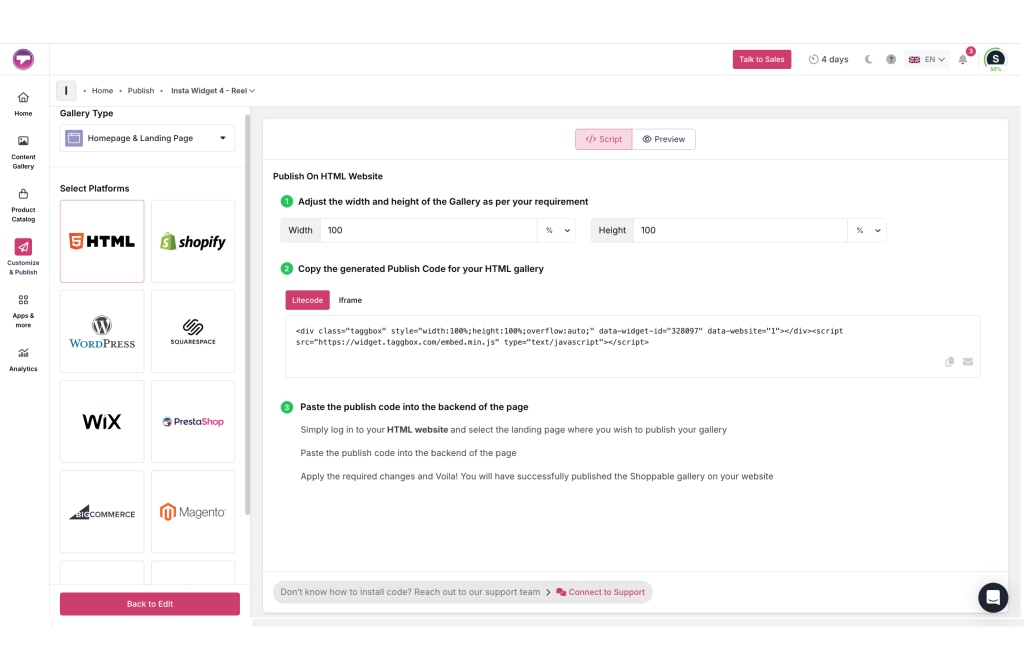
Once you’re satisfied with your widget:
- Click generate code.
- Select HTML from the list of publishing platforms.
- Choose the appropriate gallery type if required.
- Adjust the widget’s width and height according to your website layout.
- Copy the generated embed code.
Step 7: Add the Code to Your HTML Website
Open the HTML file or webpage where you want to display the widget.
Paste the copied embed code inside the section where you want your website widget to appear, for example:
- Homepage
- Landing page
- Product page
- About page
- Blog page
- Any custom HTML page
Save your changes.
Step 8: Publish Your Website
After adding the code:
- Save your HTML file.
- Upload or publish the updated website to your server.
- Open your website in a browser to verify that the widget is displaying correctly.
Your Taggbox widget should now appear on your HTML website.
Troubleshooting
If your widget does not appear correctly, check the following:
Verify the Embed Code
Ensure the complete embed code has been copied and pasted without any modifications.
Check the Placement
Confirm that the code has been inserted in the correct section of your HTML page.
Clear Browser Cache
Refresh your browser or clear the cache to load the latest version of the page.
Check Widget Visibility
Make sure the posts in your gallery are marked as Public.
Confirm Feed Connection
If your gallery isn’t updating, verify that your connected social account is still active and authorized.
Need Additional Help?
If you’re still facing issues embedding your widget, contact the Taggbox support team. Share your gallery details and the webpage where you’re embedding the widget so they can help identify the issue quickly.