Add banner in your Taggbox Widget or Upload your banner using the simple steps below:
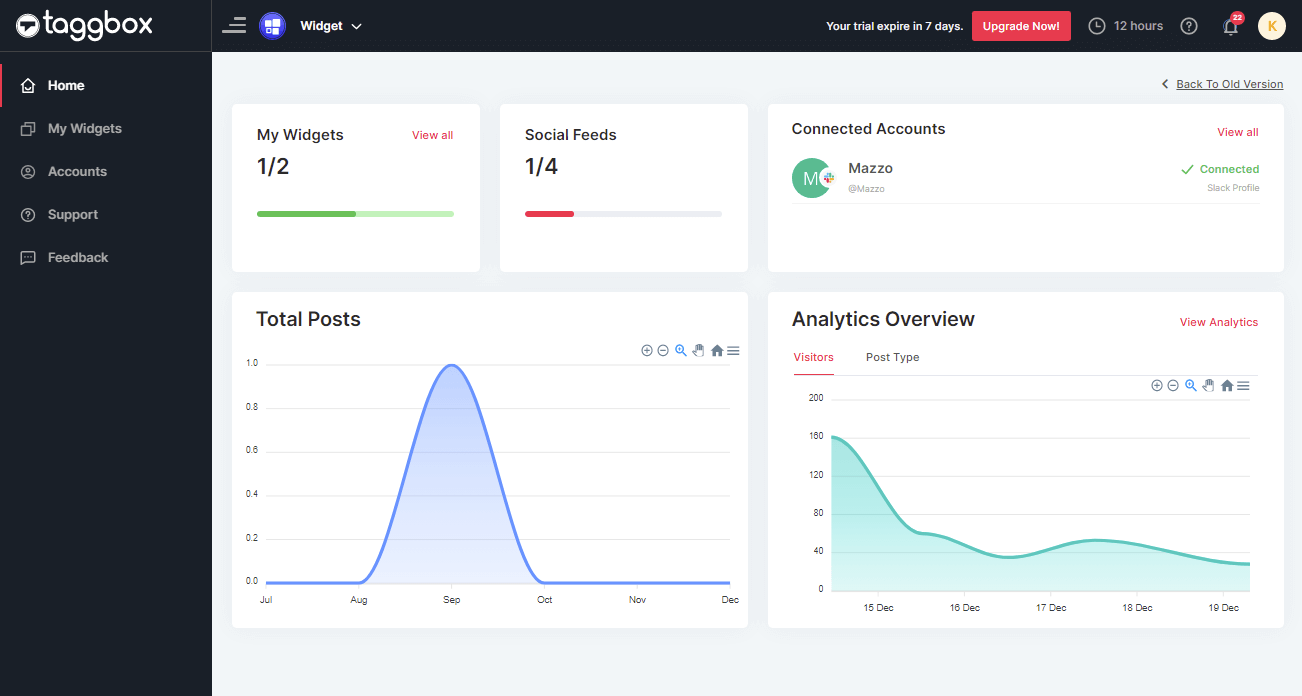
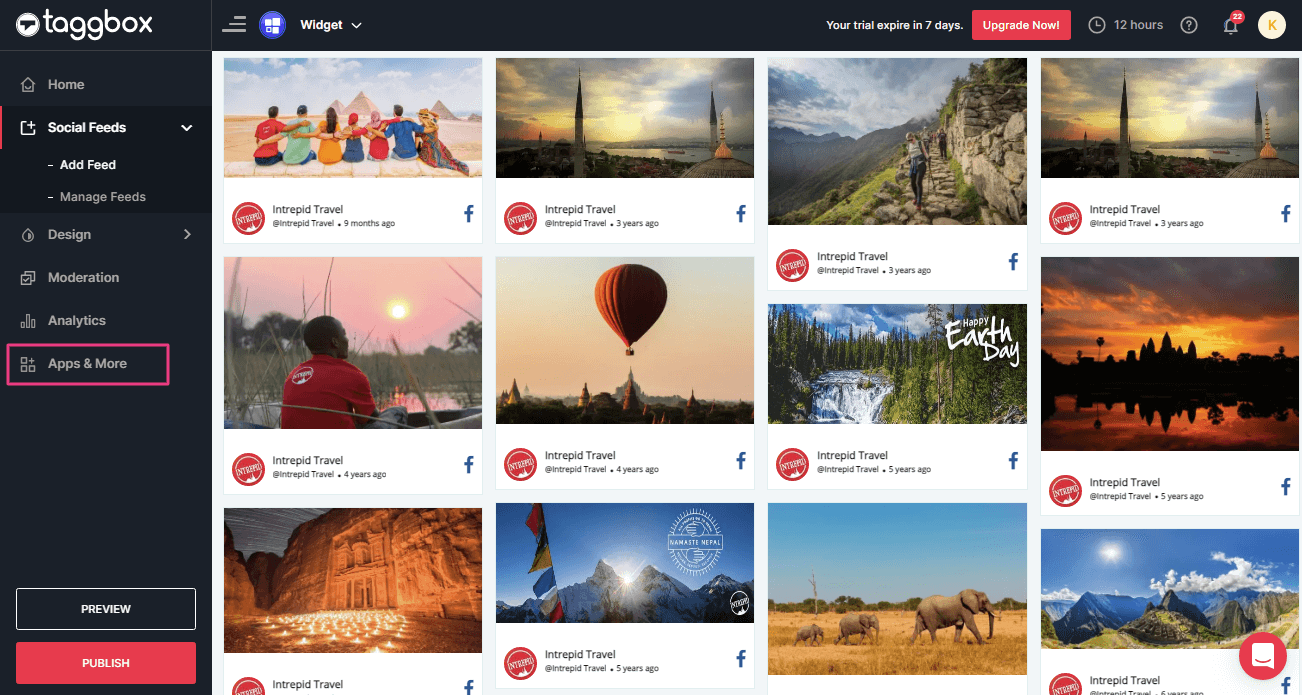
Taggbox Dashboard
First, Login to your Taggbox Widget Account. You’ll see your widget dashboard like this:
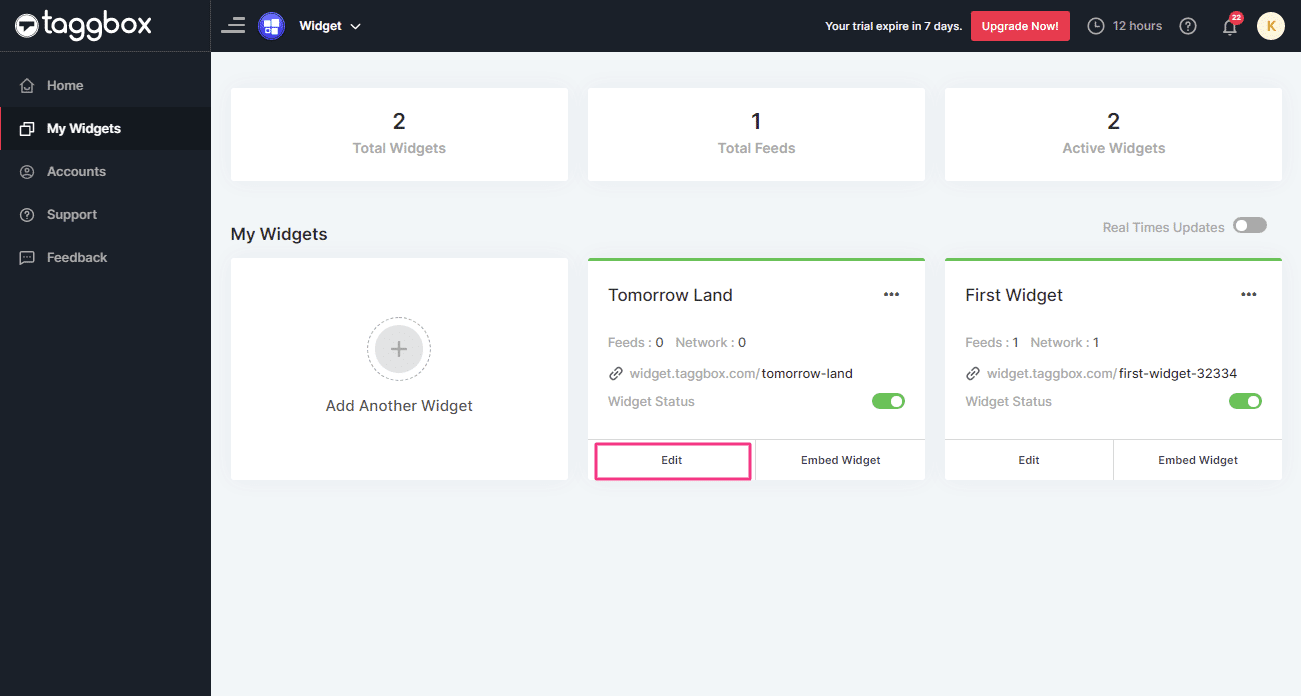
Now, on the left menu panel click on My Widget. To open the list of widgets you’ve created.
Choose your widget and click on Edit button
Add Banner to your Widget
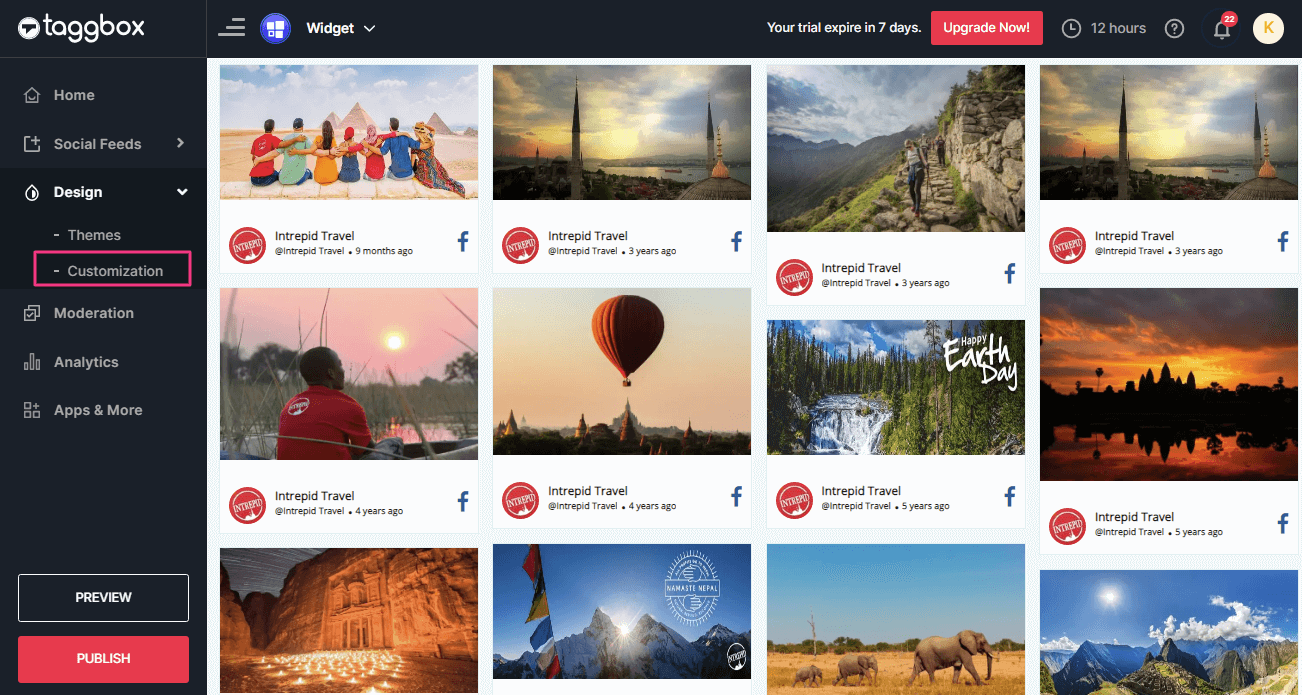
1. Now, Click on the Design Tab and select Customization (You will find it on the left-hand side of the page) to add a banner in your widget theme.
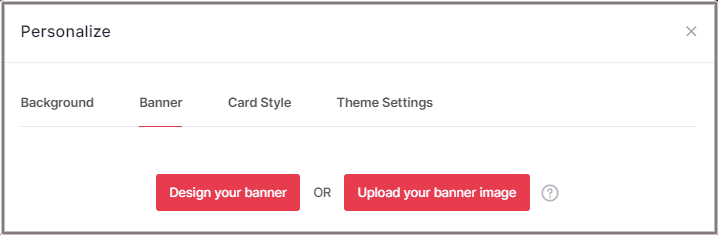
2. After clicking the Customization tab, you will see a pop-up “Personalize“.
Click on the Banner tab. Here you will see two options:
- Design your Banner
- Upload your Banner Image
Design Your Banner
This feature enables you to design your banner according to the templates that we have provided.
Designing your banner helps you to create your own brand image and to show your hashtag to your guests.

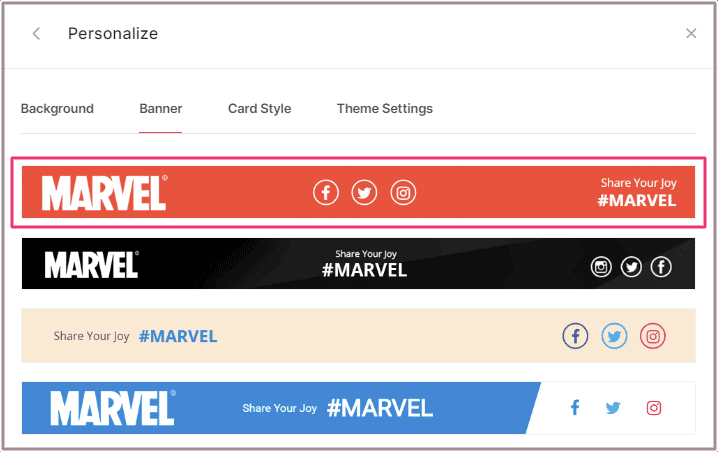
Click on “Design your banner” and you will find various template options to design your banner.
For example, here I am choosing the first banner.
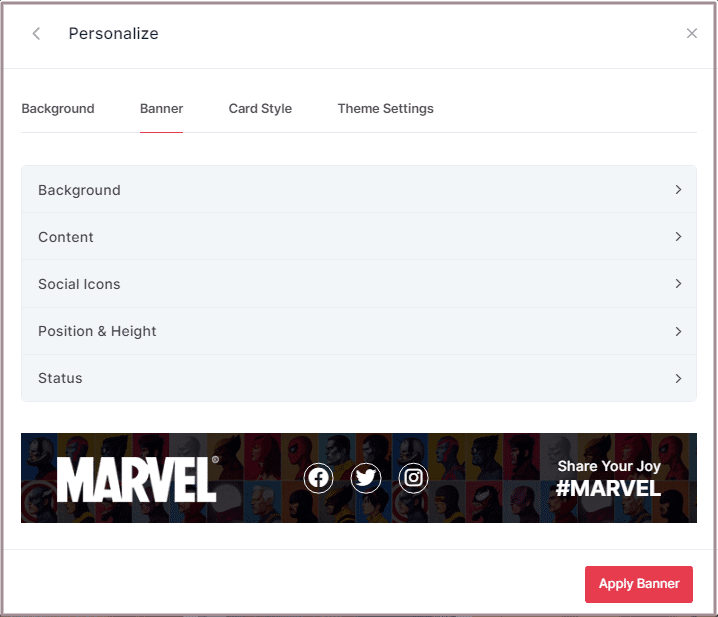
After selecting your banner template, you can see many other options like Background, Content, Social Icons, Position & Heights, Status to design your banner.
Background:
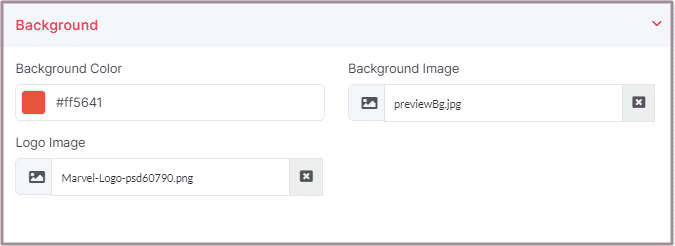
To edit your banner’s background, choose the Background option. Here you can change Background Color, Background Image, and Logo Image as well. Such as:
Background Color
If you want to change your Banner’s Background Color then you can choose a background color option for this and change the background color according to your need.
It will look like this after changing the color of banner:

Background Image
If you want to change your Banner’s Background Image then choose the Background Image option and upload the image of your choice.
It will look like this after changing the background of banner:

Logo Image
You can upload your own logo on the banner. Simply choose Banner logo option and Upload Logo of your choice.
It will look like this after changing the logo of banner:

Content:
To change the content of the banner, click on the Content tab, Here you can change
- Subtitle
- Title
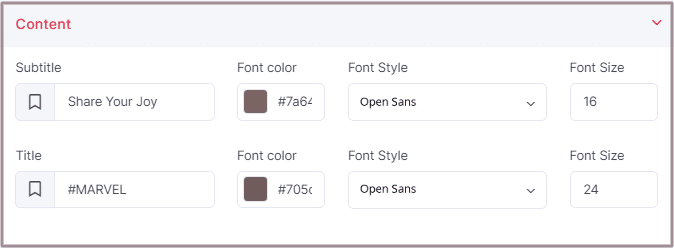
Subtitle
In the Subtitle, you can change your subtitle content and also can manage font color, style and size. Here we have “Share Your Joy” as our default subtitle, you can change it as per your requirement.
Title
To change the title, you can choose the Title option. Here we have “#MARVEL” as our title, you can set any title or hashtag that you want to promote. You can change the font color, Style, and Size of the Title.

Social Icons:
Socials icons are the icon or the small images of social media networks such as Facebook, Twitter, and Instagram. Through these icons, you can tell your audience about your social media platform.
By default all the options are active but you can change them according to your preferences.
If you do not want social icons then click on the drop-down list and choose option OFF.
Here we have selected the Facebook, Twitter & Instagram option and you can see that in the Banner, all the three Icons are added.
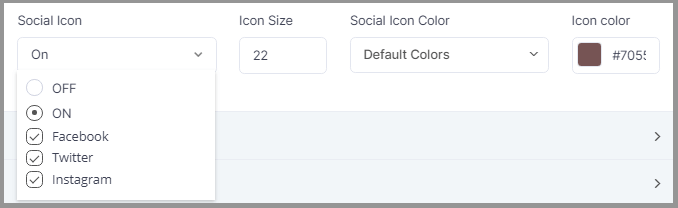
You can also change the size of the icons, also if you want to change the color of the icons then choose the option Social Icon Color and from the drop-down list click on Choose color and pick a color from Icon Color. We have selected Red as per background and Title.
Position & Height:
From here, you can manage the banner height and position. If you want to change the height of the banner then you can simply increase or decrease the size using the slider.
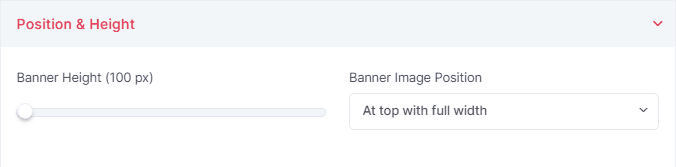
If you want to change the position of the banner image then click on the drop-down list and choose the option you want. Simply clicking on one of the two options which are:
1. At the top with full width
2. At the bottom with full width.
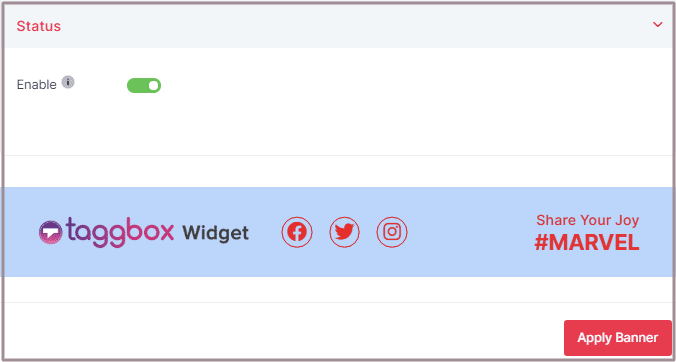
Status:
This option asks you whether you want to enable or disable the banner.

Enable the toggle status to turn ON the Banner.
After you have made all the changes then click on the Apply Banner Button (bottom right side).
Great, You have successfully Design your Banner.
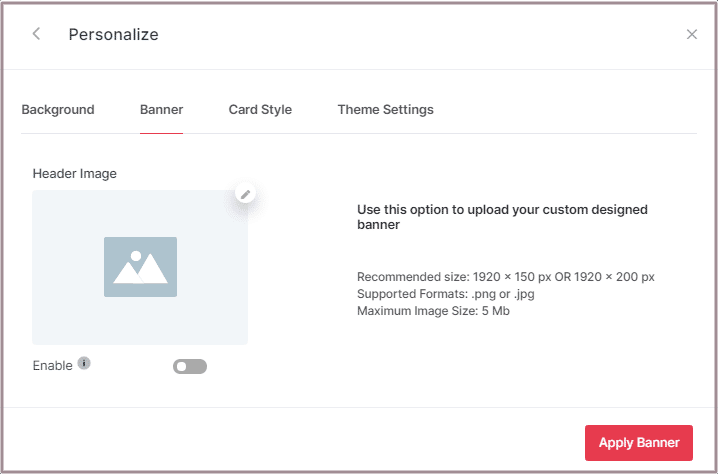
Upload Your Banner
You can also upload your own banner but make sure you must fulfill these conditions.
Recommended size: 1920 x 150 px OR 1920 x 200 px
Supported Formats: .png or .jpg
Maximum Image Size: 5 Mb
Follow the below steps to upload your banner image:
Choose Upload your banner image option to upload a banner.
After clicking the Upload Your Banner option, you will see a pop-up menu like this:
Click on the Pencil icon Button and Upload your banner image from the desktop.
Then enable the banner using the Toggle option. If you want to disable turn it OFF.
Finally, After uploading your Banner, click on Apply Banner Button.
Other Method
There is another way by which you can change the Banner. Just click on the More option in Editor Widget.
After that, you will see a window. Click on the Widget Banner option from that window.
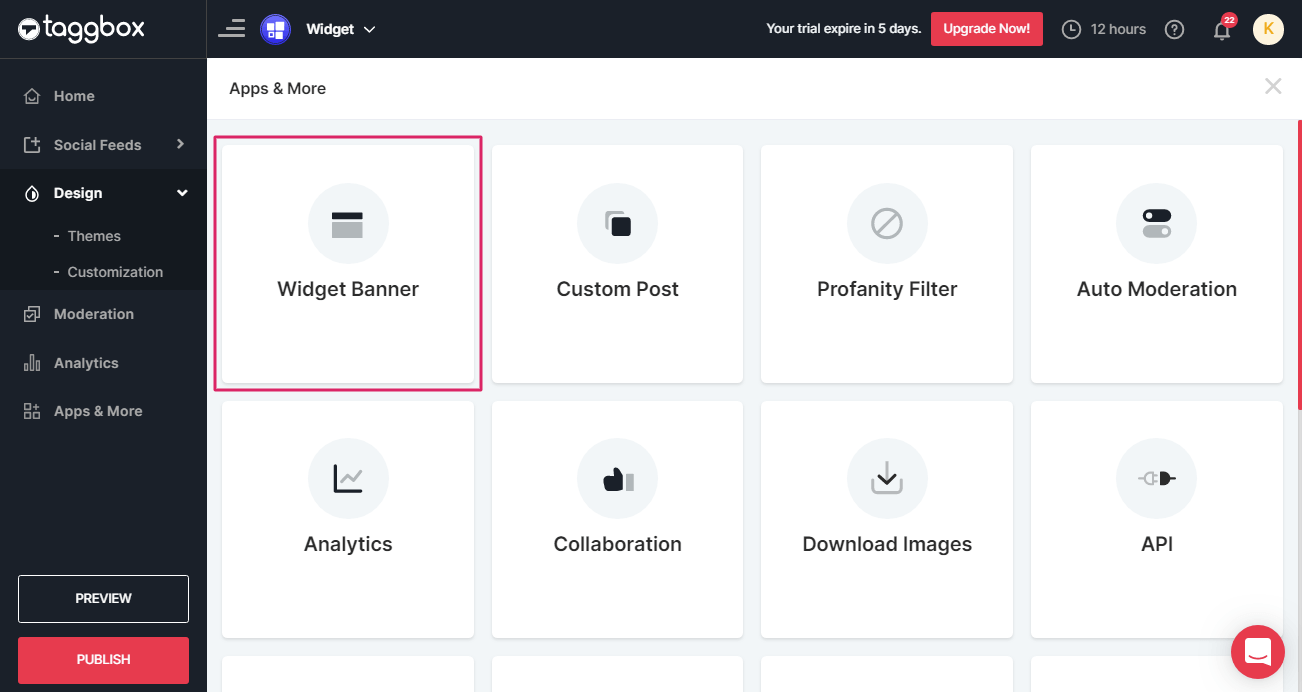
Then again Follow all the above-mentioned steps to Design or Upload the banner.
If you face any additional issue then please feel free to Contact us or write us at [email protected].