What is Custom Post?
A custom post is a feature on Taggbox Widget for Social Feeds Widget. Where you can add your own content between live social feeds on Social Widget. You can display those custom posts like live social media posts in real-time. You can manually add a customize post image, author image, author name and your own content in a custom post.
Create Custom Post
Follow steps below to Create & Add a Custom Post:
Step 1. Log on to your Taggbox account and navigate to your widget editor.
Step 2. Click on Apps & More (You will find it on the left-hand side of menu panel) –
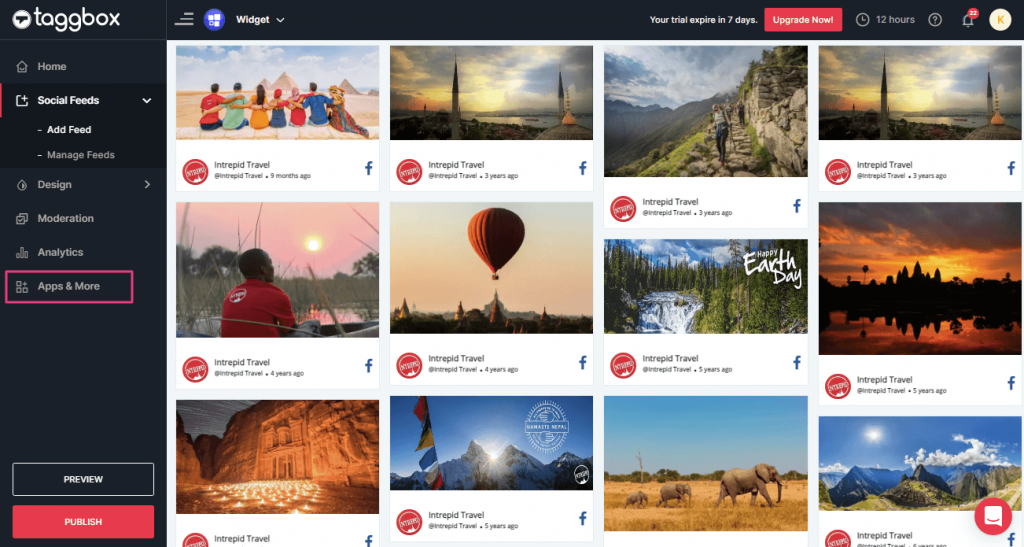
Step 3. Now Select the Custom Posts option :–

Step 4. You will see a Modal Popup to Create a Custom Post. Fill in all the required details such as Upload Post Image, Author Profile Image, Author Name, Content, Link etc.
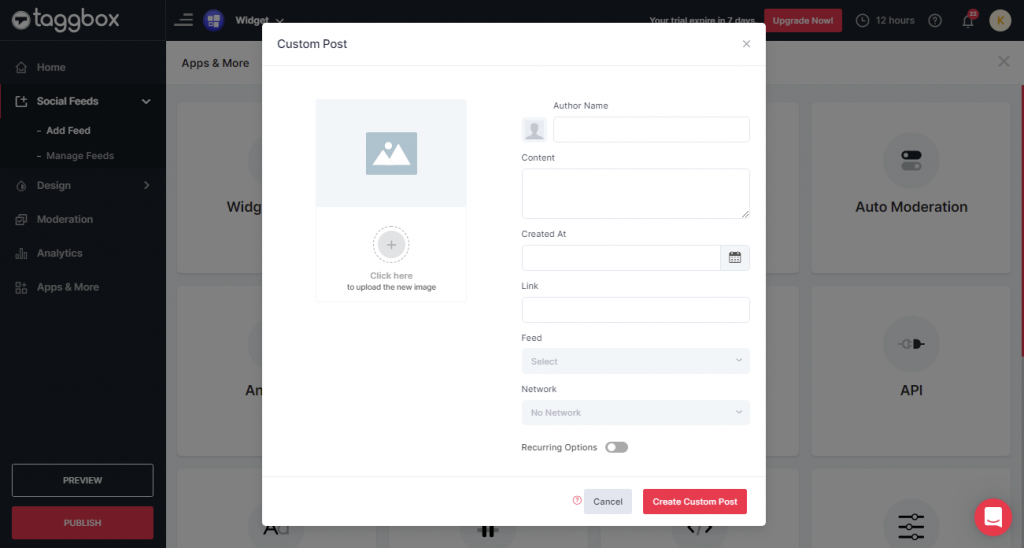
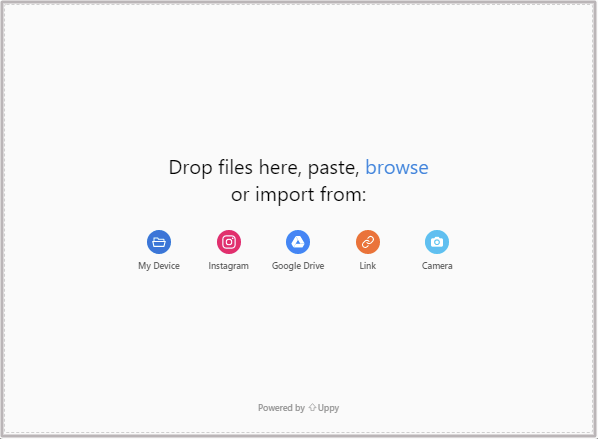
Step 5. Select Click Here and upload an image from your desktop, Instagram, Link, Google Drive or Camera.
Step 6. Click on the Author profile image icon and set a profile picture of the Author.
Step 7. Enter Author Name.
Step 8. Enter Content that you want to display.
Step 9. Enter the Link if you want someone to click the link and visit the webpage and then select the Network to make the link valid.
Step 10. Finally, click on Create Custom Post Button to finish.
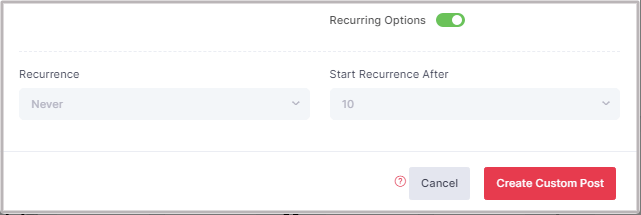
Note: You can also choose a recurring option to set the posts recurrence.
Just Turn On the toggle button and set the frequency as shown below:
Step 11. Similarly, Repeat the above steps to create multiple custom posts.
If you face any additional issue then please feel free to contact us at [email protected]
This article was helpful