Follow this step-by-step guide to display a social wall on Arreya digital signage.
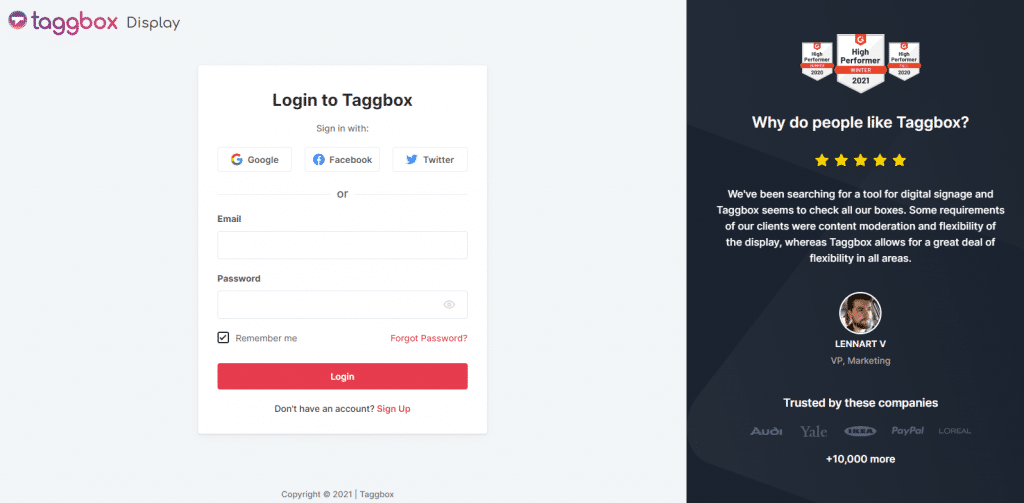
Step 1
Register or login to your existing Taggbox Display Account
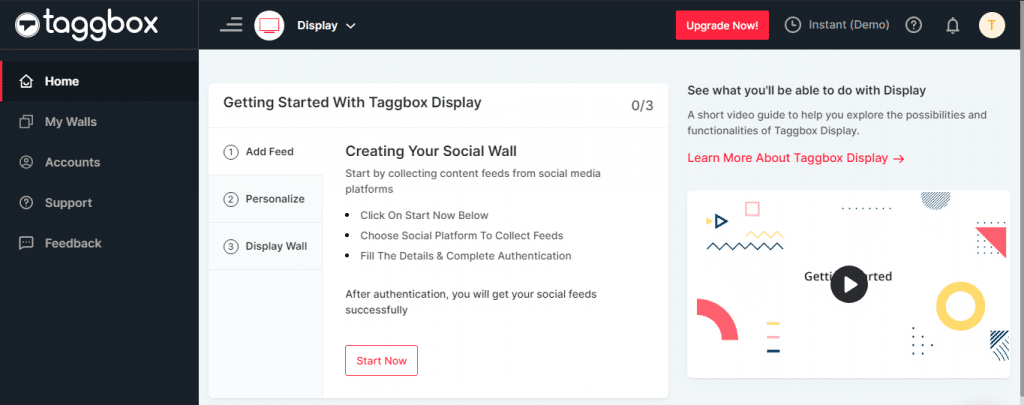
Step 2
Next, you will see the Taggbox Display dashboard. Here click on the ‘Start Now.’
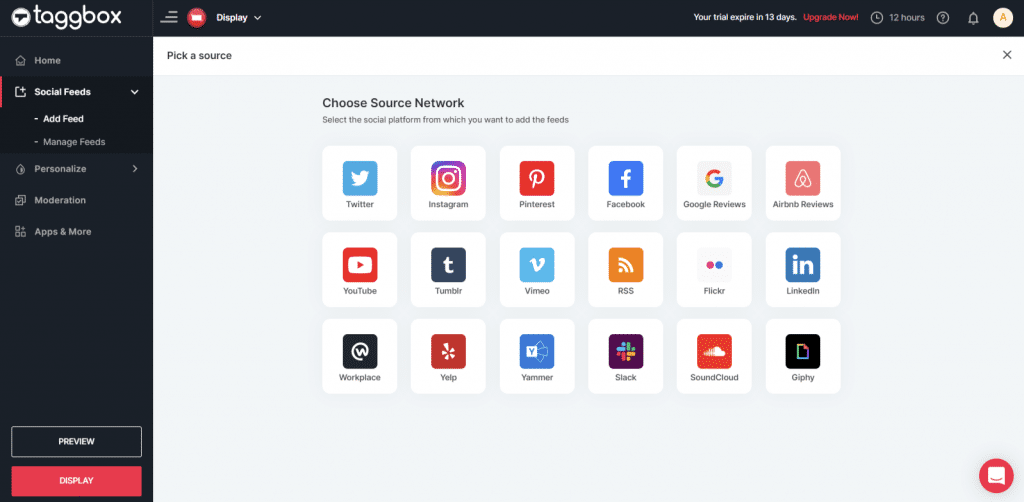
Step 3
Now ‘Choose Source Network’ from where you want to fetch the feed
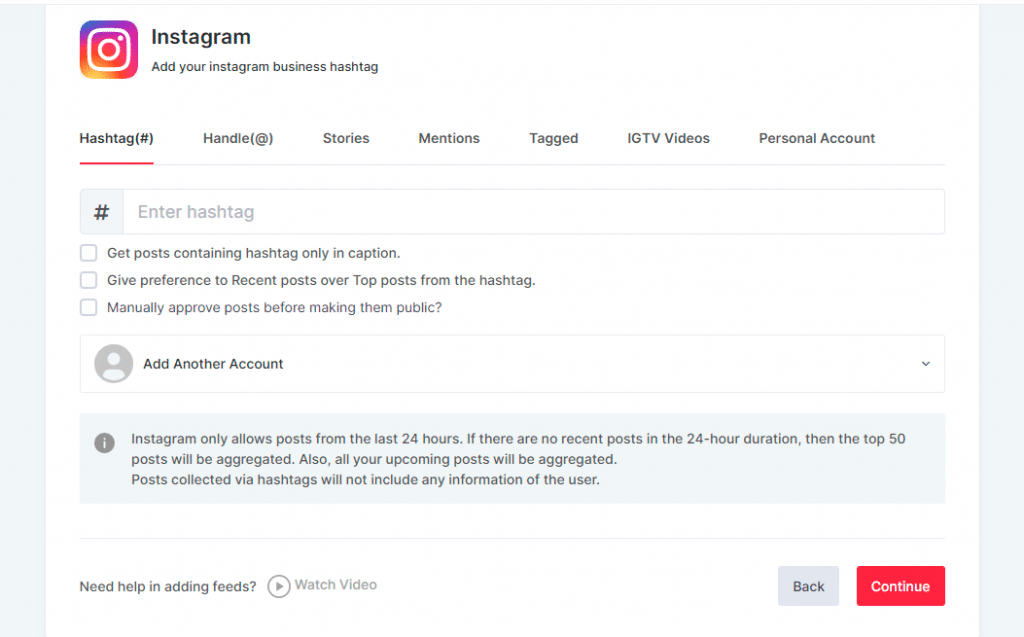
Step 4
Let’s take Instagram as a source to create the social feed. Here you will find multiple options to create a feed, i.e., Hashtag(#), Handle(@), Stories, Mentions, Tagged, IGTV Videos, Personal Account.
Step 5
Check the box ‘Manually approve posts before making them public to enable moderation for your social wall. From the moderation panel, you can choose what content you want to showcase on your digital screen, also you can remove unappealing posts.

Step 6
Next, you will see the preview of your social wall.
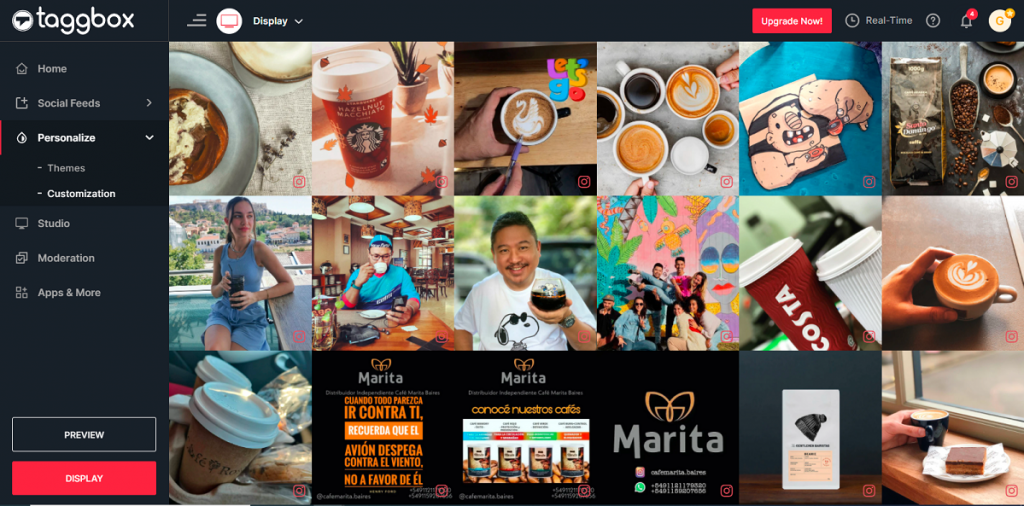
You can also change the look of your social wall by using the ”Personalize” feature. The ”Personalize” feature lets you change your social wall’s theme, background, card style, and fonts.
Step 7
Now click on the ‘Display’ button and copy your social wall URL

Step 8
Now login to your Arreya digital signage account
Step 9
Go to the ‘Content’ tab & click on ‘Presentations.’
Step 10
Create a new presentation or edit your existing presentation.
Step 11
Go to the page where you want to add the social wall.
Step 12
Now click on the ‘Widget’ from the Navigation menu & choose ‘Website’ as your option from the drop-down.
Step 13
Paste your copied social wall URL and hit the ‘OK button.
And that’s it. You have successfully added the Taggbox Display social wall to the Arreya digital signage.
Need any support? Reach out to us at [email protected]