Introduction
With a whopping number of 1.84 billion daily active users, Facebook is the most highly leveraged social media platform in the world.
The popularity of this enormous platform has exploded to the level it has due to its adaptive nature to the latest trends.
Every day, innumerable people post content on their Facebook handles that can be referred to as Facebook feeds.
The content can be in the form of photos, videos, gifs, reviews, etc. Such content works extremely well and is in complete favor of brands and marketers who are trying to increase their brand awareness and presence.
However, this content needs to be displayed through the correct medium for maximum impact.
Digital signage is a highly interactive and communication tool that functions as a perfect medium for brands and business owners to reach out to maximum potential customers.
People often underestimate the importance of digital signage and consider it as a mere screen. However, it serves its purpose of being much more than an attractive screen.
Using a popular and responsive aggregation tool like Taggbox Display, you can easily collect feeds from Facebook, curate them and display them on digital signage.
Taggbox Display offers its users various features like customization options to enhance the look of the feeds. It also offers an advanced moderation panel to filter out content that is objectionable and unnecessary.
The tool also provides analytics for the users to track the performance of the Facebook wall and the platform provides assistance to its users if they come across any issues while using the platform.
Now that you are all set and familiar with the tool, follow the mentioned steps below to seamlessly display Facebook feeds on digital signage using Taggbox display.
Try Taggbox Display– Start Your 14 Days Free Trial
Display Facebook Social Wall on Digital Signage
To display Facebook feeds on digital signage, you need to follow the given steps-
Step 1
First Signup or Login to your Taggbox Display account
Step 2
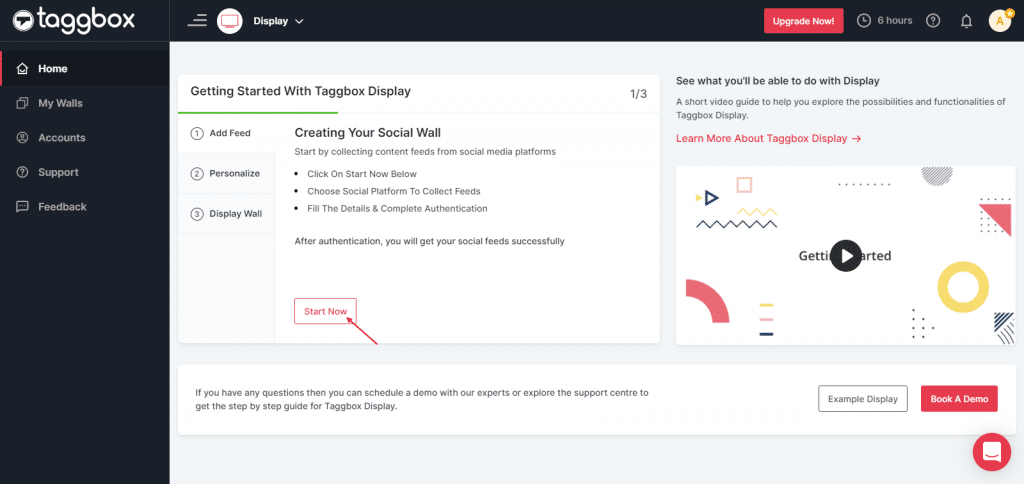
After Login you will be land on the Taggbox Display Home, Click on Start Now and on Next Screen, you will ask to choose a network to create a social wall
Step 3
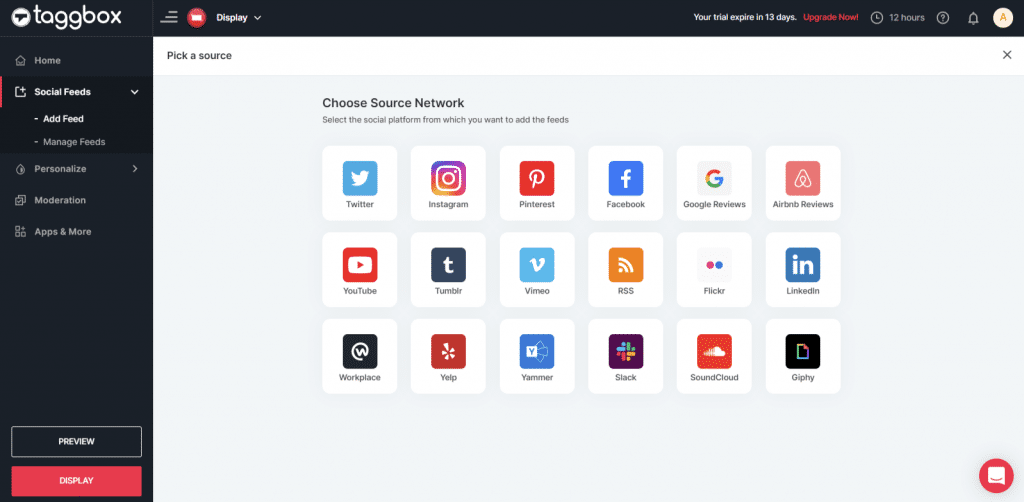
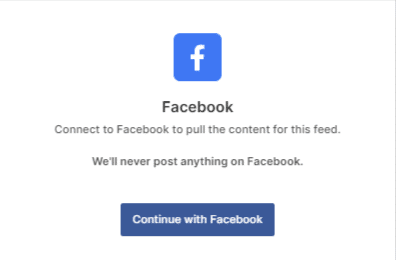
In the popup that appears, select the Facebook connection type from the top tabs and then fill out the required fields.
Step 4
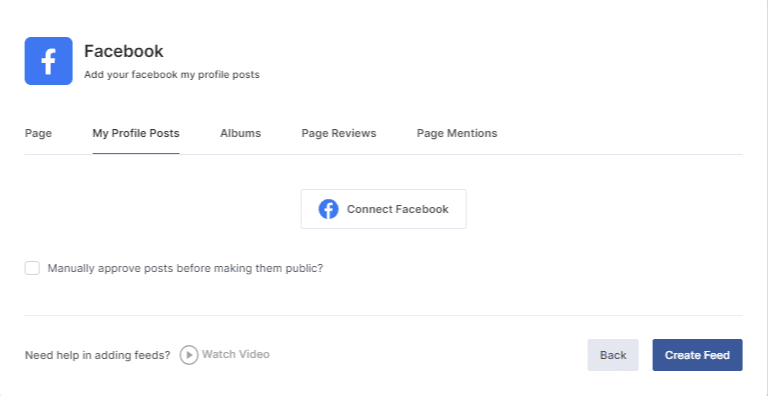
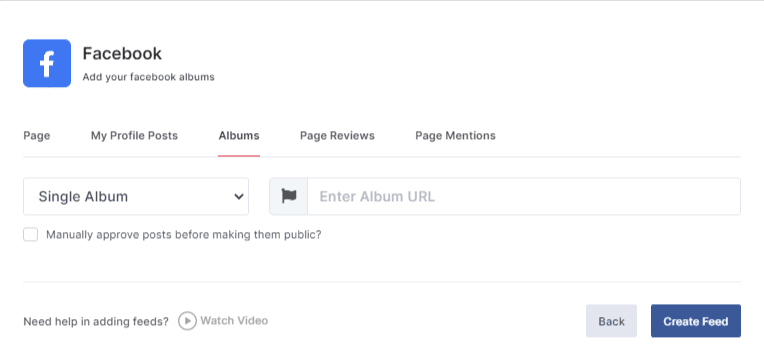
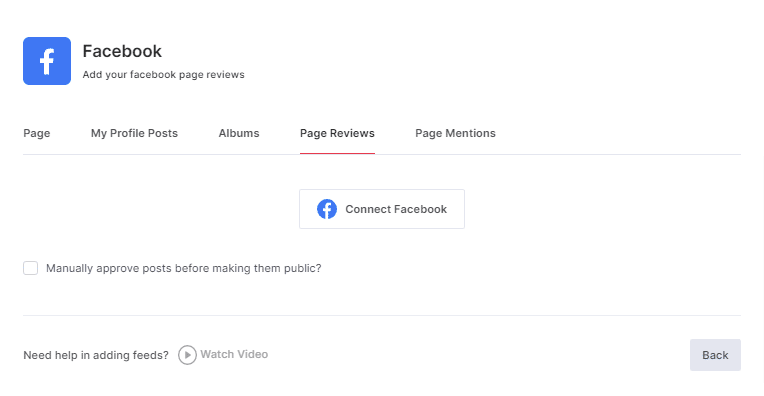
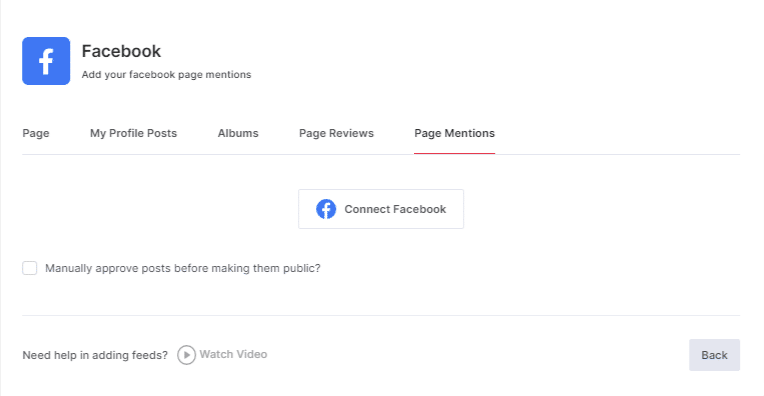
Choose one of the following to create a wall:
Page: Enter your Facebook Page URL and collect all your FB official page feeds.
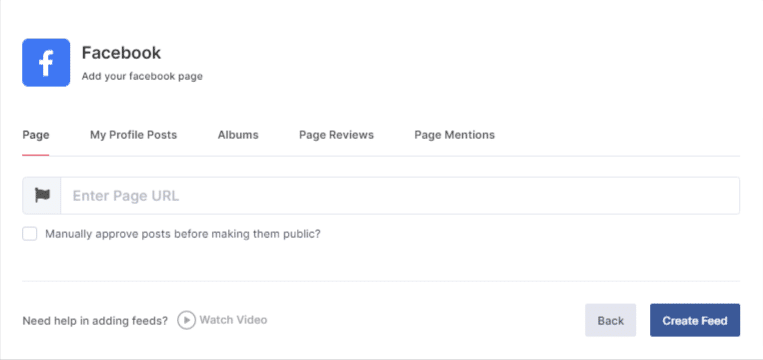
My Profile Posts: If you don’t have a business page, then you can directly collect your profile feeds from here.
Album: Choose Album to fetch the Facebook Profile Albums to your Facebook Feeds
Page Reviews: Choose Page Reviews to fetch your User-generated reviews on your Facebook Feeds
Page Mention: Choose Page Mention to fetch the feeds in which your page handle is mentioned
So you need to provide Login Credentials for the Social Network and Sign In.
To enable Moderation on the connection select “Manually approve posts before making them public”.
Then click the “Create Feed” button to complete adding.
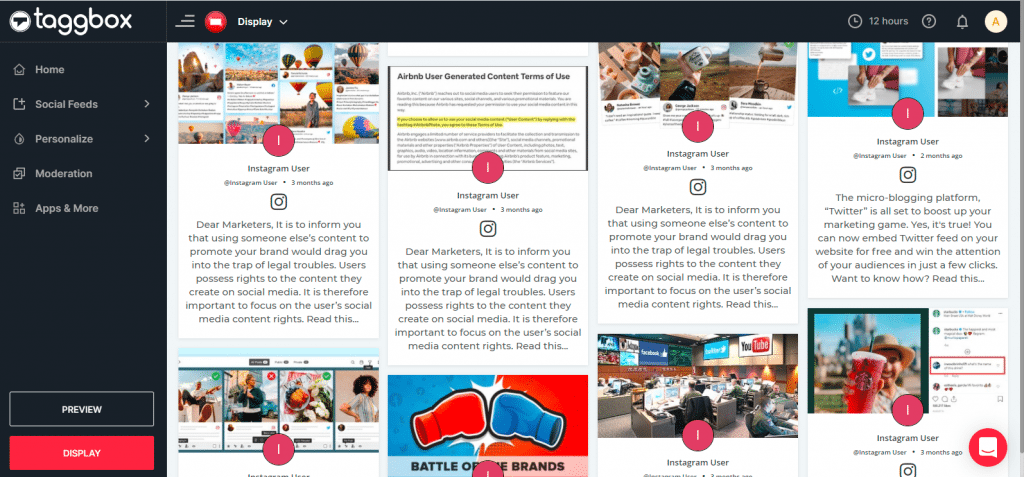
The Connection has been created and within a few moments posts will appear in the Moderation Panel of the page. Like this:
After creating connections you can use Personalize and Moderation Panel to set up your Social Wall according to you.
Try Taggbox Display– Start Your 14 Days Free Trial
Display Facebook Social Wall on any Digital Signage Platform
To display the Facebook feeds on any digital signage platform you need to follow the below steps:–
Step 1
Click on the Display button at the bottom of the left column on your wall editor.
Step 2
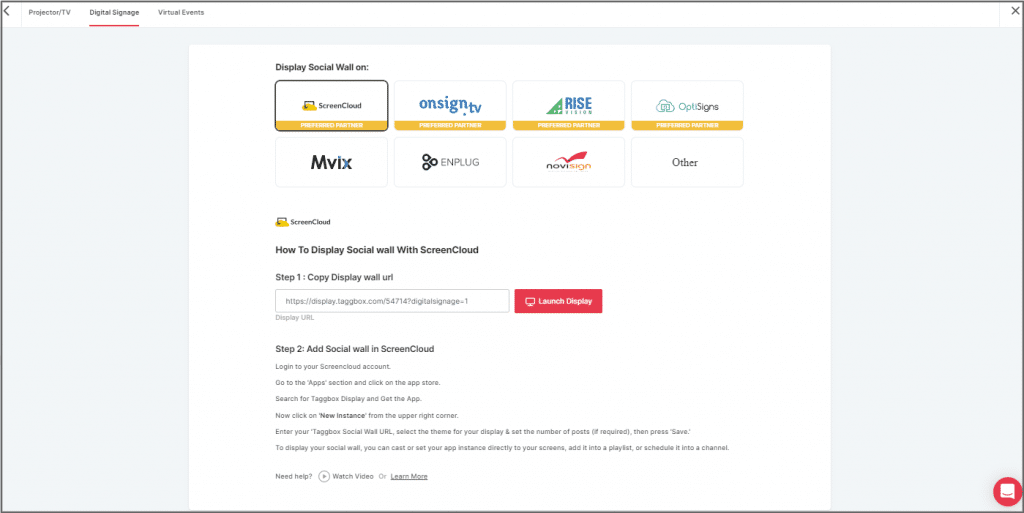
Select your Platform (Eg: Mvix, Enplug, Scala etc.)

Try Taggbox Display– Start Your 14 Days Free Trial
Display on Screencloud
Step 1
To display on Screen Cloud, select Screen Cloud as your digital signage option
Step 2
A dialogue box explaining steps to display the social wall on Screen Cloud will appear. From the last step, copy the Embed Code/ URL to the clipboard.
Step 3
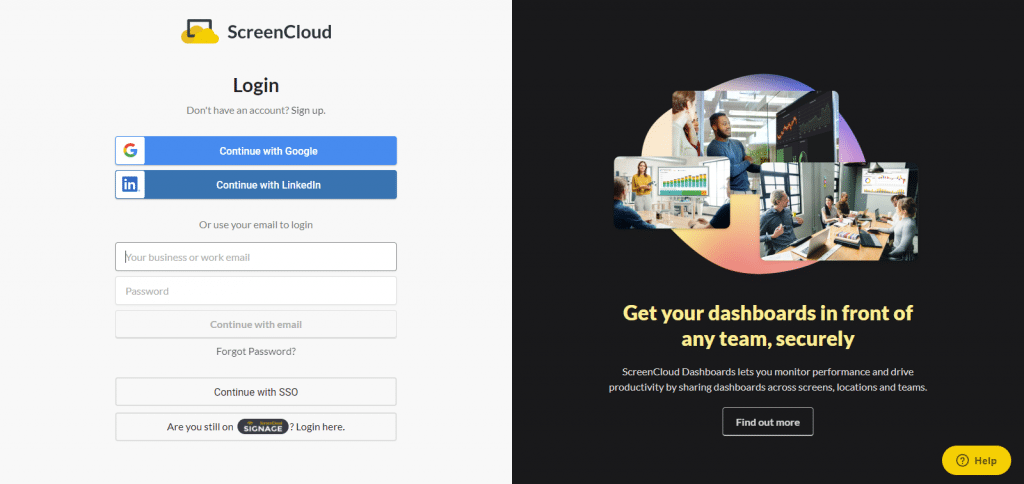
Now, login to your Screen Cloud account.
Step 4
Click on “Apps” and Search for Taggbox Display
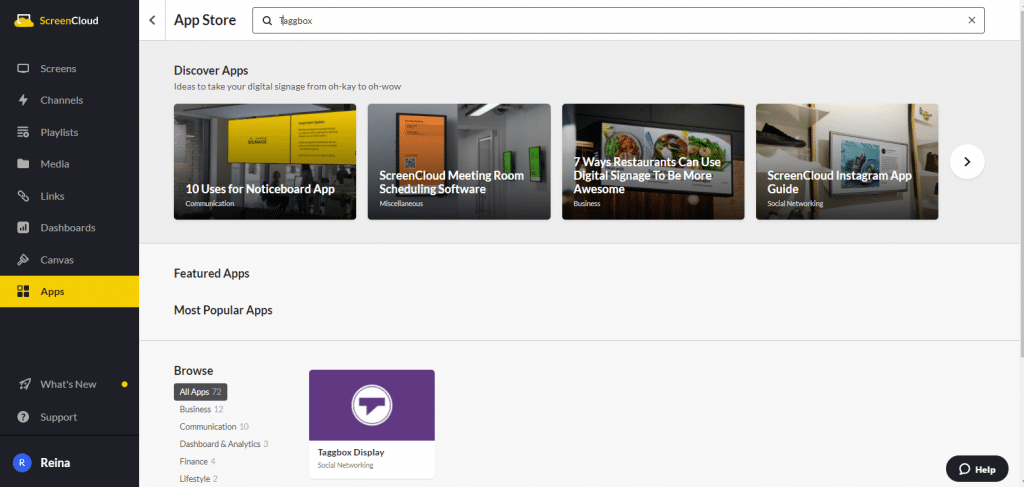
Step 5
Now you will get the app guide, click on get option

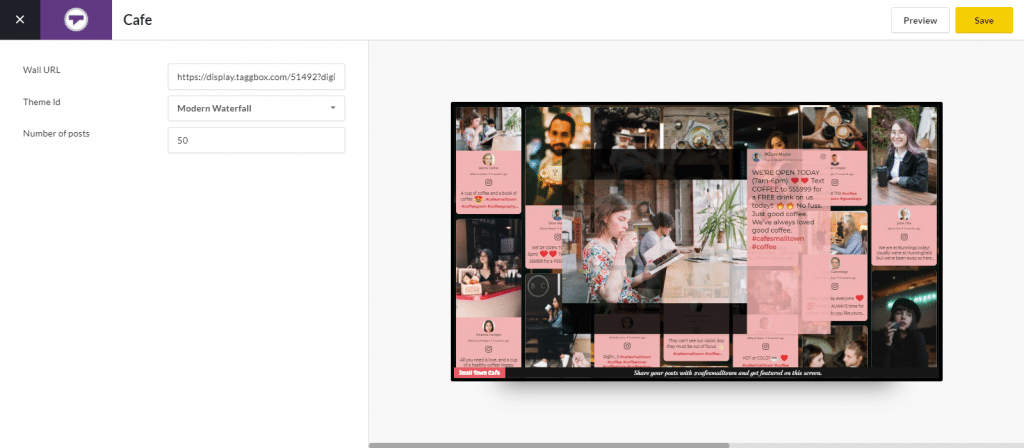
Step 6
Now give name to your wall, enter the unique URL of your social media wall (as per above), select the theme and number of posts. Click save.
Great! You have successfully integrated a social wall on your Screen Cloud digital signage.
Try Taggbox Display– Start Your 14 Days Free Trial
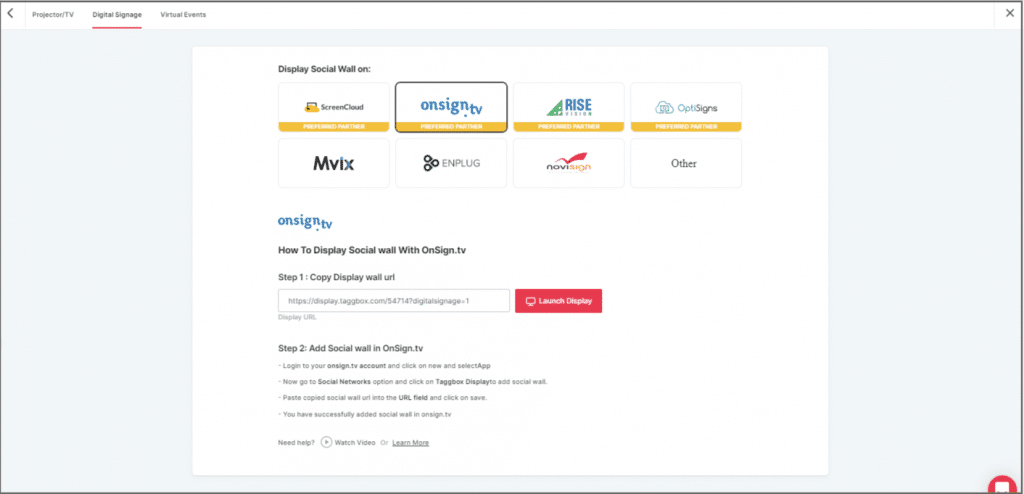
Display on Onsign
Step 1
Click on the display button and you will get the following options. Here you have to select Onsign.tv
Step 2
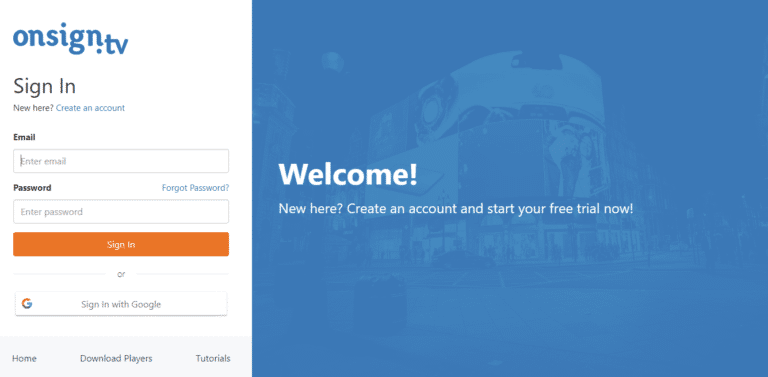
Now, Register on OnSign or login to your existing account.
Step 3
Go to the Content section on the upper left. Click on New and then select App.
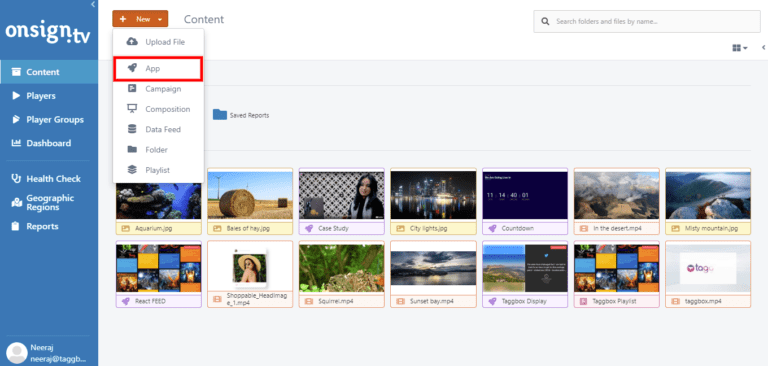
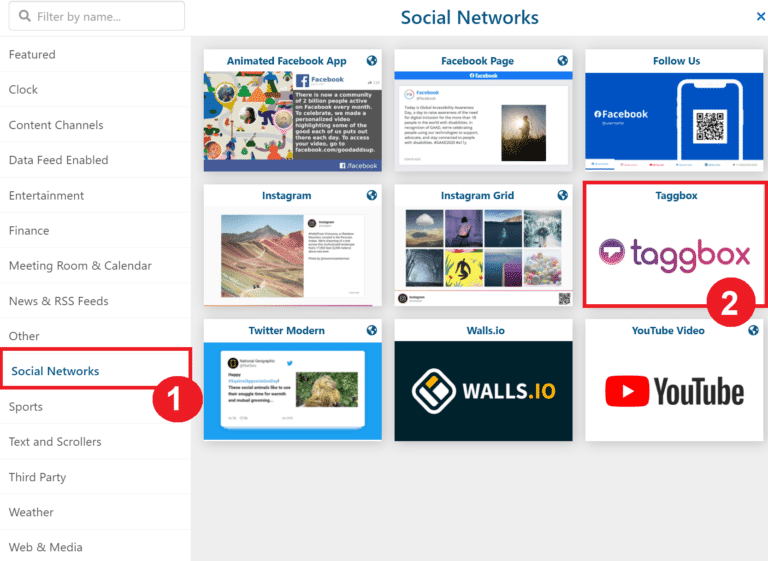
Step 4
Search here for social networks and click on the Social Networks Tab. Then choose the Taggbox App Option.
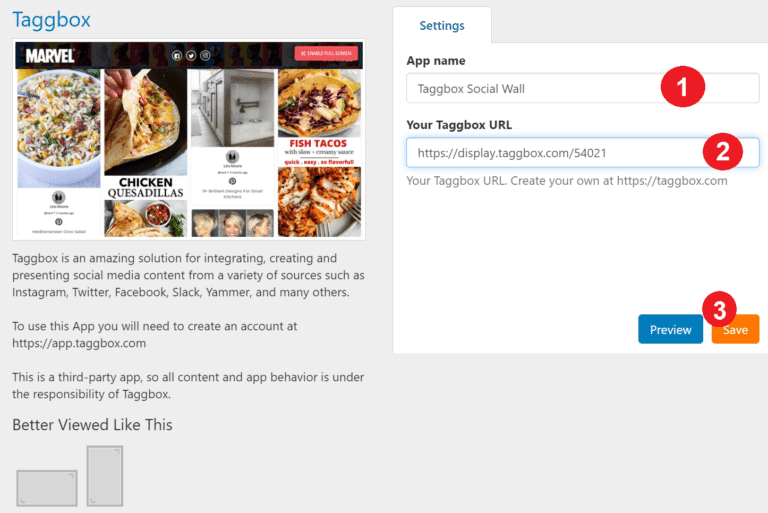
Step 5
Paste your Taggbox wall link into the URL field. Then select the ‘Preview’ button in the lower-right corner. Everything looking good? Hit the Save button.
Display on Rise Vision
Step 1
Click on the Display button and you will get the following options & Choose Rise Vision
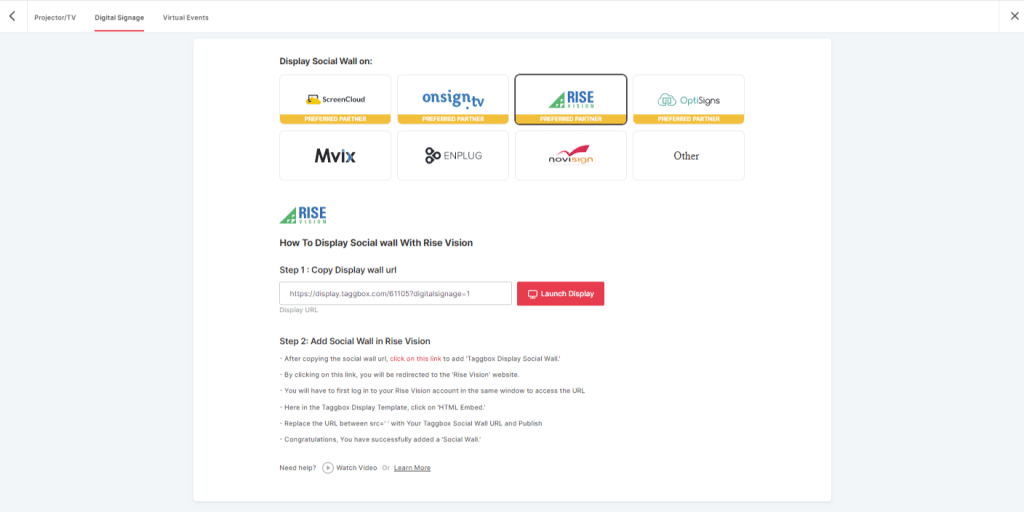
Step 2
A dialogue box explaining steps to display a social wall on Rise Vision will appear. From the first step, copy the Embed Code/ URL to the clipboard.
Step 3
Now, Register or Login on Rise Vision or login to your existing account. or if you have already logged into the Rise Vision then directly follow Step 4.
Step 4
Now click on this link “https://bit.ly/3igriSA” and you will see the Taggbox Display Social Wall Template Screen. Here you have to select the “HTML Embed” Option.

Step 5
Now Replace the URL between “src=’ ‘ in iframe class section” with your Taggbox Display Social wall URL and click on publish button
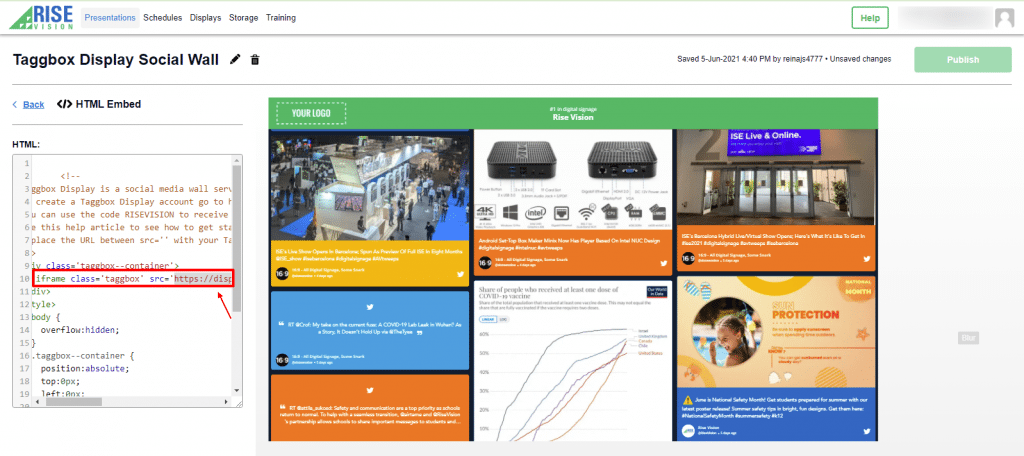
Congratulation, you have successfully integrated Taggbox Display Social Wall on Rise Vision
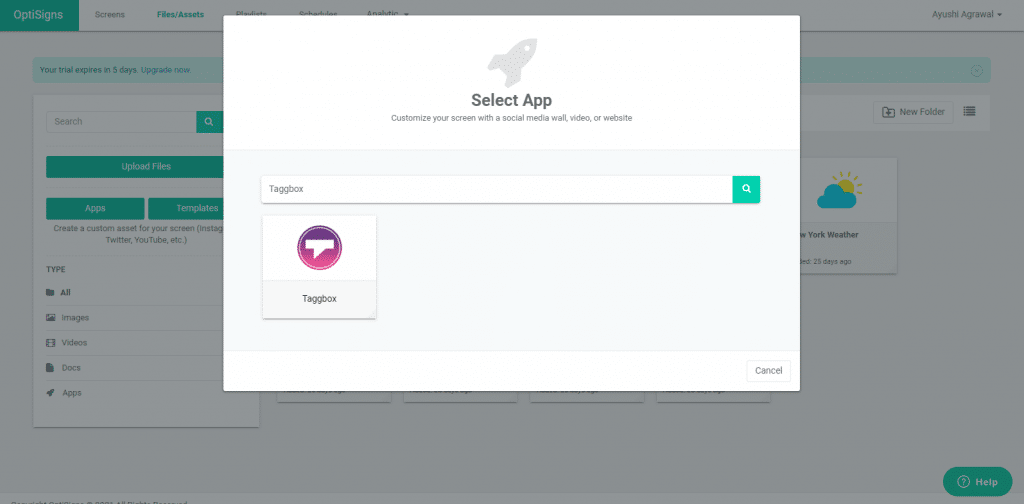
Display on OptiSigns
Step 1
Click on the display button and choose OptiSigns as your option
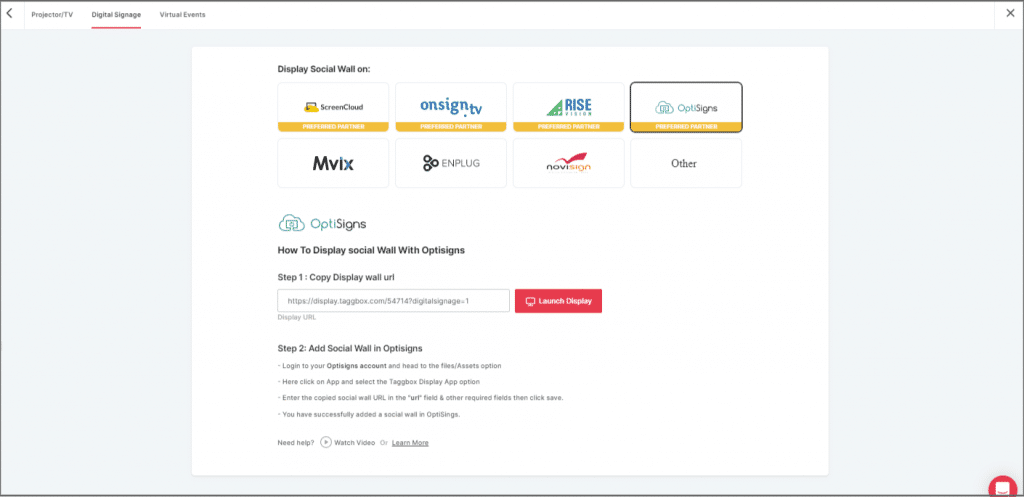
Step 2
Now Register or login to your existing Optisigns Account
Step 3
Go to Files/Assets, Click on “App” and search for the Taggbox Display App
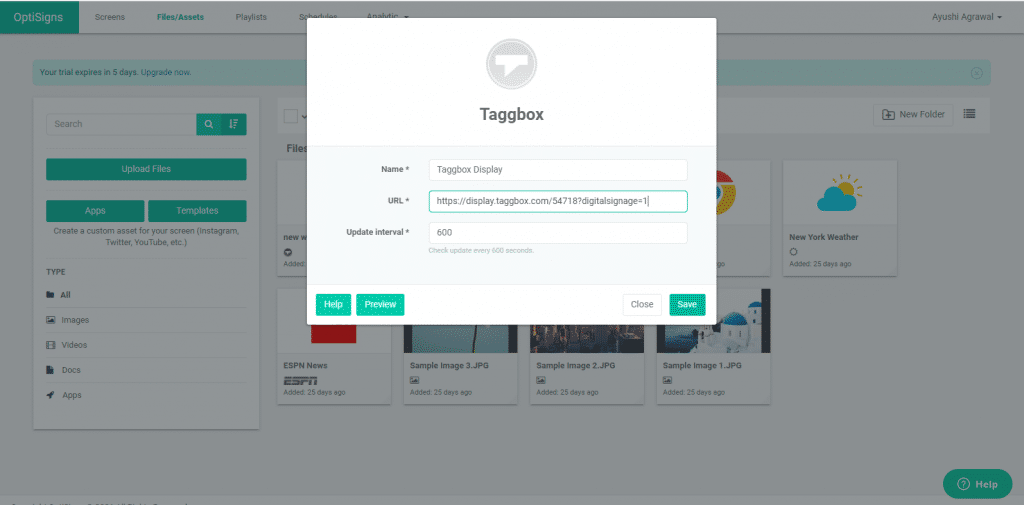
Step 4
Click on the Taggbox Display app & Enter the required information
Name: Enter your unique social wall name
URL: Copy the social wall url from taggbox display account & paste it in the URL bar
Update Interval: Manage the frequency of updating of your social wall
Preview: Check the preview of your social wall
Save: If everything looks fine then click Save
Congratulations! You have successfully integrated the Taggbox Display social wall on OptiSigns Digital Signage.
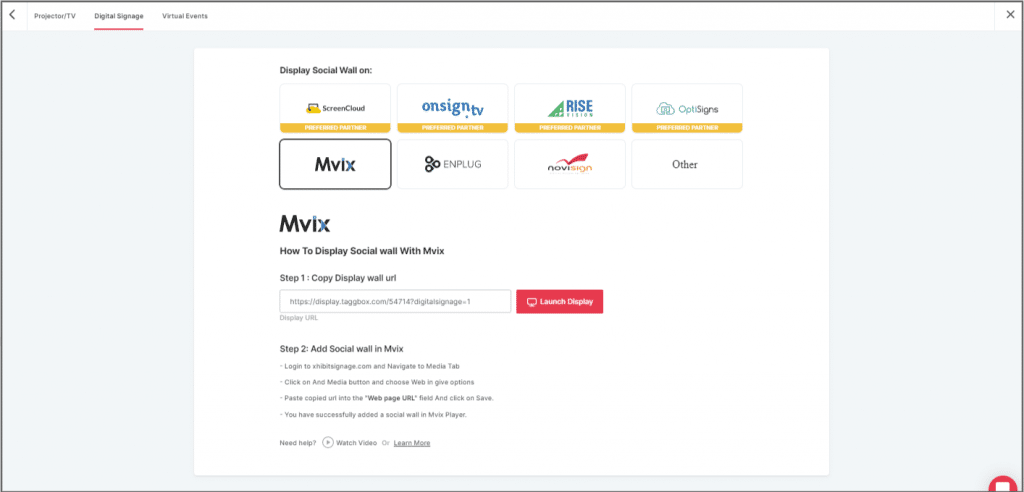
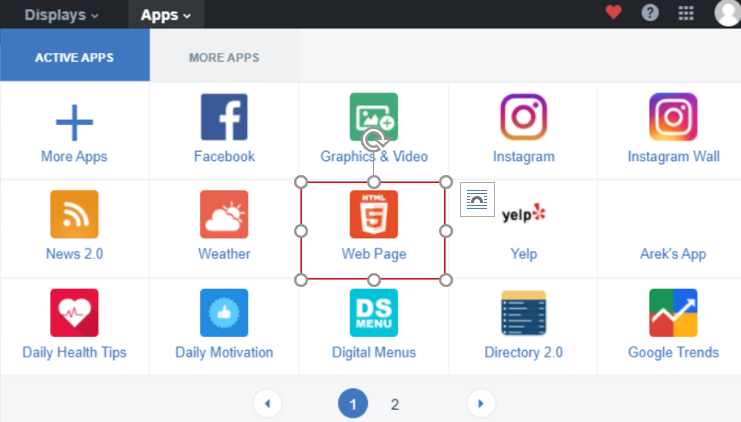
Display on Mvix
Step 1
To display on Mvix, select Mvix as your digital signage option.
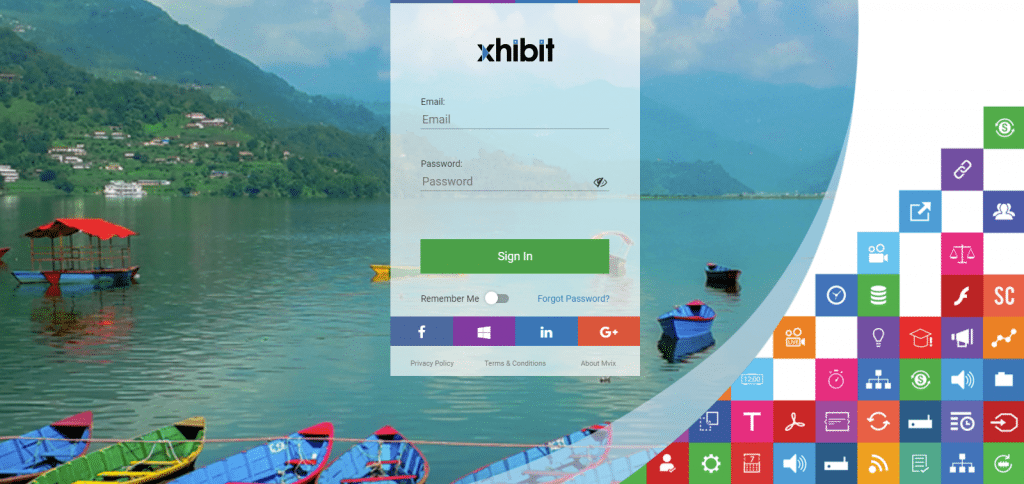
Step 2
Now, login to your xhibitsignage.com
Step 3
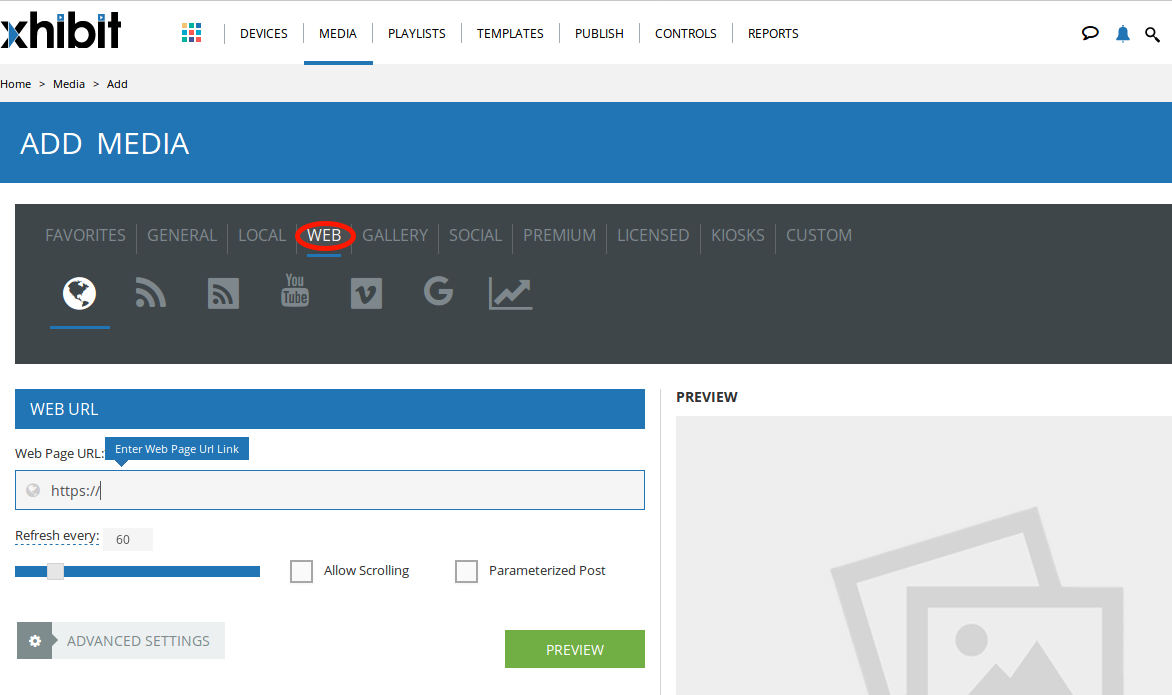
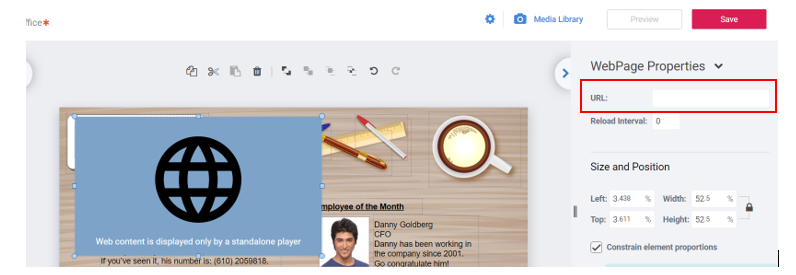
Navigate to Media Tab and Click on Add Media.
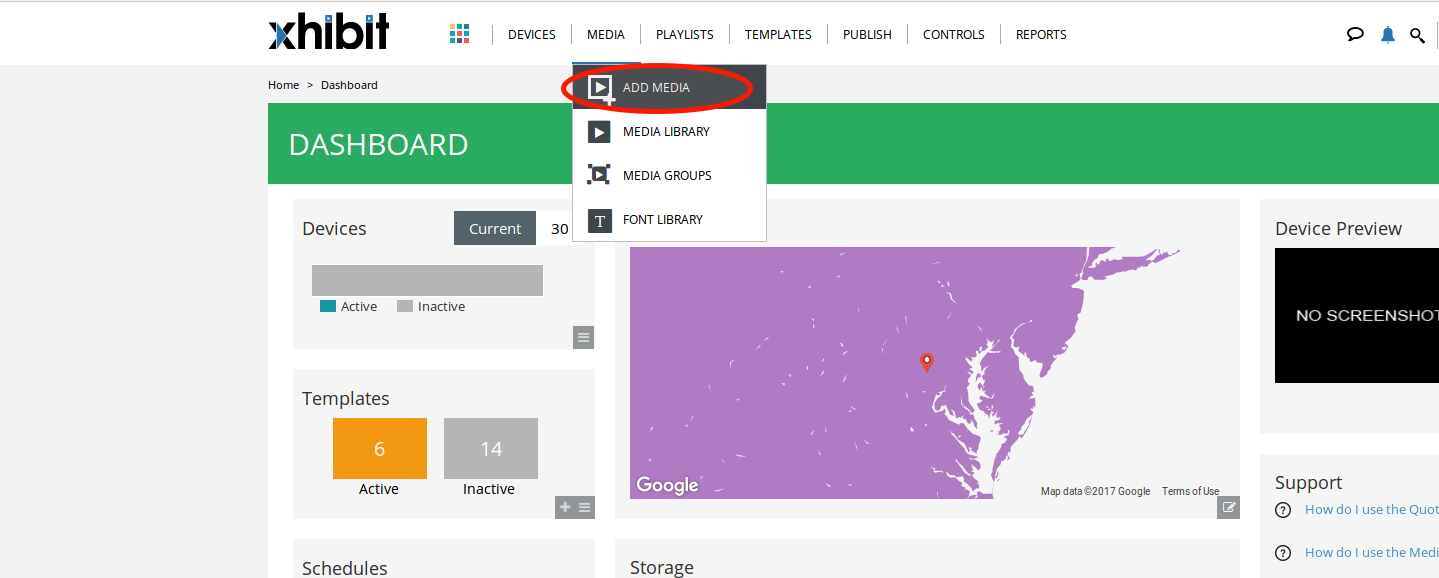
Step 5
Click on Web Tab.
Step 6
Click on the Webpage widget icon.
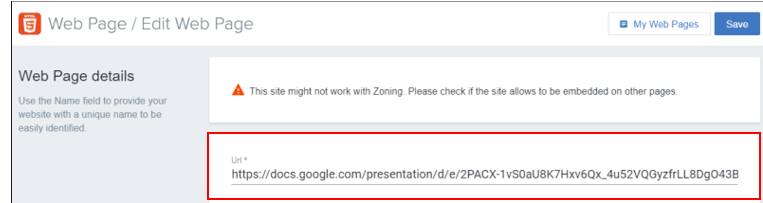
Step 7
Here, in the Web Page URL field, paste the copied Embed URL.
Great! You have successfully integrated social wall on your MVIX digital signage.
Try Taggbox Display– Start Your 14 Days Free Trial
Display on Enplug
Step 1
To display on Enplug, select Enplug as your digital signage option.
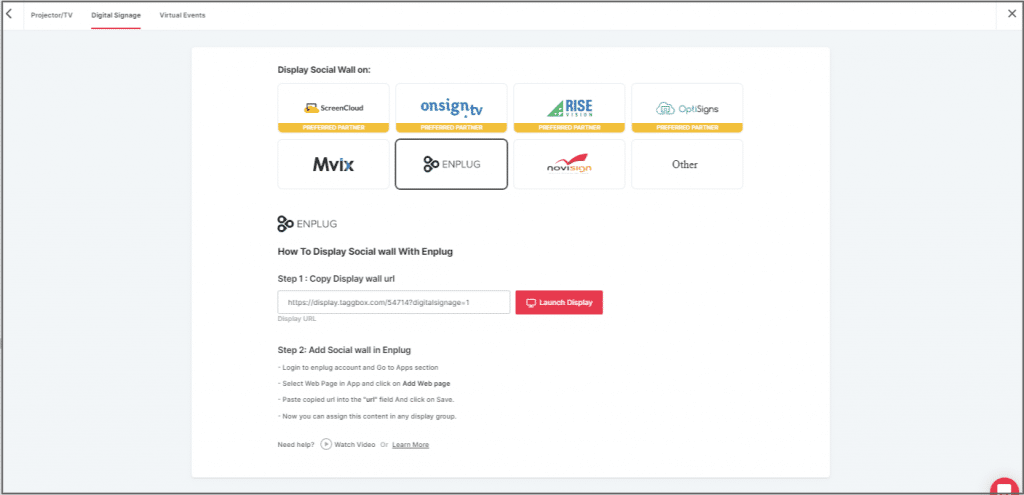
Step 2
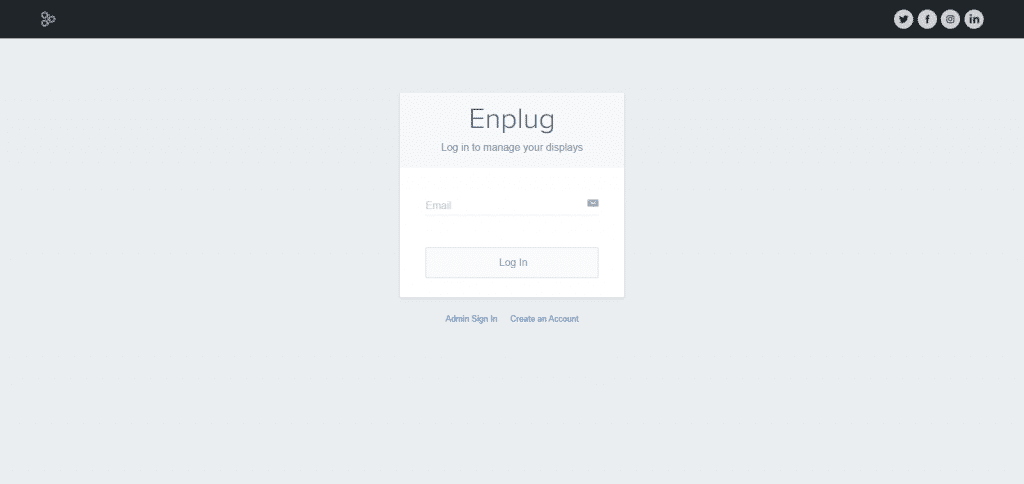
Now, login to your Enplug account.
Step 3
Next, click on the Apps dropdown.

Step 4
Select the Webpage App.
Step 5
Now, click on Add Website.

Step 6
In the URL Field, paste the copied Embed URL.
Great! You have successfully integrated social wall on your Enplug digital signage.
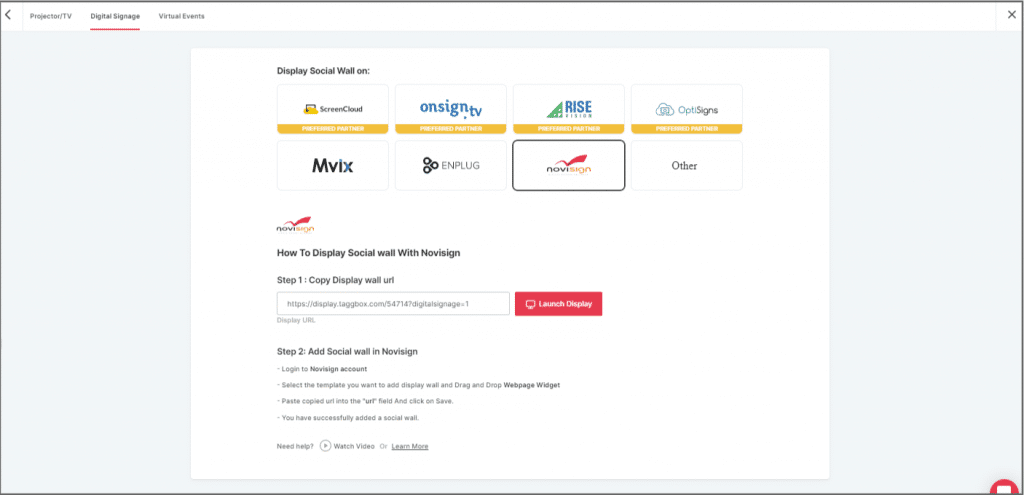
Display on NoviSign
Step 1
Select Novisign as your digital signage option.
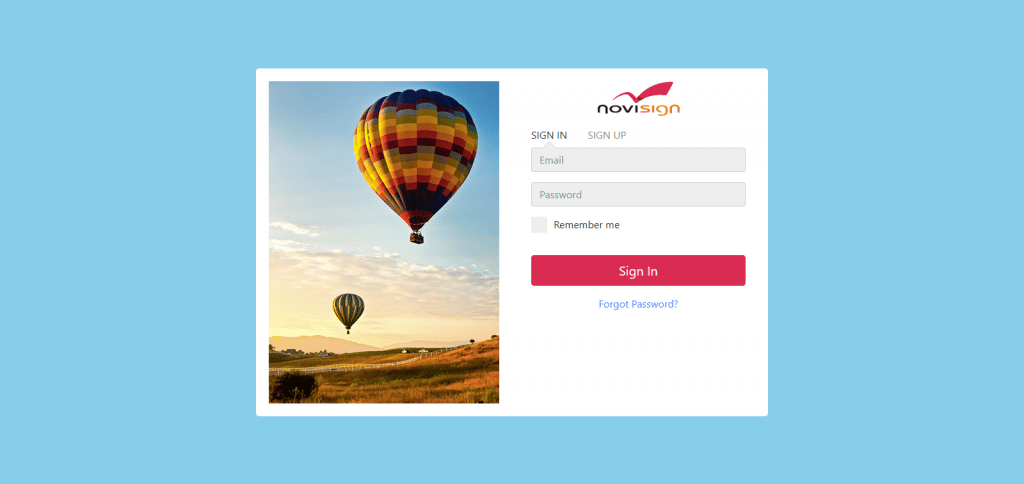
Step 2
Now, login to app.novisign.com.
Step 3
Next, click on the Compose button.

Step 4
Select Template.

Step 5
Now, drag and drop widgets: Webpage.

Step 6
In the Webpage Field, paste the copied Embed URL.
Great! You have successfully integrated a social wall on your Novisign digital signage.
Conclusion
We have reached the conclusion and are certain that you must have found the process extremely easy.
Displaying Facebook social wall on digital signage is a great way to increase the reach of your business to your potential customers, garner their attention, escalate their engagement, and eventually increase your conversions and sales.
You can easily attain the aforementioned using Taggbox Display – the best Facebook aggregation tool available. The platform is extremely easy to use and does not require any technical skills or coding experience to set up.
Now that you are well acquainted with the tool and know the steps, get going and start immediately!
Try Taggbox Display– Start Your 14 Days Free Trial