Moderation Panel is a useful feature that comes in handy when you are using hashtag connections and other public networks.
In such a case, you might not get relevant or appropriate content every time.
Moderation gives you complete authority to filter your normal feeds as well as real-time feeds. You can always review and approve content before they go live.
When you select “Manually approve posts before making them public” before creating feed then all the feeds go into Moderation panel where you can approve all the feeds manually.
Watch Video or follow the guide below:
Enable and Disable Moderation
New Connection
If you are creating a New Connection, enter the input and then select the “Manually approve posts before making them public?” checkbox before clicking the “Create Feed” button.
Doing so will take all of your aggregated feeds into the Moderation Panel, where you can manually approve feeds according to your requirement.
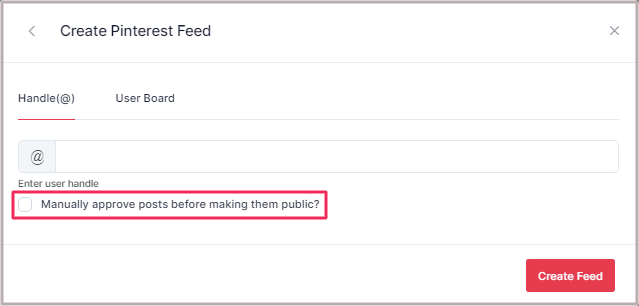
If you leave this option unselected then Moderation will be disabled for the connection. This means the new content will automatically be approved and will be live on website.
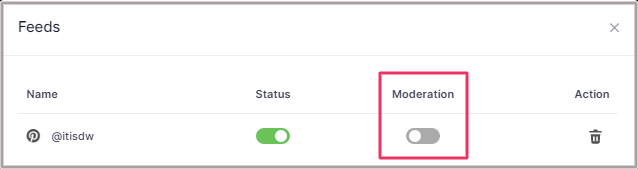
Existing Connection
If you have an existing connection and you want to enable or disable Moderation for it, then go to the “Social Feeds Panel” on the left-hand side of the screen. Select “Manage Feeds”.
If your connection shows “ON” Status then turn it “OFF” to Disable Moderation for future upcoming posts.
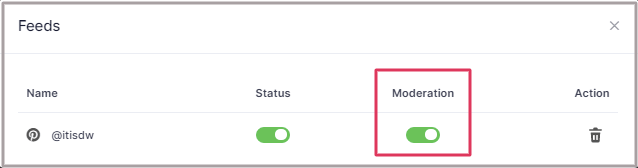
If your connection shows “OFF” Status then turn it “ON” to Enable Moderation for future upcoming posts.
Using Moderation Panel
Click on Moderation tab on the left menu panel.
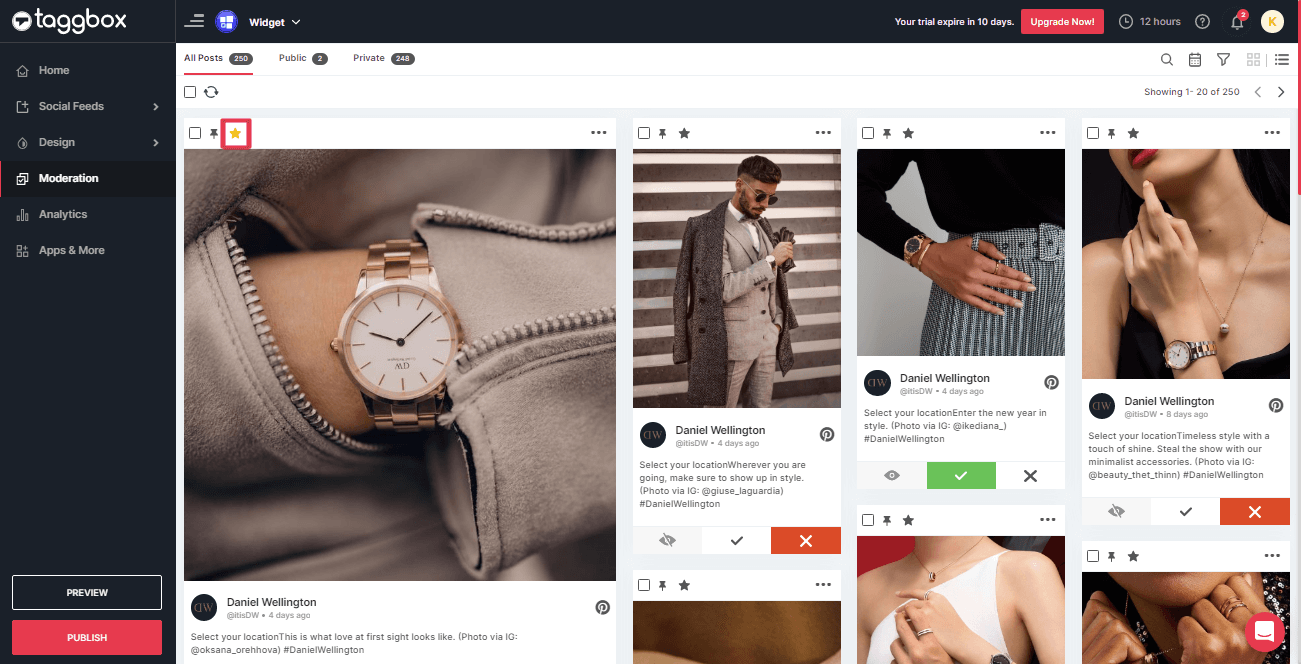
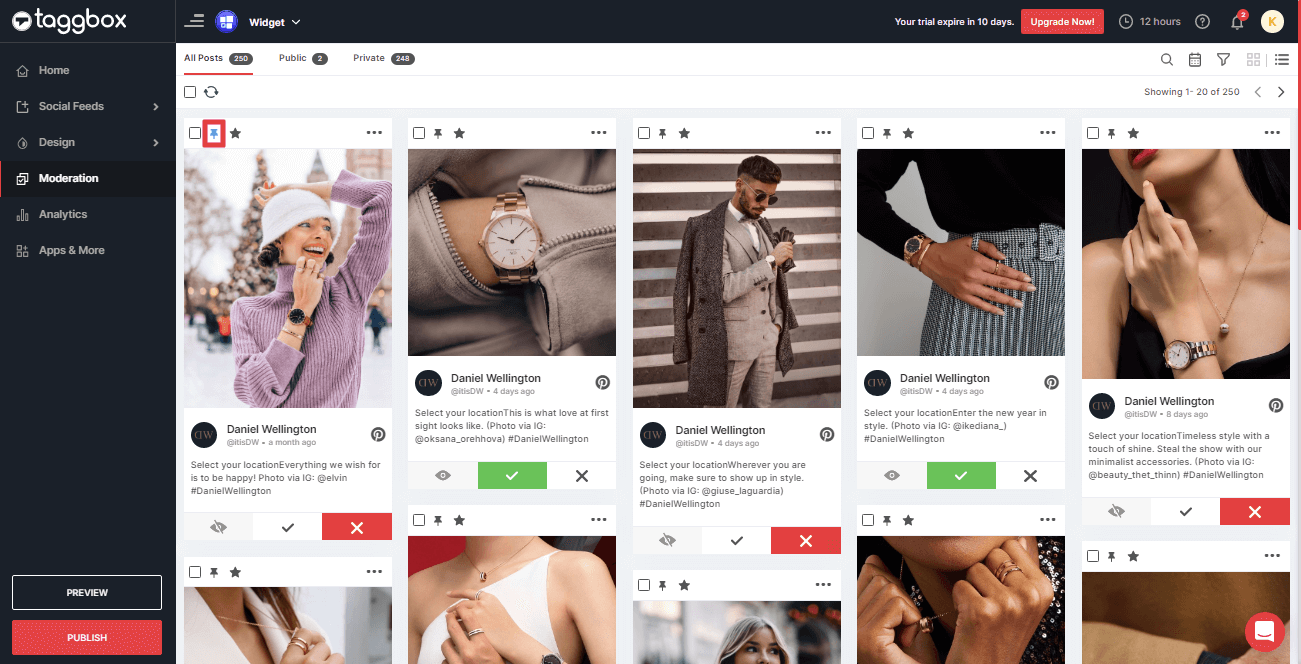
In the Moderation Panel, you will see three tabs:
- All Posts
- Public
- Private
Like this:
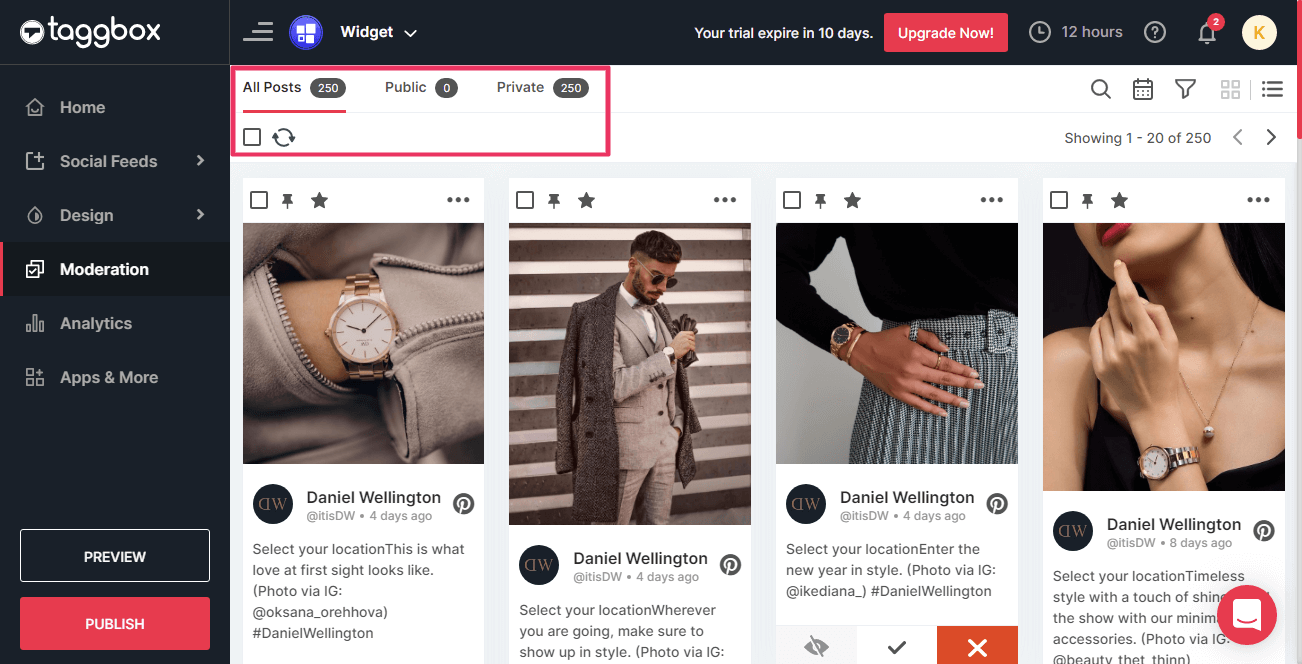
Under All Posts tab you can see all of your aggregated feeds.
Such as Public and Private both.
Here is an example of All Posts which contain both Public posts (✓ Green symbol for public) and Private posts (X Orange symbol for private).
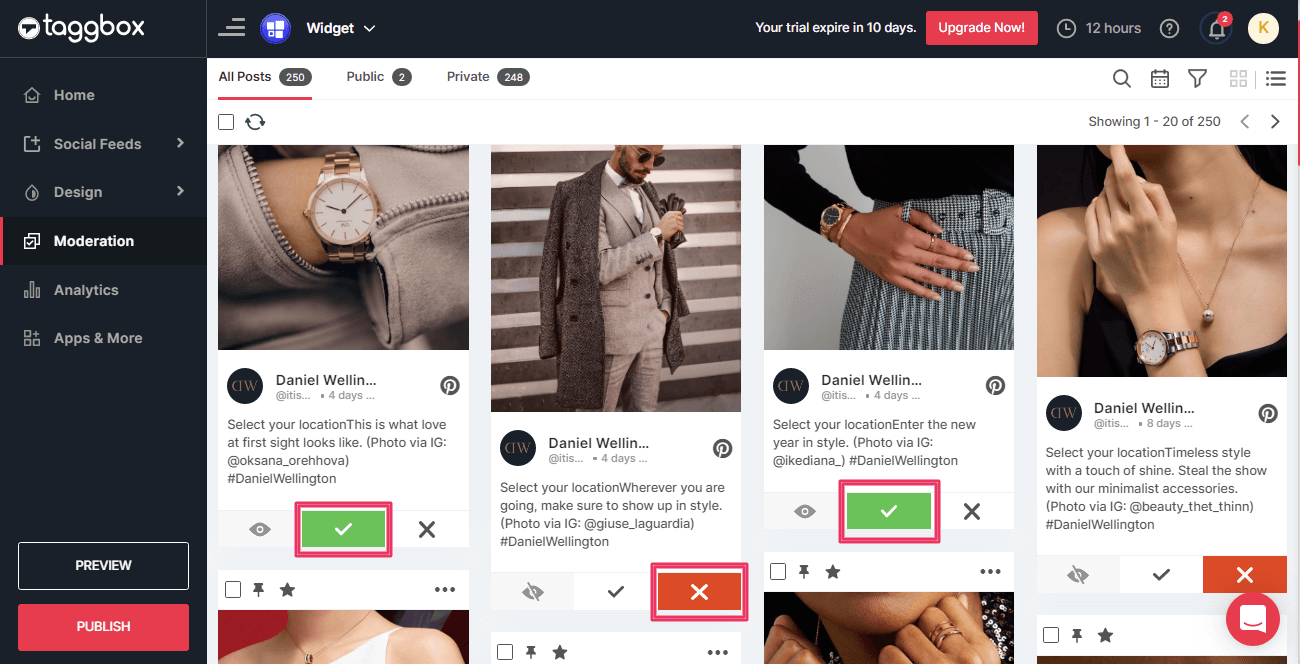
Public Tab – Displays only public posts with ✓ Green symbol.
Private Tab – Displays only private posts with X Orange symbol.
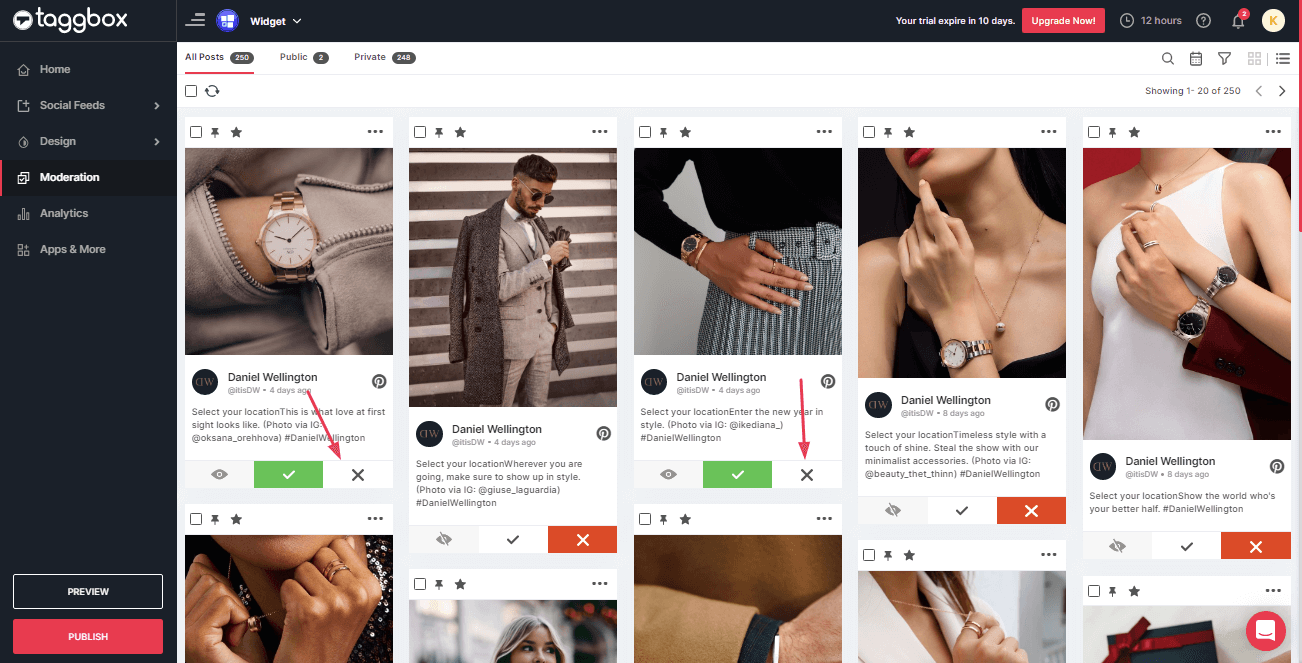
Approve and Reject Post
Approve private content to be public by just clicking the “✓” icon on the post and it will be Public.

Reject public content to become private by just clicking the “X” icon on the post and it will be Private.
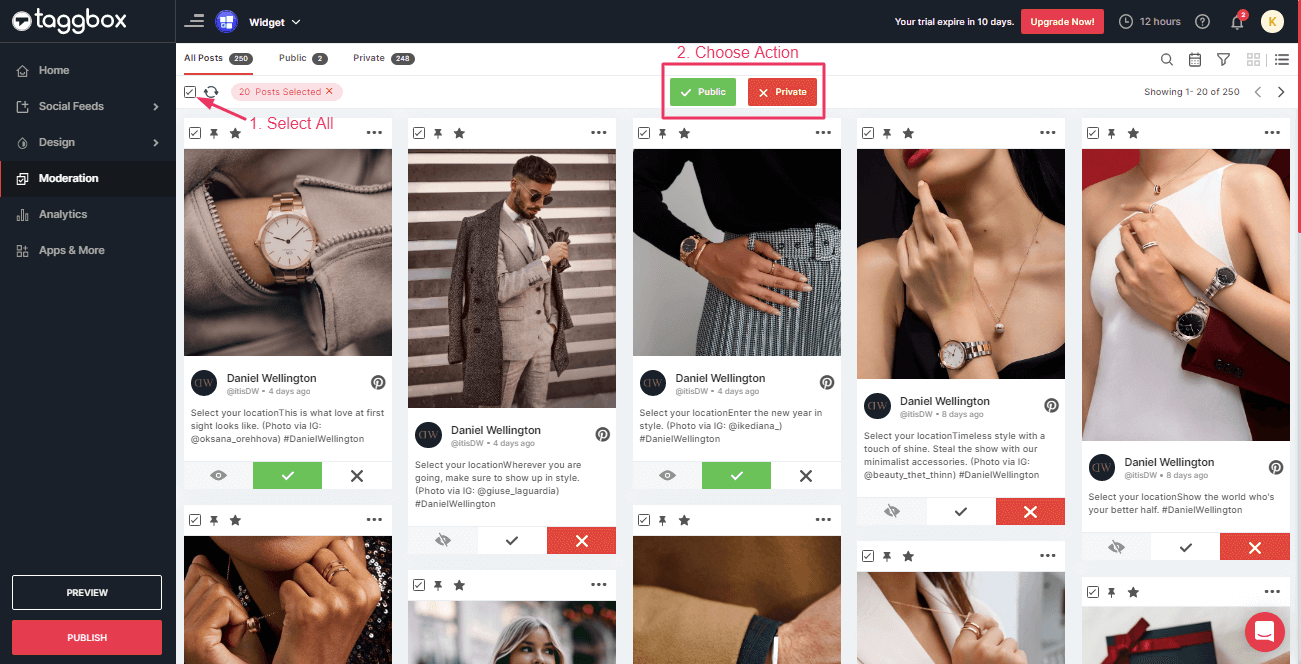
Bulk Moderation
You can also make posts Private and Public using bulk moderation and control the visibility of multiple posts at the same time.
Just click the Select All checkbox and then choose your option to make posts Public or Private.
Additional Actions
Click More (…)
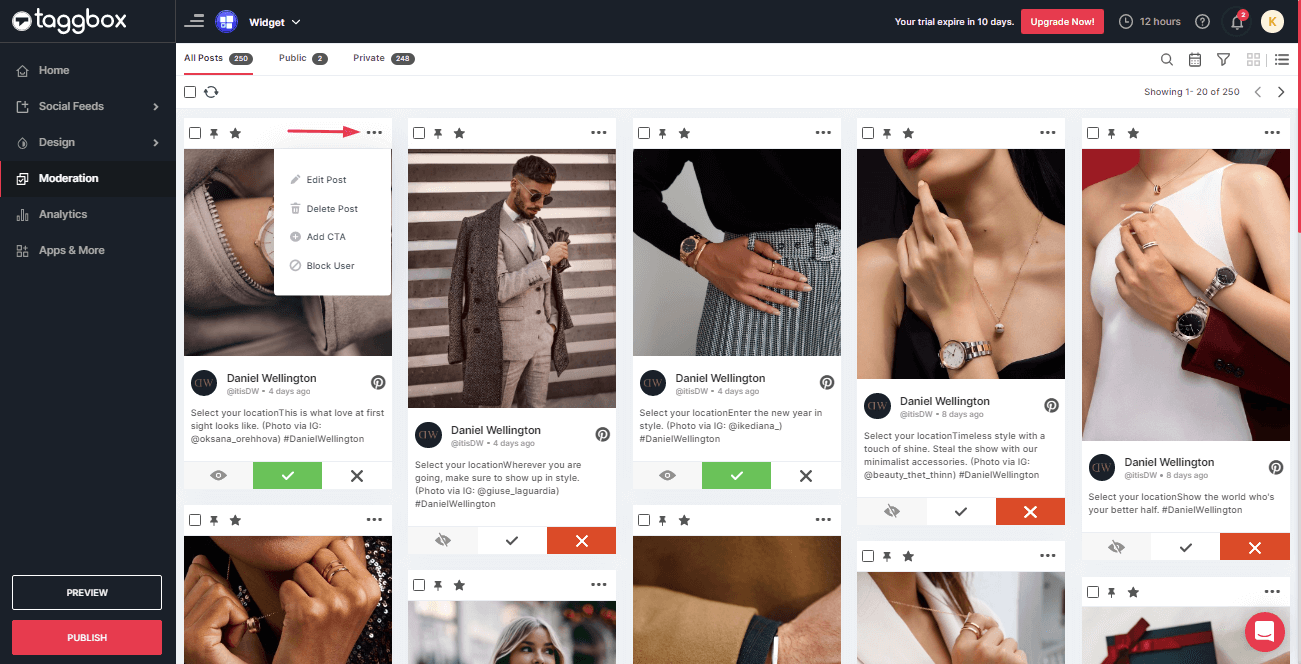
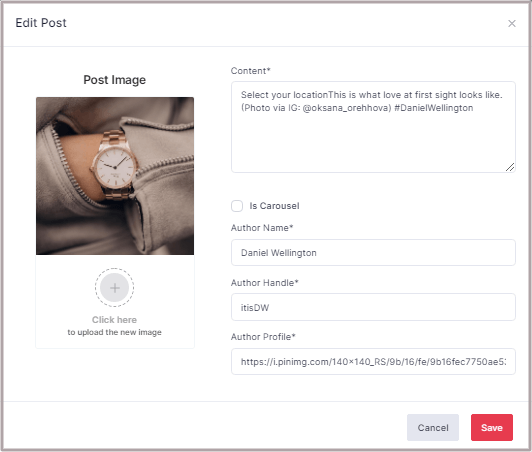
Edit Post – You can edit the information of any post. Select Edit Post.
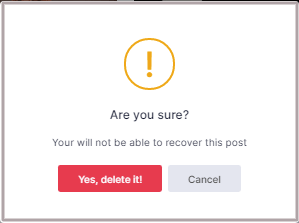
Delete Post – You can delete any content permanently from the aggregated feeds. Click Delete Post and select Yes, Delete it! to confirm.
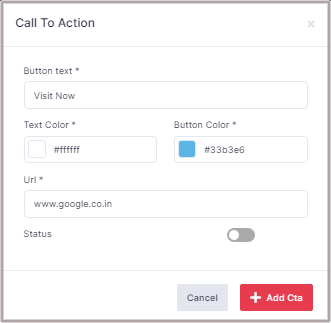
Add CTA – You can add a CTA (Call to Action) button on any specific post. Select Add CTA.
Block User – You can block any user that you think isn’t publishing relevant content.
Highlight – Make the post stand out by doubling the size of the post. Just Click the Star icon above any post:
Pin To Top – You can pin any post on top of the others. Just click the Pin icon
Note: If Real-Time Update is enabled and new content is aggregated then still your Pinned post will be on Top.
You’re done, go back to your Widget Editor to see the changes made.
If you have any questions, please Contact us or write us at [email protected].