Cvent has introduced a custom widget for its users to make your virtual events more engaging and impactful. This feature allows the host to make their attendee website session more third party interactive and accessible.
As an organizer it is a must for you to try out new methods to boost the effectiveness of your events. Trying out new ideas can help you take your attendee’s experience to the next level as people are mixing up through virtual mediums.
Create A Social Wall For Your Next Virtual Event
1. First register on Tagbox Display by logging into your existing account
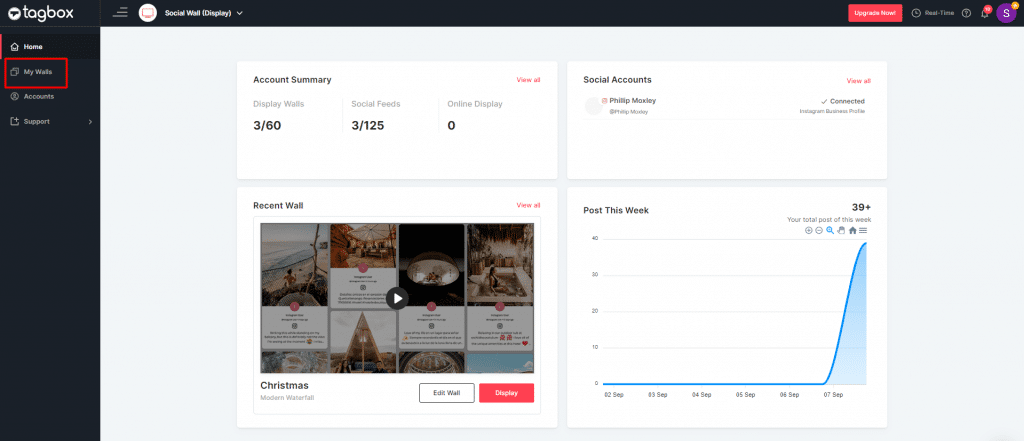
2. Step 2. Click on “My Walls” from the sidebar section
Step 3. Name your Wall and accordingly, it will be given a unique URL automatically. You can also change this if you want.
To enable the profanity filter simply select “Apply Profanity Filter” and click on “Create wall”

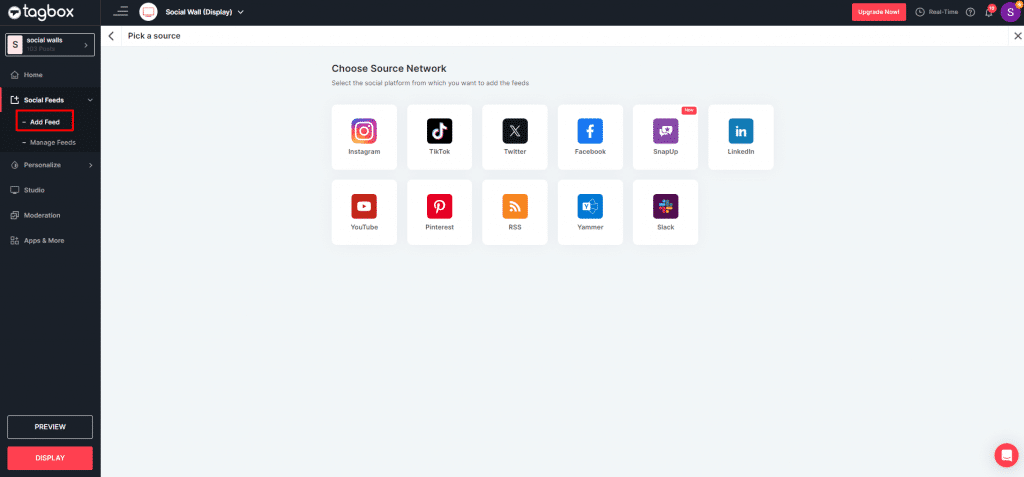
Step 4 Add your Source:
A) After you have successfully created your social wall, you will be taken to the “Pick a source” page
B) Select one social icon to create your feed.
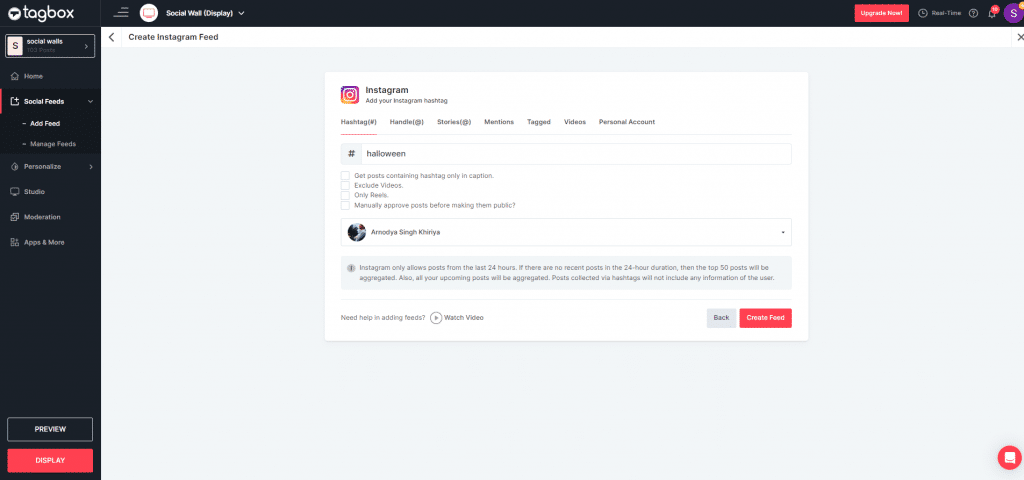
Let’s take Instagram, after selecting the “Instagram” icon, you will see a pop up, titled as Create Instagram Feed.
Pick one from the following to create an Instagram feed:
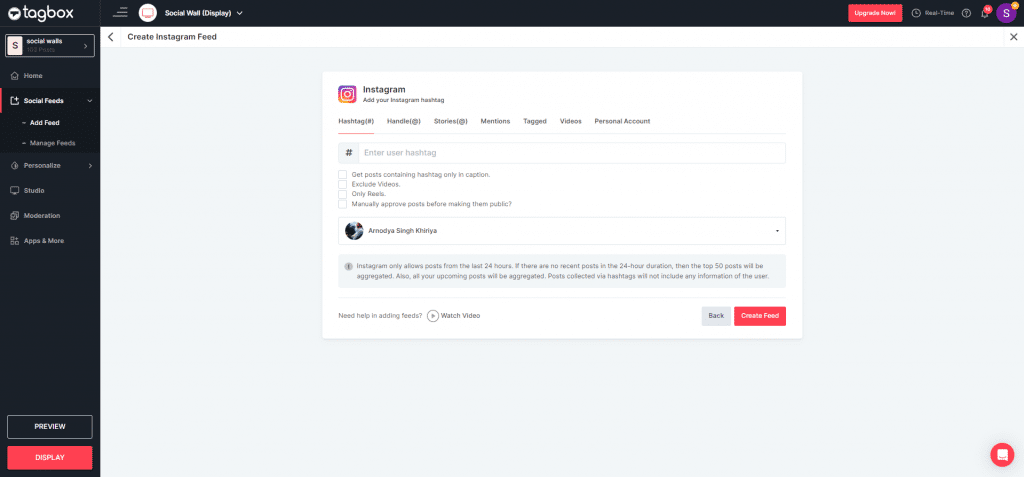
- Hashtag (#)
Type out your hashtag in the gap and you can collect all your hashtag-embedded feeds of Instagram.
After entering the hashtag, you can select the following options according to your needs.
- Add multiple photos
- Exclude retweets
- Exclude replies
- Manually approve posts before making them public?
After you have clicked on “Create Feed”, you will get directed to a screen with posts fetched by your hashtag or mention you entered to “create a feed”.
As per your requirements, you can also add more feeds by clicking on the sidebar menu feed option.
Add multiple feeds in one social wall and manage them with the manage feed option.
Moderate your Social Wall
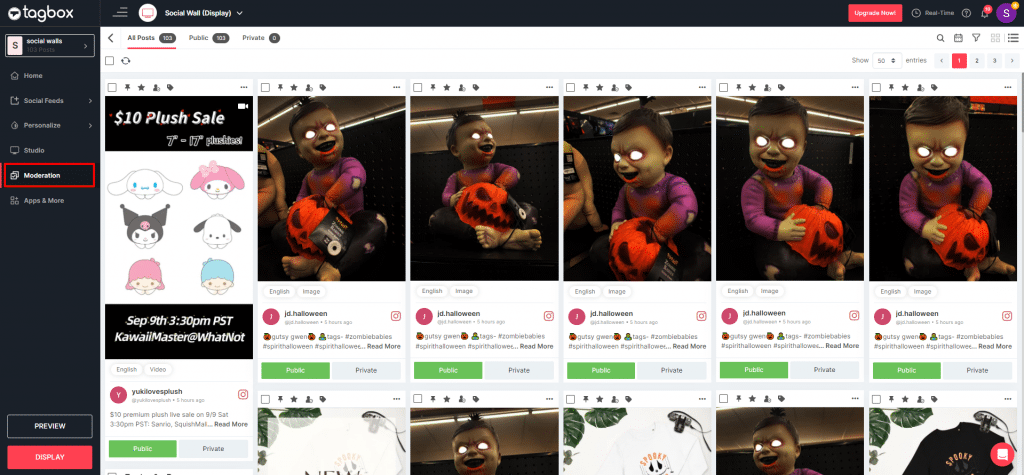
A) After you click on moderation, you will see this screen.
You can select the posts from your Instagram wall.
- Auto-moderation
Choose the auto-moderation filter from the sidebar menu if you do not wish to manually moderate the posts.
After clinking on auto-moderation you can see a popup. Here you can screen out posts by
- Handle
- Hashtag
- By words
Customize your social wall
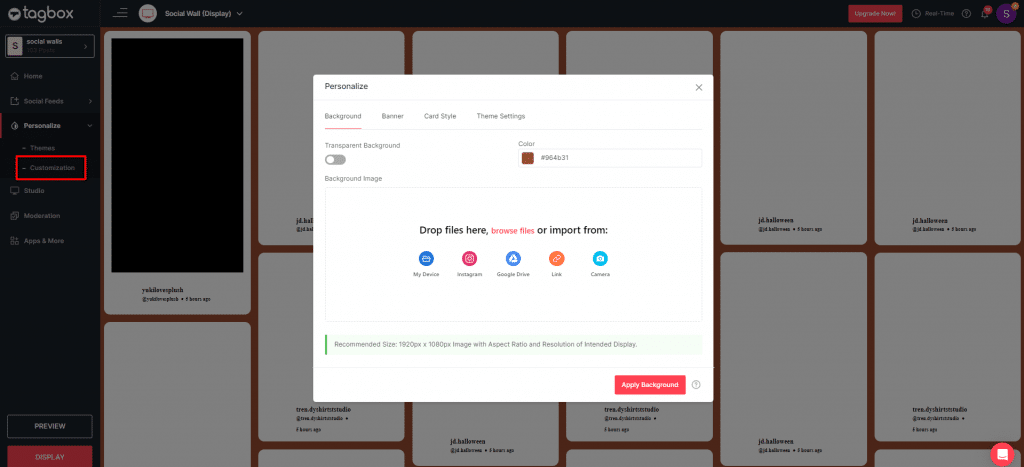
To make your social wall more impactful you can easily personalize your social wall by creating a feed and moderating posts.
Follow these steps to personalize your wall
- Go to the sidebar, click on “Personalize”
- Then, you will have two options-
A) Themes- Go with one of our responsive themes that fit any screen. Fo ryour virtual event, Ticker and Hashtag slideshow are the two best theme options.
B) Customization- find out other different ways to make your feed outstanding
- Background: Customize the background according to your branding and style.
- Banner: Add banner to transform your wall.
- Card style: change your postcard’s colour and style.
- Theme setting: Advanced features to make your wall personalized.
Choose your display source or platform
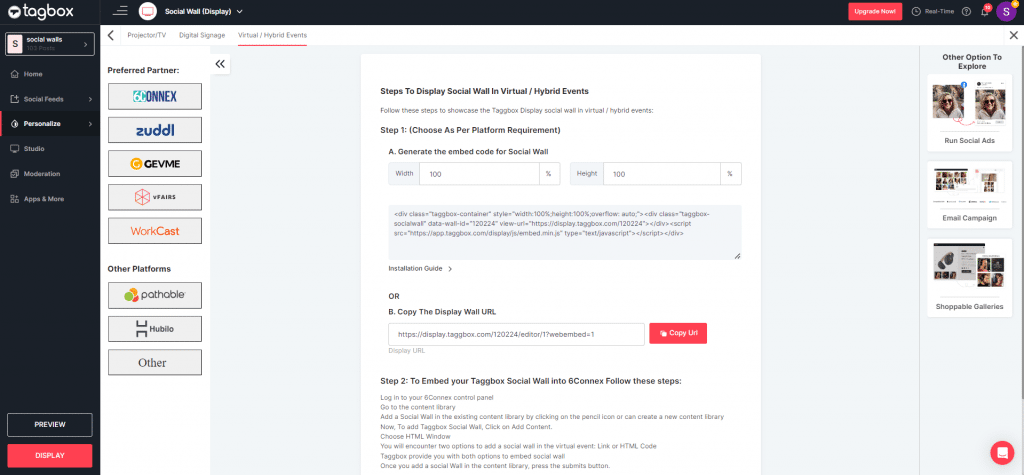
Step 1. Click on the “Display” option at the bottom of the sidebar menu.
Step 2. Move to the “Virtual events” section.
Now follow the instructions to get your embed code to publish your social wall on Cvent virtual events.
Embed and Manage Your Social Wall on the Cvent Virtual Event Platform
Log into your Cvent virtual event account.
Access the attendees website and App Builder
Start by choosing your event. Click on “Attendee Hub” from the left-hand navigation, then click on “Website and App” and click on “Manage Website and App”.
Add a code widget
Click on “Features” > select “Session Content”. Scroll down to the Audience Engagement Section and locate the Code Widgets card.
Note: For first-timers accessing this section, go to “Set Up” and “Create Code Widget.” OR click “Manage” > “Create Code Widget”.
Name your widget and choose the little picture that represents it on the session’s engagement panel.
Assign a new code widget to the sessions:
Click “Select sessions”.
You can put a checkmark next to every session where you want to add this code widget. After doing so, you can click “Done”.
You can also add an existing code widget created previously for other sessions.
People attending the session can see and use it on the attendee website.
If you wish to remove the widget, click on “Manage session” > uncheck the session and update or refresh the page. The widget will be removed.
Embed code snippets:
Click “Add code” > add code from the third party provider > again click on “Add code”.
Repeat this step for each session you have assigned to the widget. Update or refresh your page to make your custom widgets live on the Attendee Website.
The recommended width is 480 pixels. For wider iFrame, desktop viewers must scroll down to see parts of your widget.
View your widget:
Check out your widget when your Attendee website is live to see how it will look. OR register yourself for the session you have added the custom widget to and log into the Attendee Website.
The steps are simple- click the “Calendar icon” on the top right corner > select “View your full schedule” > select “Session” and open the custom widget