To create and embed Instagram feed on WordPress websites, you need to follow the given steps-
Add an Instagram Feed
Try Taggbox Widget – Start Your 14 Days For Free
Step 1
First, create your Taggbox Widget account or Log in to your existing account

You’ll be redirected to Taggbox Widget Dashboard:

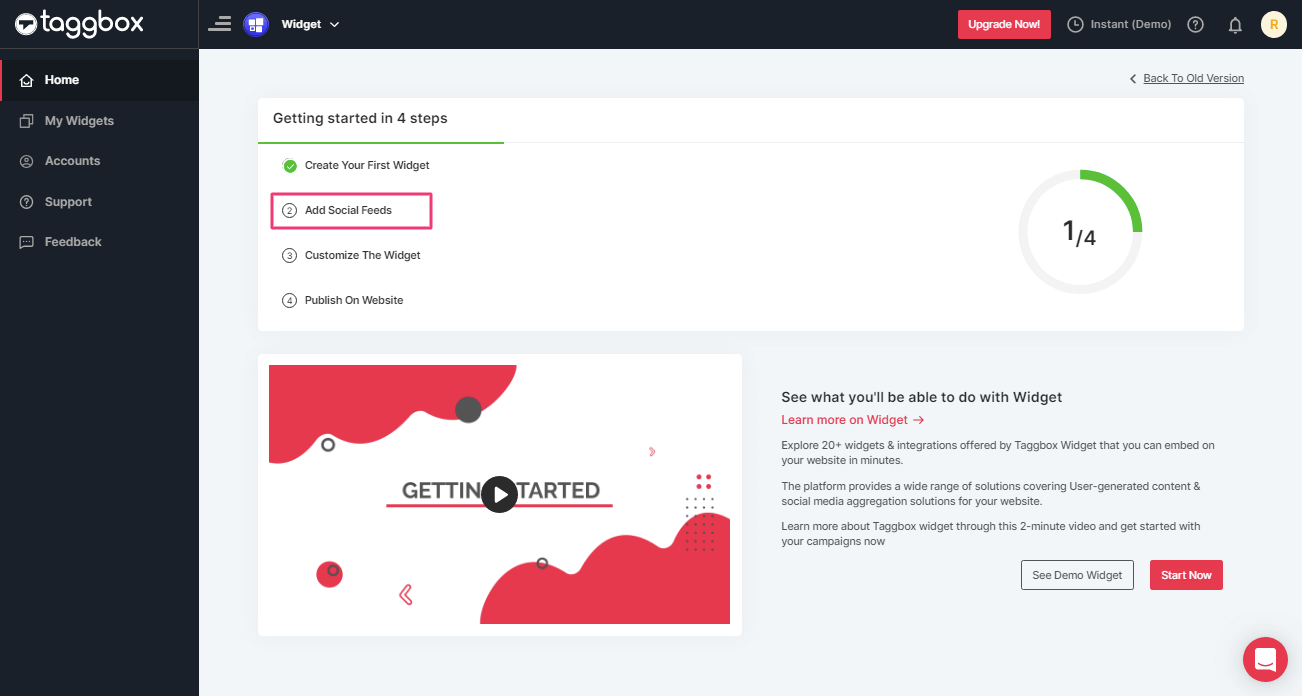
Step 2
Click on the “Add Social Feeds” option to start adding Instagram feeds to your widget.
Tip: You can also add multiple feeds from multiple sources like Instagram, Facebook, Twitter, Youtube, etc all in one widget.
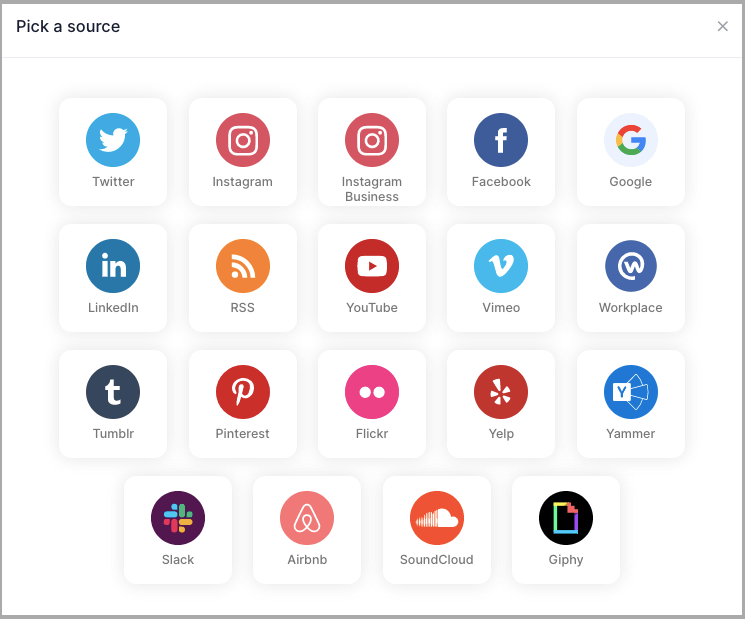
Step 3
On the new Dialog Box “Pick a source” select Instagram Business as your source of aggregating feeds:
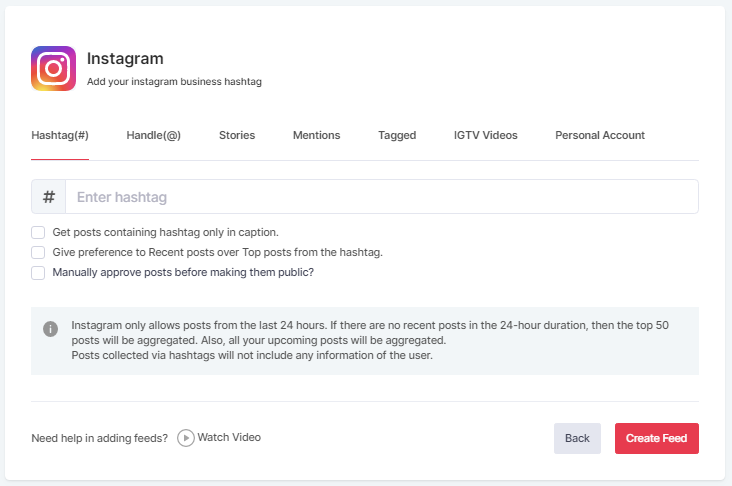
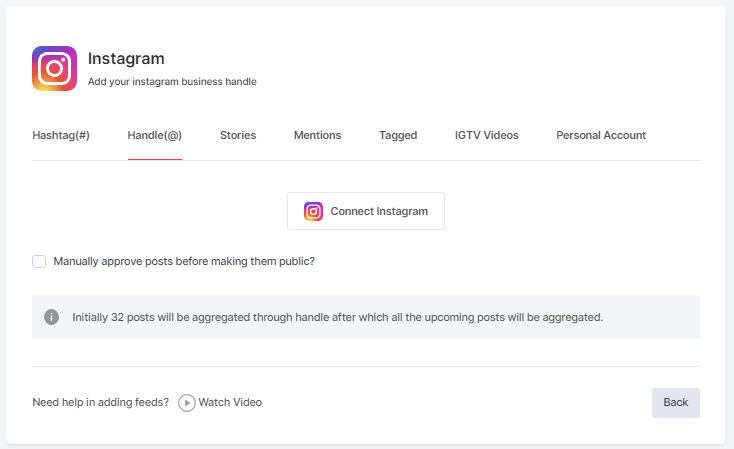
Step 4
A pop-up “Create Instagram Business Feed” will appear; where you’ll find 6 options to create your Instagram feed for the WordPress website.
1. HASHTAG (#) – To fetch Instagram feeds using hashtags(#).
2. HANDLE (@) – To fetch feeds from a profile account.
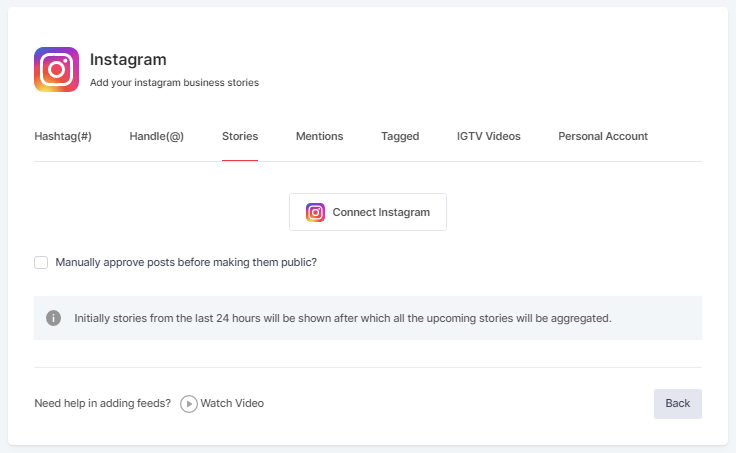
3. Stories – to fetch your profile’s Instagram Stories.
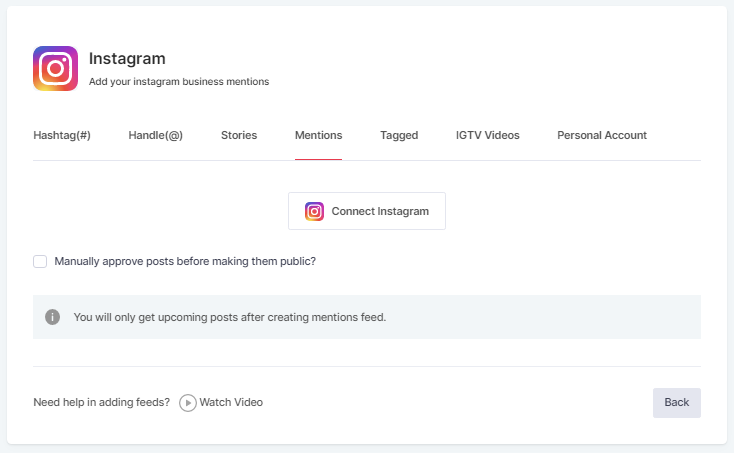
4. MENTIONS – To fetch feeds in which your account is mentioned on Instagram Posts.
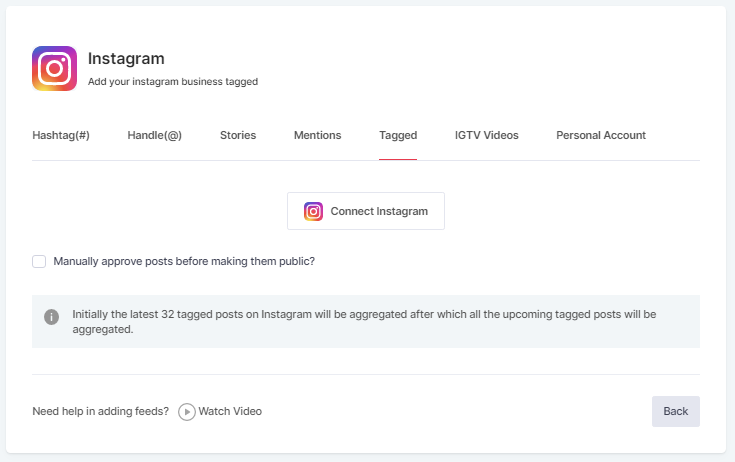
5. TAGGED – To fetch feeds in which your profile is tagged on Instagram Posts.
6. IGTV Videos– To aggregate IGTV videos.

Step 5
Choose your aggregating method and enter the input accordingly.
Click the “Create Feed” button to start the processing of embedding Instagram feeds according to your selection.
If asked complete the required authentication to fetch the feeds.
(Note: The Email Id you log in with on Facebook should have an Instagram account too because you know Facebook owns Instagram).
On successful authentication, in a short matter of seconds, your feeds will be displayed on Taggbox Editor.
Tip: You will find a “Design” option to customize your feed’s display, with many options to choose from according to your need.
Generate Instagram Feed Embed Code
To embed Instagram feed on your website you need to follow below steps
Step 1
Click the “PUBLISH” button on the bottom-left of the screen, You can also see the PREVIEW of how your feeds gonna look on different devices.

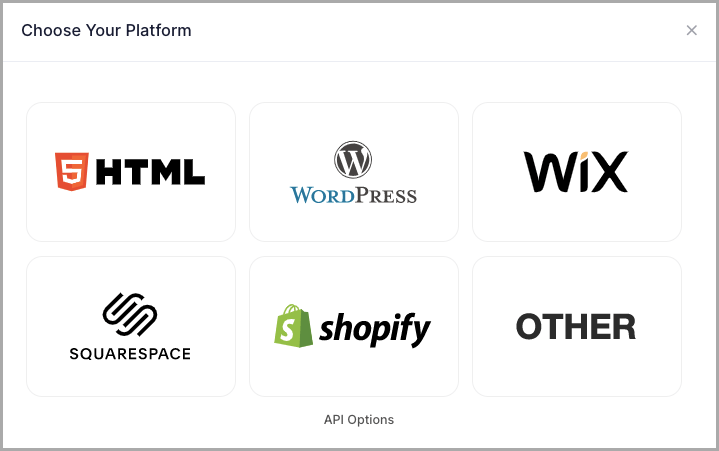
Step 2
On the dialog box of “Choose Your Platform,” select the “WordPress” logo to generate code.
Step 3
A new Dialog Box will appear “WordPress”;

Step 4
Enter the width and height into the input box according to your requirement;
Click GET CODE and COPY the generated code; you can also share the code on email ID by clicking the SHARE button.

Embed Instagram feed On WordPress 5.0 Website
Step 1
Open the page/post in your WordPress backend where you want to embed the Instagram feeds.
Step 2
Select “(+) Add Block” in the top left corner of the WordPress Editor.
Step 3
Here, click on Formatting and then choose Custom HTML and paste the copied embed code in the editor.
Step 4
Click on Publish/Update post and You’re done.
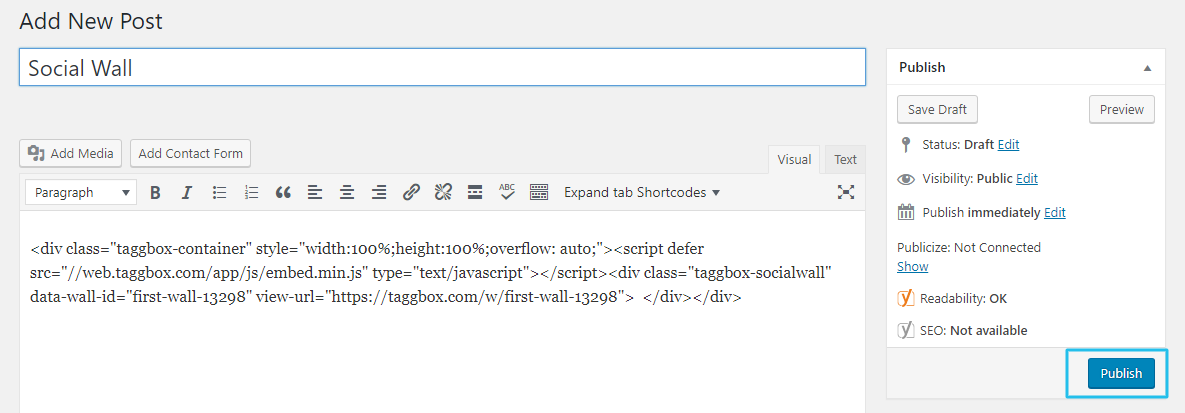
Embed Instagram Feeds on WordPress Classic Editor
Step 1
Open the page/post in your WordPress backend where you want to embed the Instagram feeds.
Step 2
On the right-hand side, you will find a Visual and a Text option. Choose Text Mode.
Step 3
Paste the generated embed code where you want to show your Widget and click on Update/Publish to save the changes.
Great! You have successfully embedded Instagram feeds on your WordPress website.
Try Taggbox Widget to Embed Instagram Feed – Start Your 14 Days For Free
If you have any questions or need help, please Contact us or write us at [email protected]