Introduction
Every sector irrespective of the niche requires a tool that can create a connection between the brand and the users and eventually drive more attention and engagement from the brand users.
The perfect solution for the aforementioned concern is a social media wall that can work brilliantly to help the brand attain increased interaction with the customers.
A social wall basically integrates content from various social media platforms like Facebook, Instagram, Twitter, Pinterest, etc. which can be later on displayed on the various screens including digital signage.
Digital signage is an interactive tool that works extremely well to increase interaction and lets brands target their customers effortlessly.
Even though displaying a social wall on digital signage sounds like a technical job, it does not require any coding or technical skills.
Keep reading as we have mentioned about a step-by-step guide to display social walls in digital signage using Taggbox Display.
Taggbox display is the ultimate UGC and social media aggregation platform that allows users to collect the content from social media, curate it, and display it easily on digital signage.
The tool is extremely responsive and allows brands to customize the social media wall as per their needs and requirements. The user can also moderate the content to display premium quality content. To keep track of the performance of the social media wall, the user can utilize advanced analytics.
The next section of the article can be leveraged as a step-by-step guide to embedding social walls on digital signage.
Create a Wall in the Taggbox Dashboard
Step 1
First Signup Or Login to your Taggbox account

Step 2
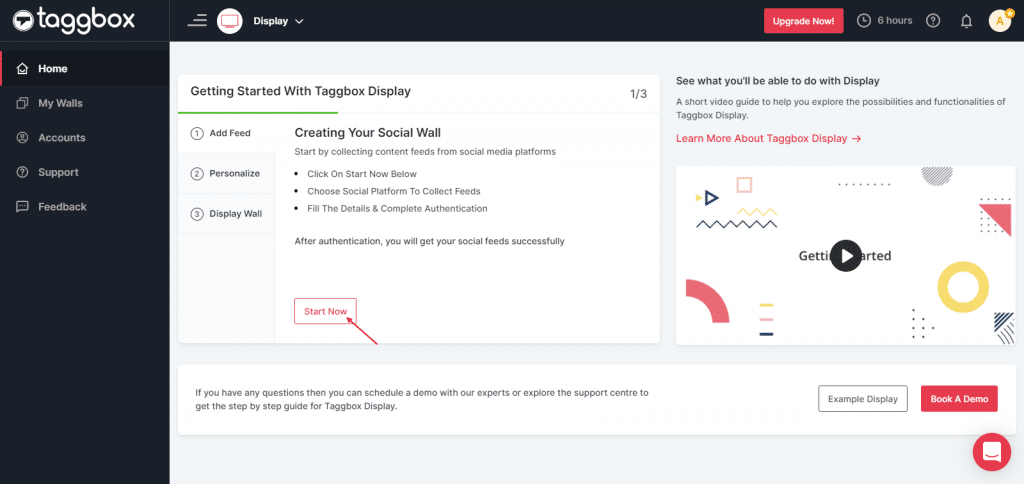
After Login you will be land on the Taggbox Display Home, Click on Start Now and on Next Screen, you will ask to choose a network to create a social wall
Step 3
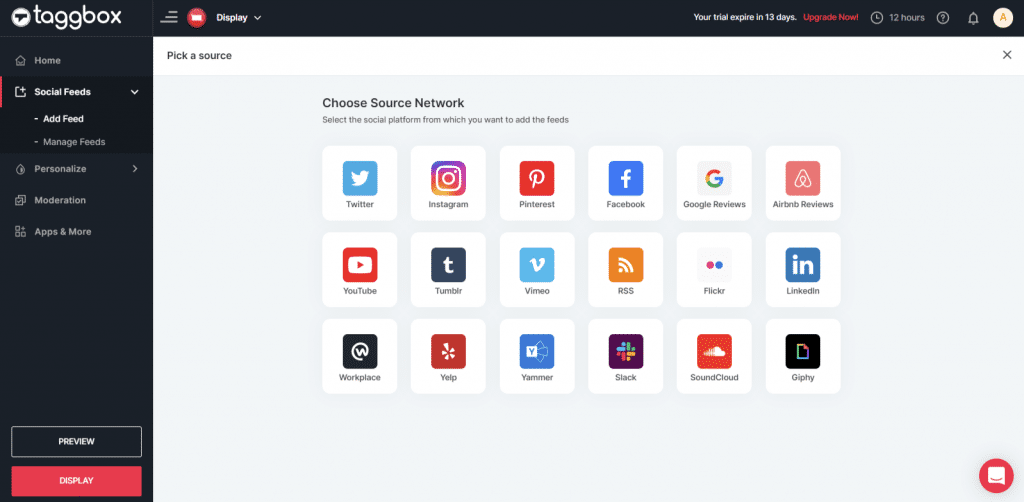
Select the source from where you want to fetch the feed
Step 4
Just take Instagram as a source to add the feed. Here you will find multiple options to create the feed like Hashtag, Handle, Stories, Mentions, Tagged, IGTV Videos & Personal Account.

Then click “Create Feed” button to complete adding.
You can also use the Personalize and Moderation Panel to set up your Instagram Wall according to you (You can find them below the Feeds option).
Read full article on How to Create Social Media Feed
After Creating Feed you can Personalize your feed or moderate your posts.
Can you help me customize my Social Wall?
Follow this step-by-step guide to display social wall on various digital signage like Mvix, NoviSign, Scala, Enplug, and more.
Display Social Wall on Various Digital Signage
To display a Social wall on any digital signage platform you need to follow the below steps:–
Step 1
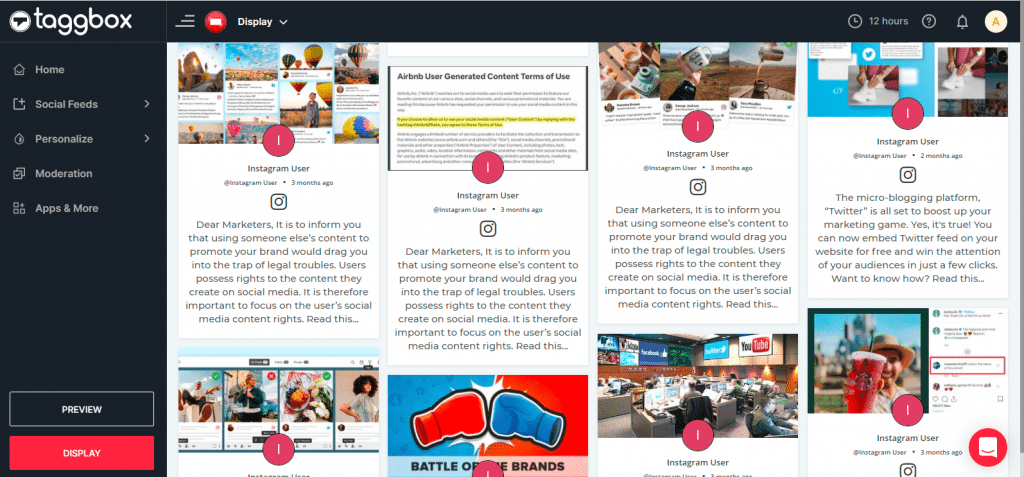
Click on the Display button at the bottom of the left column on your wall editor.
Step 2
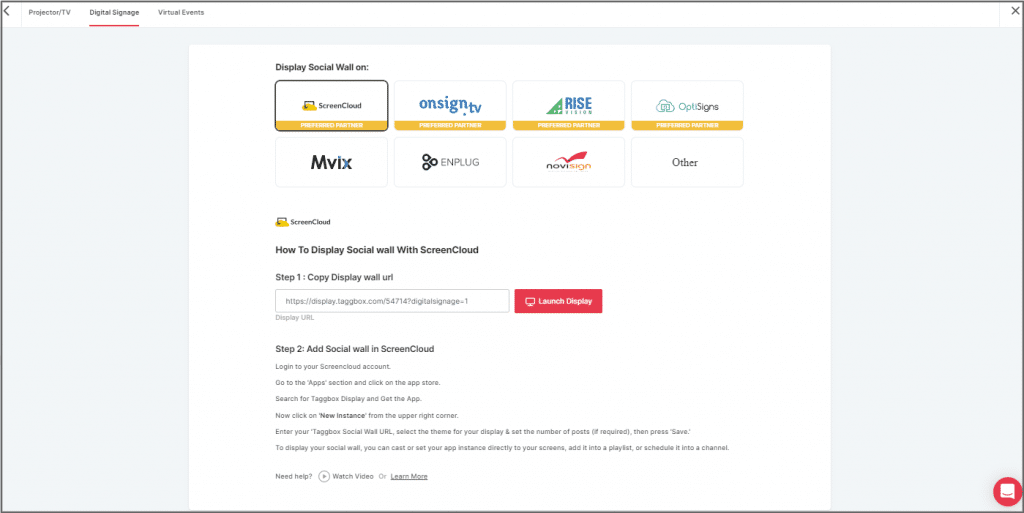
Select your Platform(Eg: Mvix, Enplug, Scala, etc.)
Display on Screencloud
Step 1
To display on Screen Cloud, select Screen Cloud as your digital signage option

Step 2
A dialogue box explaining steps to display the social wall on Screen Cloud will appear. From the last step, copy the Embed Code/ URL to the clipboard.
Step 3
Now, login to your Screen Cloud account.
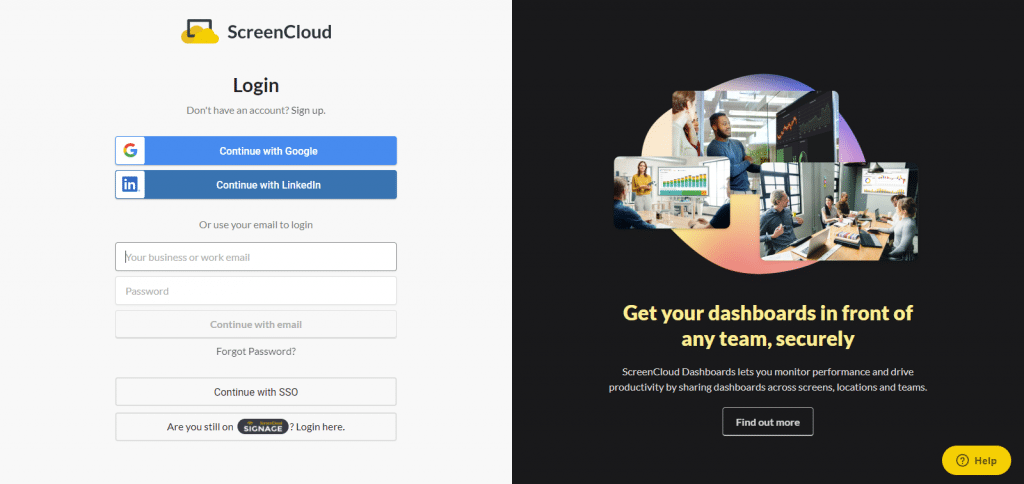
Step 4
Click on “Apps” and Search for Taggbox Display
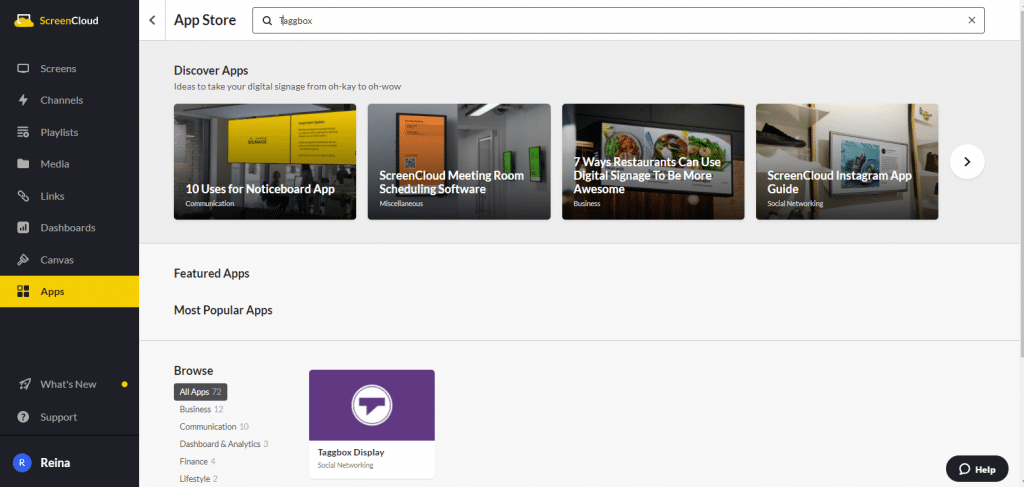
Step 5
Now you will get the app guide, click on get option

Step 6
Now give name to your wall, enter the unique URL of your social media wall (as per above), select the theme and number of posts. Click save.
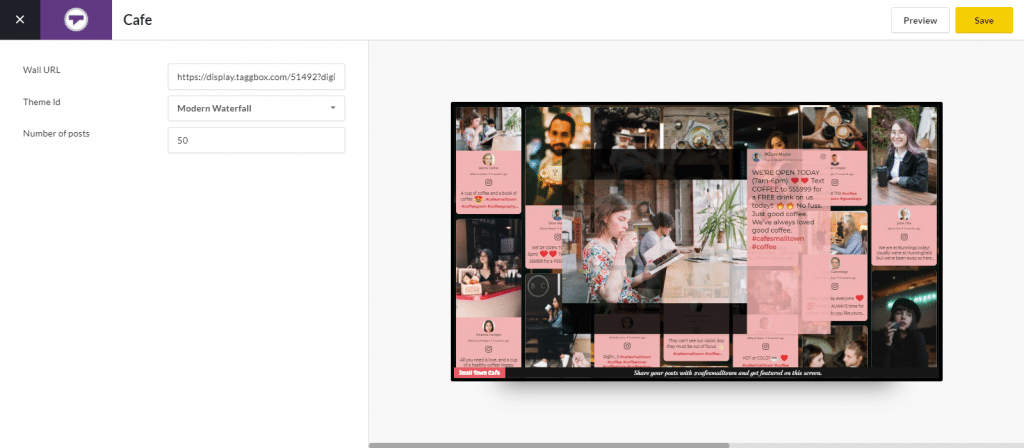
Great! You have successfully integrated social wall on your Screen Cloud digital signage.
Display on Onsign
Step 1
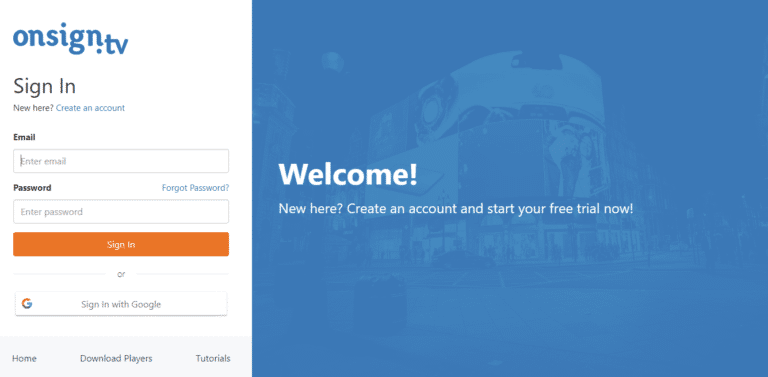
Click on the display button and you will get the following options. Here you have to select Onsign.tv
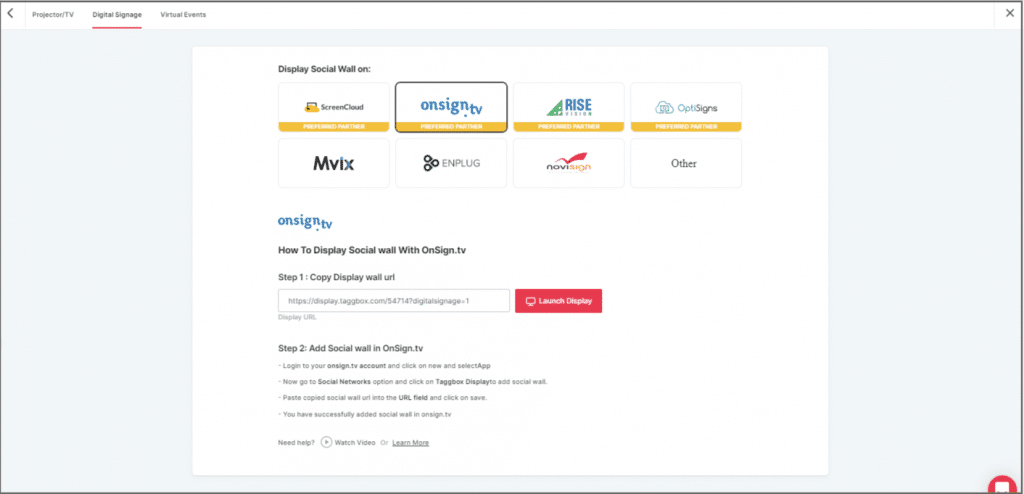
Step 2
Now, Register on OnSign or login to your existing account.
Step 3
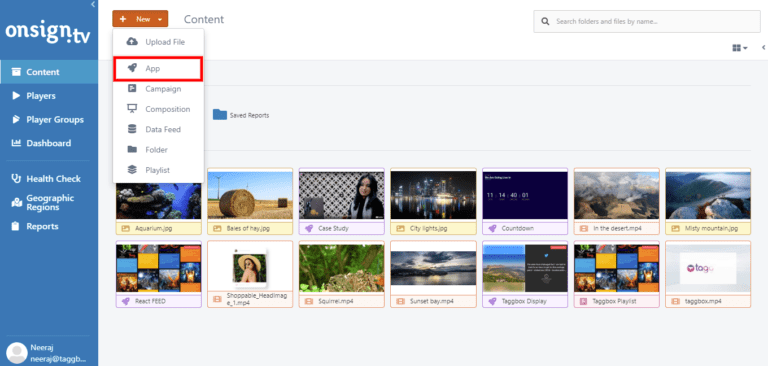
Go to the Content section on the upper left. Click on New and then select App.
Step 4
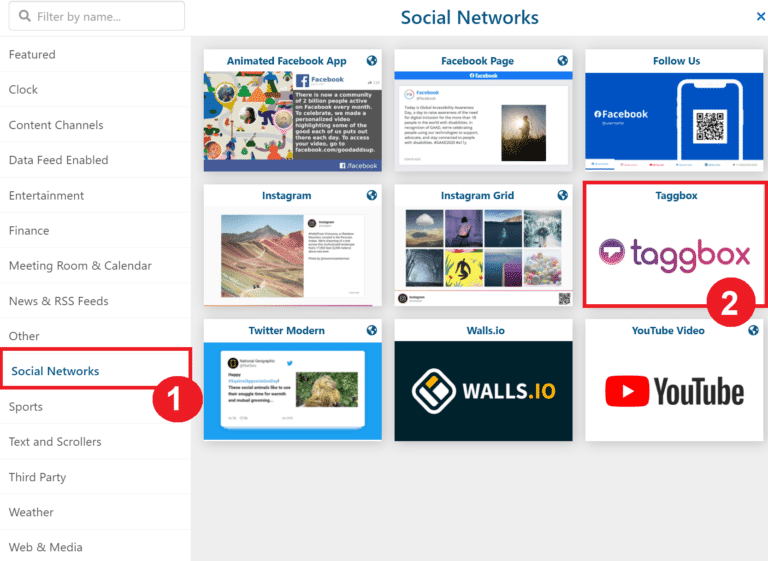
Search here for social networks and click on the Social Networks Tab. Then choose the Taggbox App Option.
Step 5
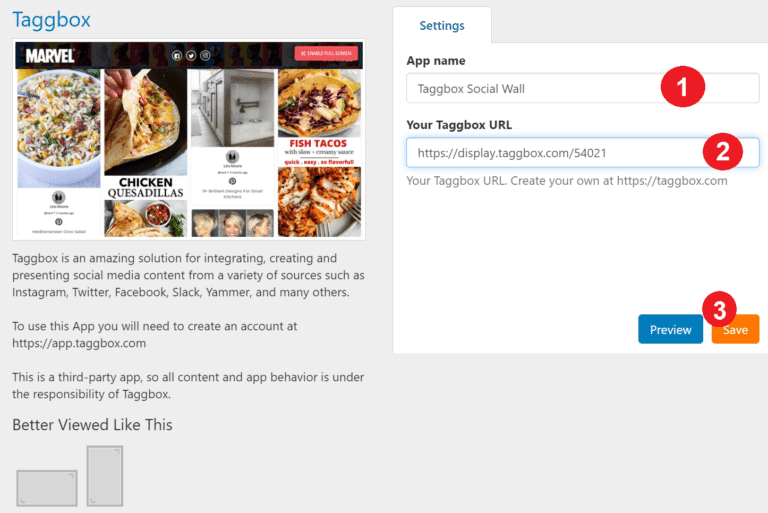
Paste your Taggbox wall link into the URL field. Then select the ‘Preview’ button in the lower-right corner. Everything looking good? Hit the Save button.
Display on Rise Vision
Step 1
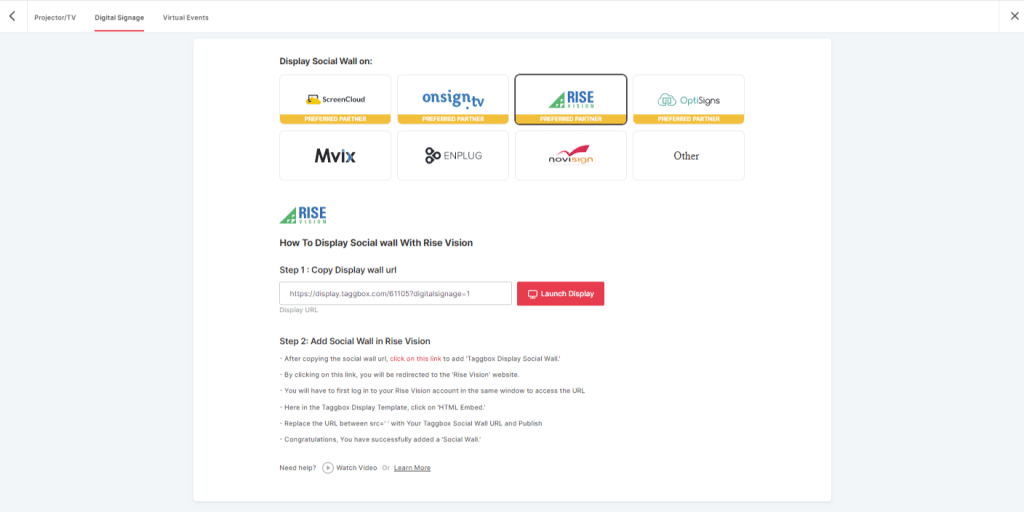
Click on the display button and you will get the following options & Choose Rise Vision
Step 2
A dialogue box explaining steps to display a social wall on Rise Vision will appear. From the first step, copy the Embed Code/ URL to the clipboard.
Step 3
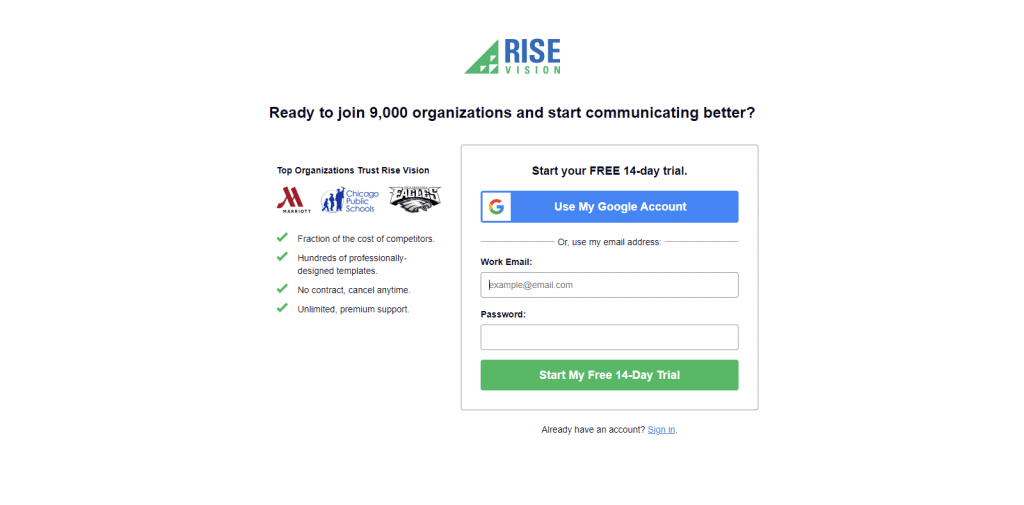
Now, Register or Login on Rise Vision or login to your existing account. or if you have already logged into the Rise Vision then directly follow Step 4.
Step 4
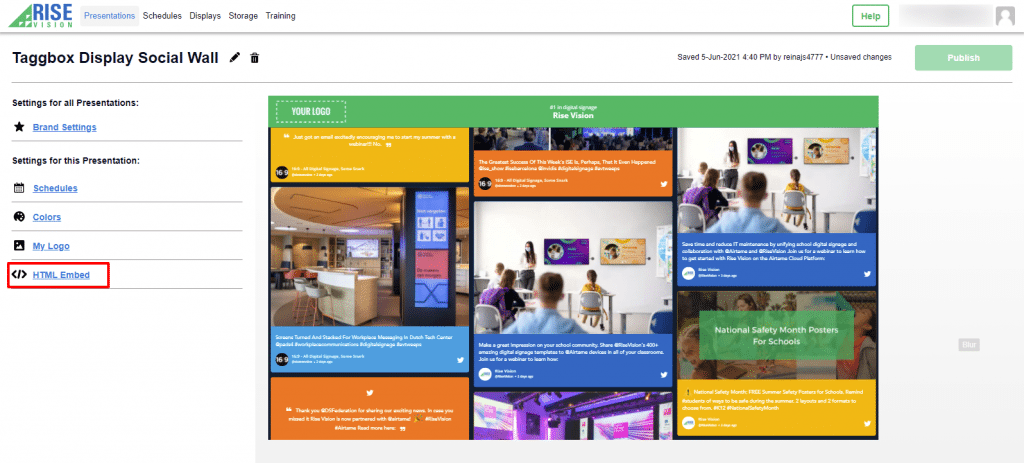
Now click on this link “https://bit.ly/3igriSA” and you will see the Taggbox Display Social Wall Template Screen. Here you have to select the “HTML Embed” Option.
Step 5
Now Replace the URL between “src=’ ‘ in iframe class section” with your Taggbox Display Social wall URL and click on publish button
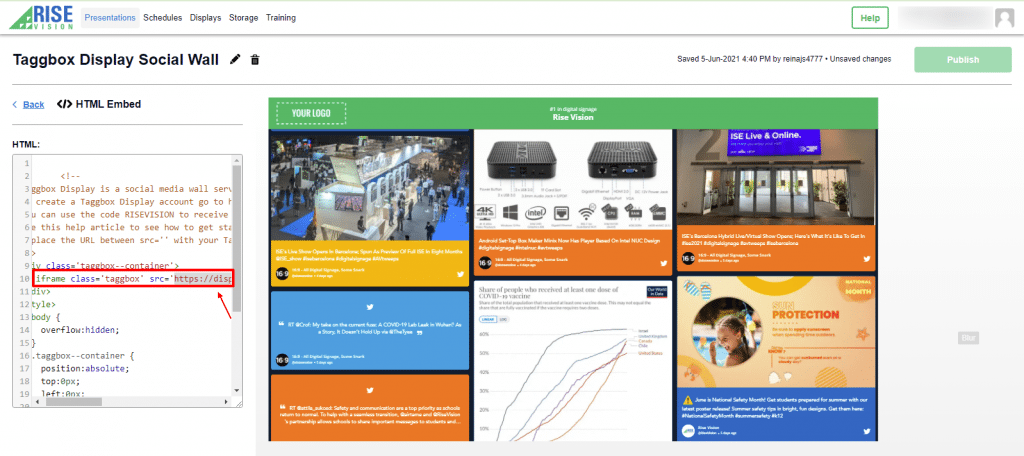
Congratulation, you have successfully integrated Taggbox Display Social Wall on Rise Vision
Display on OptiSigns
Step 1
Click on the display button and choose OptiSigns as your option
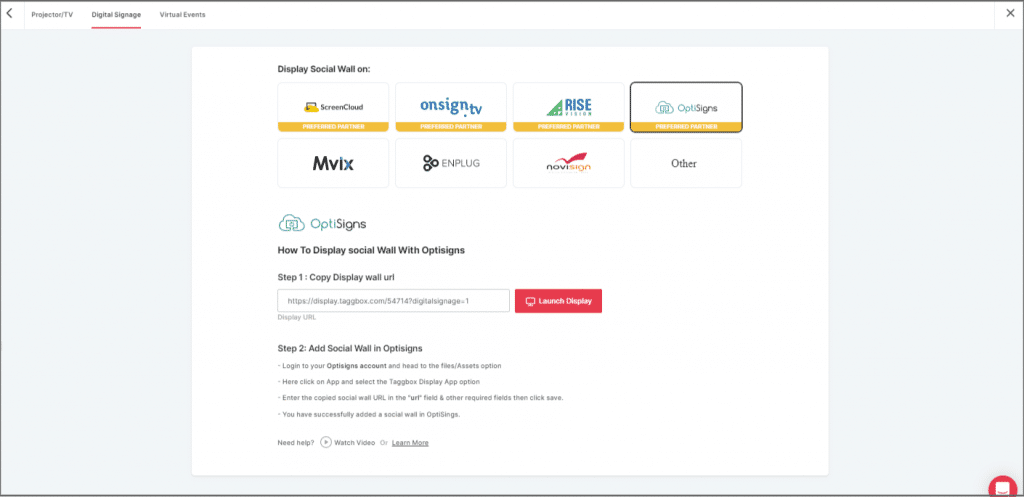
Step 2
Now Register or login to your existing Optisigns Account
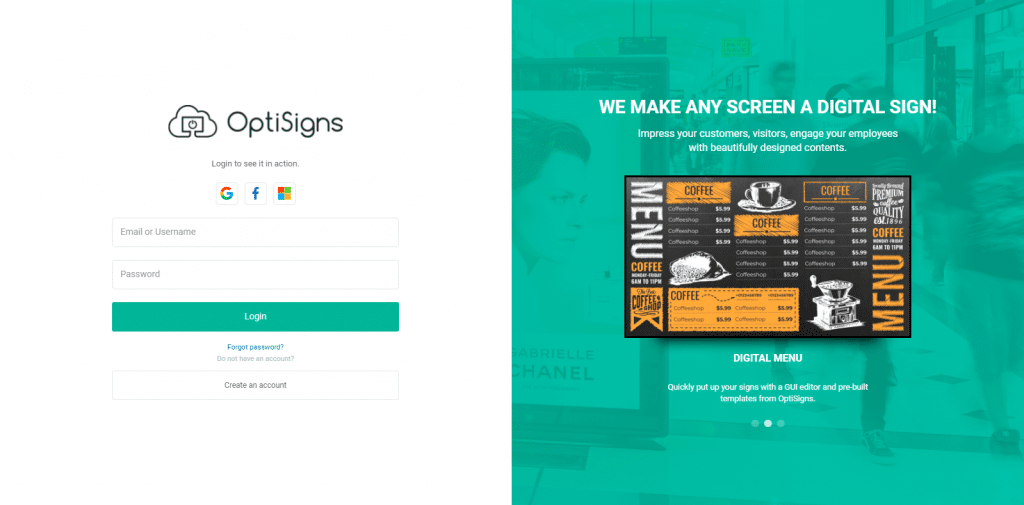
Step 3
Go to Files/Assets, Click on “App” and search for the Taggbox Display App
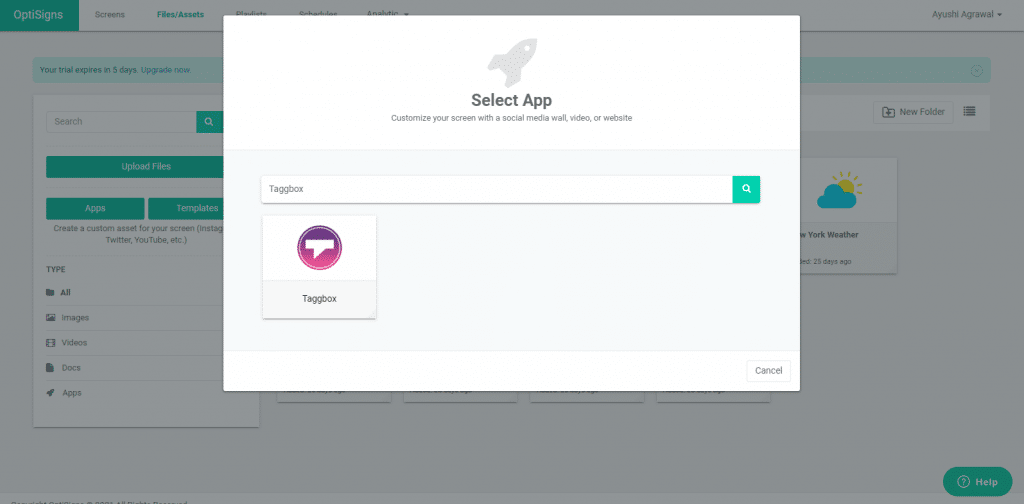
Step 4
Click on the Taggbox Display app & Enter the required information
Name: Enter your unique social wall name
URL: Copy the social wall url from taggbox display account & paste it in the URL bar
Update Interval: Manage the frequency of updating of your social wall
Preview: Check the preview of your social wall
Save: If everything looks fine then click Save
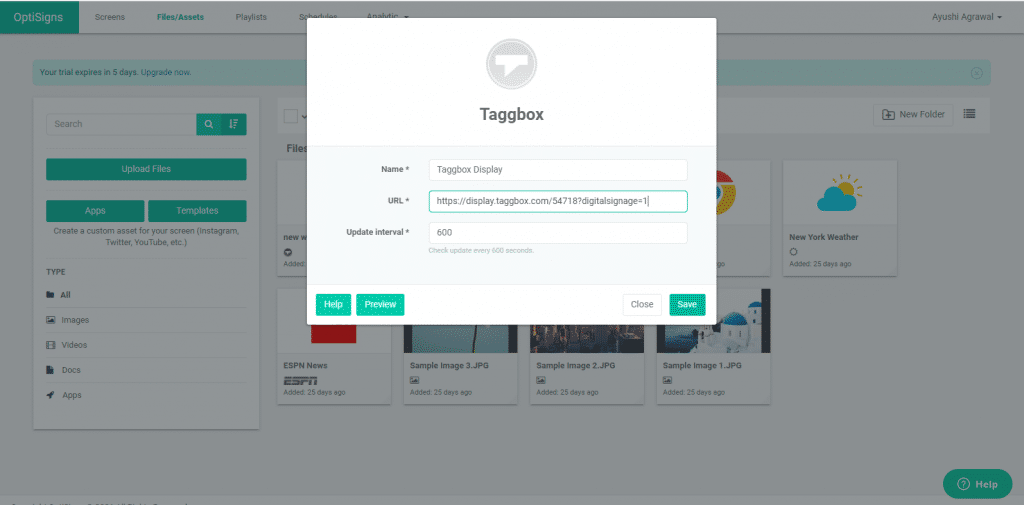
Congratulations! You have successfully integrated the Taggbox Display social wall on OptiSigns Digital Signage.
Display on Mvix
Step 1
To display on Mvix, select Mvix as your digital signage option.
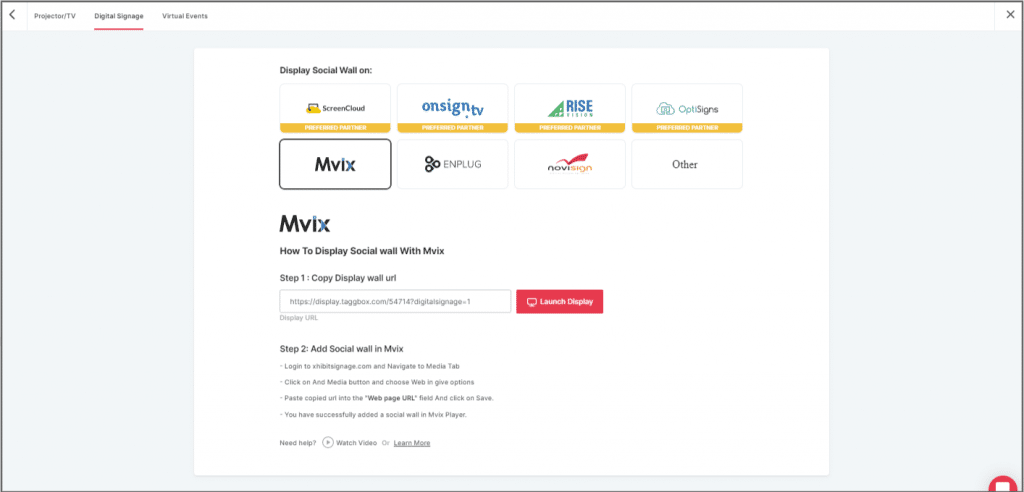
Step 2
Now, login to your xhibitsignage.com
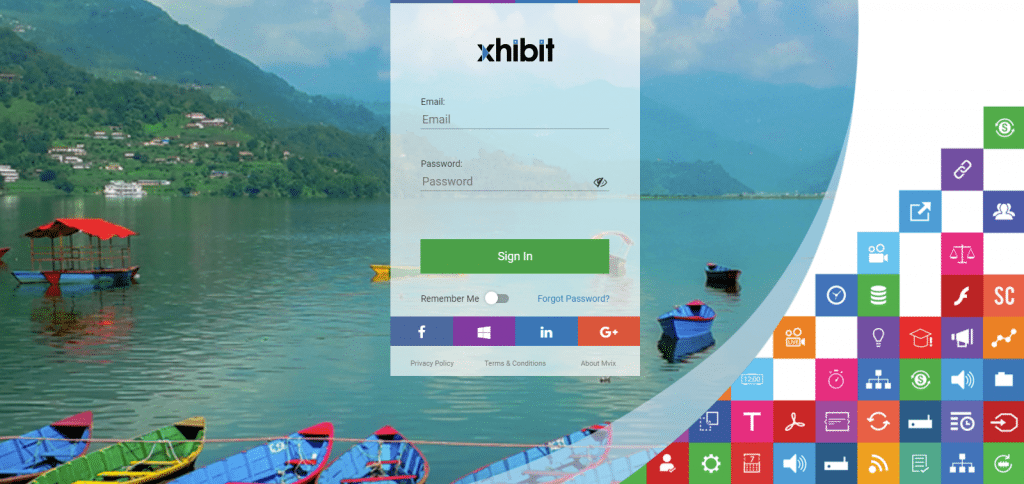
Step 3
Navigate to Media Tab and Click on Add Media.
Step 5
Click on Web Tab.
Step 6
Click on the Webpage widget icon.
Step 7
Here, in the Web Page URL field, paste the copied Embed URL.
Great! You have successfully integrated social wall on your MVIX digital signage.
Display on Enplug
Step 1
To display on Enplug, select Enplug as your digital signage option.
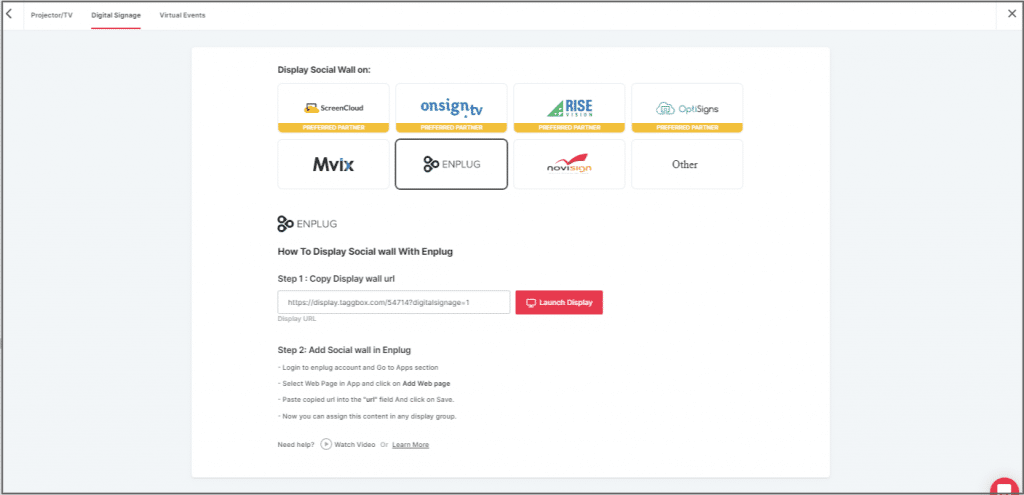
Step 2
Now, login to your Enplug account.
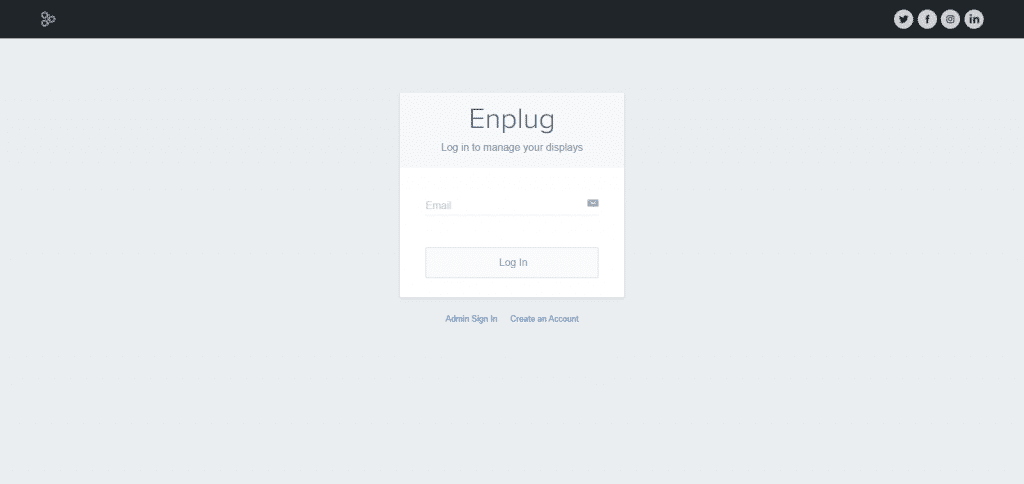
Step 3
Next, click on the Apps dropdown.
Step 4
Select the Webpage App.
Step 5
Now, click on Add Website.
Step 6
In the URL Field, paste the copied Embed URL.
Great! You have successfully integrated social wall on your Enplug digital signage.
Display on NoviSign
Step 1
Select Novisign as your digital signage option.
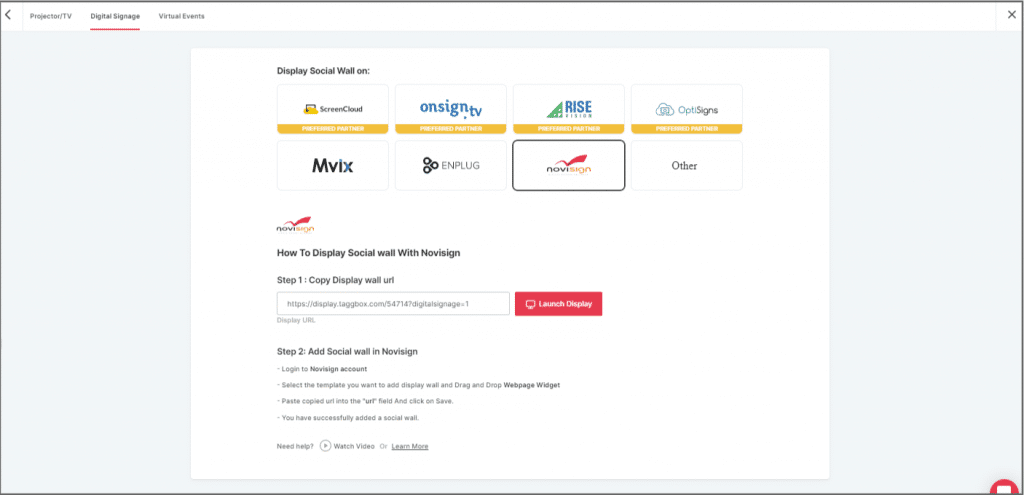
Step 2
Now, login to app.novisign.com.
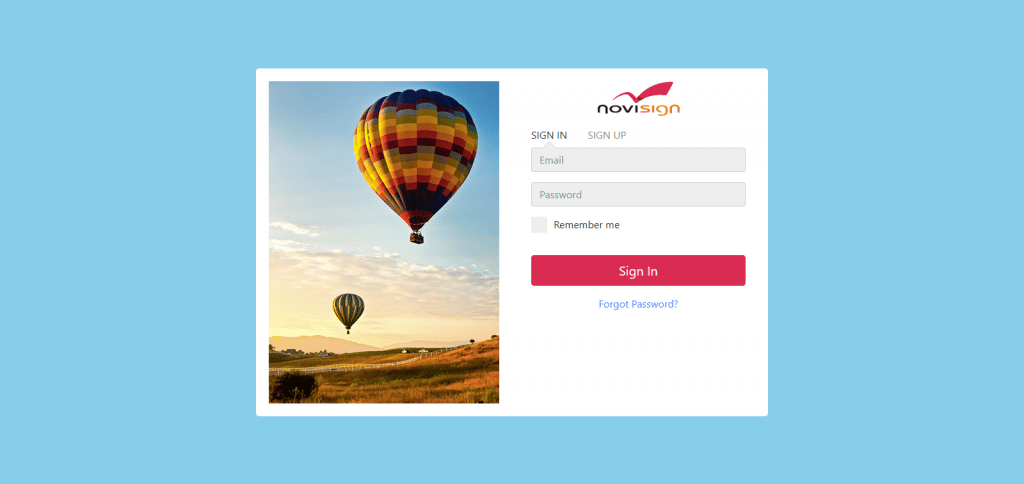
Step 3
Next, click on the Compose button.
Step 4
Select Template.
Step 5
Now, drag and drop widgets: Webpage.
Step 6
In the Webpage Field, paste the copied Embed URL.
Great! You have successfully integrated a social wall on your Novisign digital signage.
Conclusion
And just like this, you will be able to create an attractive social media wall for your next event or it can be used across various mediums and cater to various purposes.
We are at the end of the blog and you got to know how easily you can integrate a social wall on various integration platforms in a few easy steps.
By displaying a social wall, you can seamlessly attract your audience by displaying content that grabs the attention of the users, taps into impulsive shopping give a modern touch to the interiors of the venue, and is extremely cost-efficient at the same time!
If you have any questions or need help, please contact us or write to us at [email protected]