Read summarized version with
Adding relevant photos to a Google Review not only increases your credibility as a reviewer but also helps a new user make better decisions. A single picture might tell much more about a restaurant’s ambiance as compared to a long detailed text review.
More photos posted on a brand’s Google Business Profile have benefits related to the brand’s visibility as well. Therefore, a reviewer must know how to use images in their reviews to provide maximum information.
We will be discussing in detail:
- Benefits of adding photos on Google reviews
- How to Add Photos to Google Reviews?
- How to Delete Photos to Google Reviews?
Can you Add Photos to Google Reviews?
Yes, you can add images to Google Reviews.
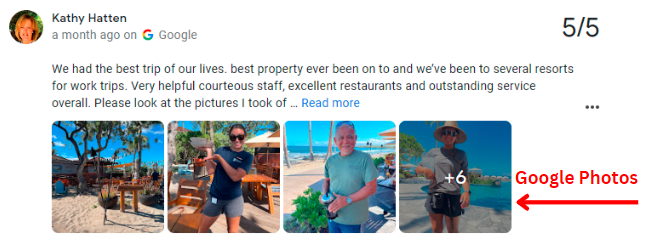
In fact, in 2018 Google updated its review guidelines to encourage reviewers to add images. Google has also launched tools specifically designed for brands to manage their image-based reviews.
In 2021, Google also integrated image-based reviews on advertising initiatives for a better user experience.
This has made image-based reviews an integral part of the Google Business Profile experience. Even today, Google is making a lot of investments in image-based review technologies. It is focusing on artificial intelligence to be integrated in the same to enhance user experience.
How to Add Photos to Google Reviews?
The process of adding images to a Google Reviews can be slightly different for various platforms. Therefore, we have compiled the steps you must follow to add images on Android, desktop as well as on iPhone.
Add Photos to Google Reviews on a Desktop
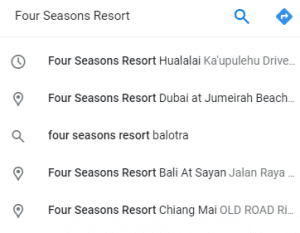
Step 1: Open Google Maps or your desktop browser and search for the business you are looking to review (Google search if you are using the browser).
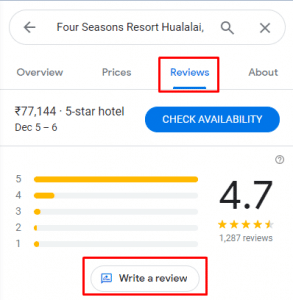
Step 2: Scroll down to the reviews section and click “Write a review”.
Step 3: Enter the star rating as well as the review for the brand
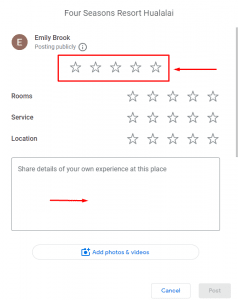
Step 4: Click on the “Add Photos” button below the text box.
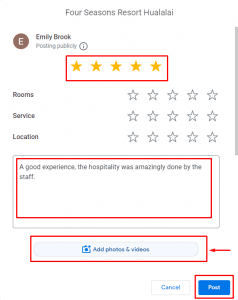
Step 5: Select the photo you want to add with the reviews, from your computer.
Step 6: Click Open and Post to complete the process.
Add Photos to Google Reviews on an Android
Step 1: Open Google Maps and search for the brand on which you want to place the review.
Step 2: Once you see the business name in the search results, tap on it to see its business profile.
Step 3: Scroll down to the reviews section and tap on the option “Write a Review”.
Step 4: Add the star rating and the review you want to give.
Step 5: Tap on the camera icon.
Step 6: Select the photo you want to upload with the review you shared.
Step 7: Tap on “Done” and ”Post” to complete the process.
Add Photos to Google Reviews on iPhone
Step 1: Open Google Maps on your iPhone and search for the brand on which you want to place the review.
Step 2: Once you see the business in the search results, tap on it to see its business profile.
Step 3: Scroll down to the reviews section and tap on the option “Write a Review”.
Step 4: Add the star rating and the review you want to give.
Step 5: Tap on the camera icon.
Step 6: Choose a photo from the gallery or take a new photo.
Step 7: Select the photo you want to upload with the review you shared.
Step 8: Tap on “Done” and ”Post” to complete the process.
Add a Photo to an Existing Review
Google allows a reviewer to add an image to a review you have already posted on Google. Here are the steps you can follow to do the same.
On Mobile Phone:
- Open Google Maps on your phone.
- Search for the brand for which you have already posted a review.
- Tap on the name of the brand once you find it in the results.
- Scroll down to the reviews section and look for the review you left.
- Select the “Edit Review” option.
- Once you are in the review edit section. Tap on the camera icon.
- Take a new photo or choose a photo already existing on your phone to add to your review.
- You can rotate or crop the photo at your convenience.
- Tap on “Done” and “Post” to complete the process.
On Desktop:
- Search for the brand you left a review for on Google Maps or Google Search in your desktop browser.
- Scroll down to the review section.
- Look for the review you want to add an image to.
- Click on the “Edit Review” button
- Click on “Add Photos”
- Select the photos from your computer that you want to add to the review.
- Click the “Open” button.
- Click “Post” to complete the process.
Also Read: How to Automate Google Reviews?
Benefits of Adding Photos to Google Reviews
Adding photos to your Google Reviews can provide several benefits for both you and the businesses you review:
For Consumers:
- Enhanced credibility: Photos add a layer of authenticity and credibility to your reviews, making them more persuasive for other potential customers. Seeing real photos from real customers can instill confidence in a brand and its products or services.
- Visual appeal: Photos make reviews more visually appealing and engaging, making them more likely to be read and remembered. This can significantly impact customer engagement and decision-making.
- Product visualization: Photos allow customers to see products in real-world situations, providing a better understanding of their size, appearance, and functionality. This can help reduce product returns and increase customer satisfaction.
For Businesses:
- Increased engagement: Reviews with photos are more likely to be read and engaged with, leading to increased brand visibility and customer engagement.
- Improved brand perception: Positive photos can help shape a positive brand perception, showcasing the company’s commitment to quality and customer service.
- Enhanced customer feedback: Photos can provide valuable visual feedback that businesses can use to identify areas for improvement.
- More user-generated content: Photos in reviews contribute to a rich library of user-generated content that businesses can leverage for marketing and social media purposes through a Google review widget.
- Improved local SEO: Positive reviews with photos can impact local SEO rankings, helping businesses appear more prominently in search results.
Overall, adding photos to Google Reviews is a mutually beneficial practice that enhances the customer experience and provides valuable insights for businesses.
By incorporating photos into their reviews, consumers can make more informed decisions, while businesses can gain a deeper understanding of their customers’ preferences and expectations.
Also Read: What is Review Gating?
How You Can Delete Photos From a Google Review?
Following are the steps one must follow in order to delete images from their reviews.
On Phone:
- Open Google Maps on your phone.
- Search for the brand for which you have already posted a review.
- Tap on the name of the brand once you find it in the results.
- Scroll down to the reviews section and look for the review you left.
- Select the “Edit Review” option.
- Tap on the photo you want to delete and select the “Trash” icon.
- Tap on “Update” to complete the process.
On Desktop:
- Search for the brand you left a review for on Google Maps or Google Search in your desktop browser.
- Scroll down to the review section.
- Look for the review you want to add an image to.
- Click on the “Edit Review” button
- Click on the photo you want to delete and select the “Delete” icon.
- Click on “Update” to complete the process.
How to Add Reviews with Photos on a Website Using Taggbox?
Taggbox simplifies the process of integrating reviews with photos onto your website, enhancing user engagement. Follow these steps, featuring the “Snap Up” feature:
- Create your free Taggbox Widget account or sign in to an existing account.

2. Click on the “Plus” sign to create a new widget, or edit the existing one.
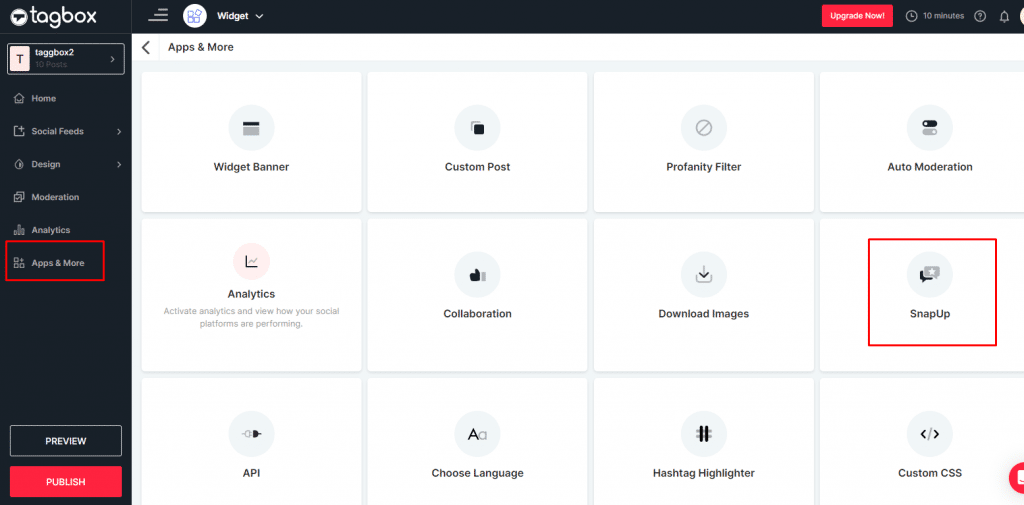
3. Click on the “Apps & More” > you will find the SnapUp option, click on the option from the list.
4. The SnapUp form settings page will appear, where you can edit the form according to your requirements.
Note: You can also choose to either display a link, QR Code, or button, for your website, email campaigns, hashtag campaigns, etc. However, the SnapUp link would be a good choice for your SMS Marketing.
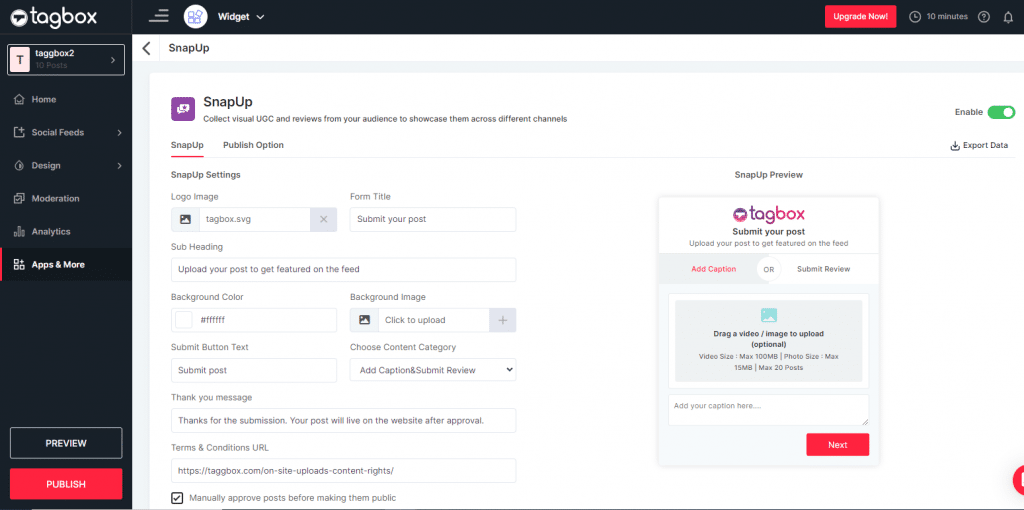
5. After creating the SnapUp form, it’s time to customize the form and moderate the content according to your choice.
- Upload Logo: An image can be attached here to be displayed in the SnapUp button. You can add your company logo here.
- Title: It is the heading that will appear on the form.
- Subheading: It is a detailed description of what your users can expect in the form.
- Category: In choose content category, choose “Submit Review” for the users and also change the button name to “Submit Review”
- Other Edits: You can change the background color, image, etc., add a “Thank You” message, and choose the content category.
6. Once you are done with the details mentioned above and apply the settings, you can move to the publishing options. In the Publish Option, select how you would like to publish your reviews.
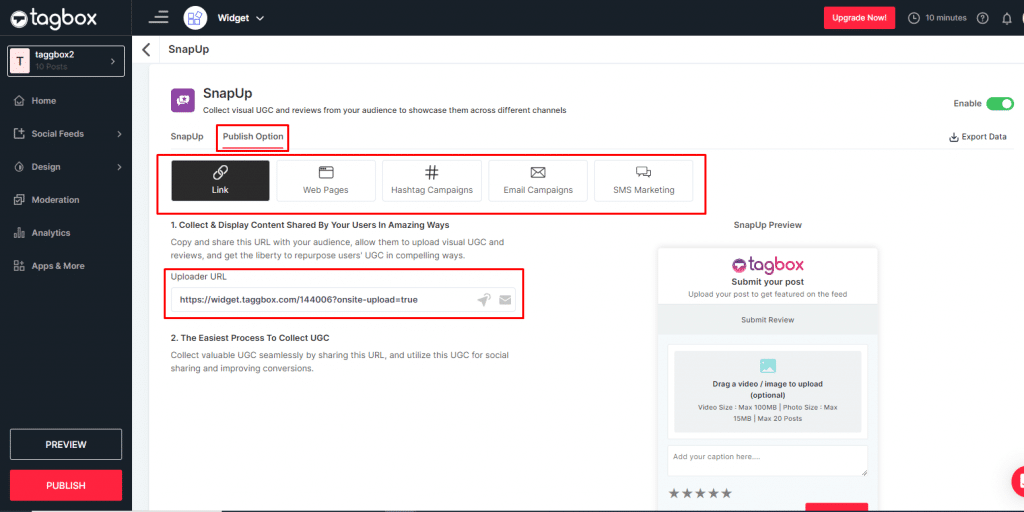
Note: By default is Enabled for your users, but you can disable the SnapUp feature, whenever you would like to.
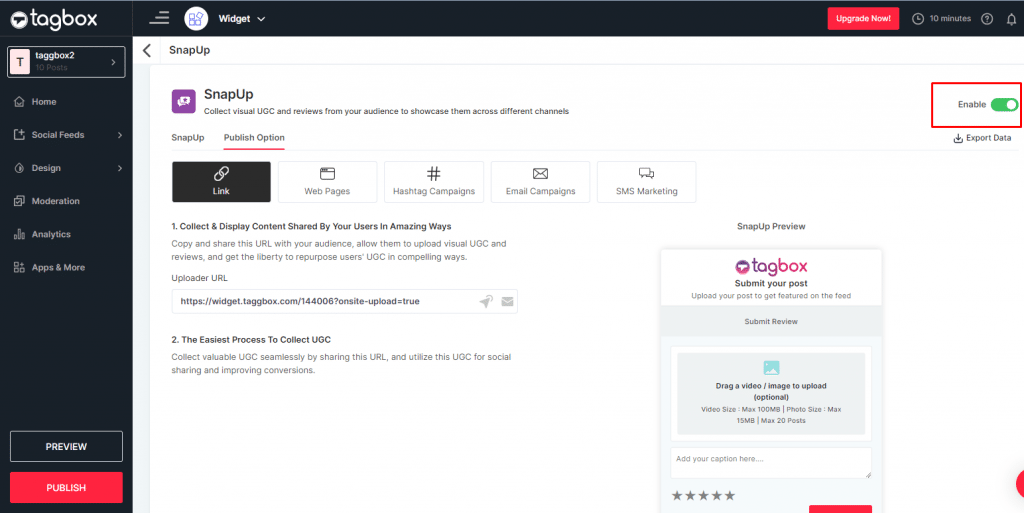
7. Finally, copy the URL or select the method that you want to showcase.
Want to more about “SnapUp” feature? Check out this blog now!
Taggbox Widget’s All-new Feature: SnapUp
Key Takeaways
Adding images in Google Reviews is a great way of offering credibility and authenticity to a brand, business, product, or service provider. Asking customers for reviews can be time-consuming sometimes, but you can get better and genuine reviews on Google.
You can also use Taggbox as it simplifies the process of integrating reviews with photos onto your website, enhancing user engagement.

